Here's how I discovered my favorite homemade yogurt recipe, and I promise it's simpler than you think. When our neighbor in Bataan started selling fresh goat's milk, I wasn't sure what to do with it at first. Like many Filipinos, I used to think making yogurt was too complicated and best left to the experts. But let me tell you, if I can make this in my small kitchen while watching my favorite teleserye, you absolutely can, too!
The magic happens in your Instant Pot while you sleep, and you'll wake up to the creamiest yogurt that costs way less than store-bought ones. My kids love it with fresh mangoes for breakfast, my husband adds it to his protein shake, and I've even started using it instead of mayonnaise in my macaroni salad.
The best part? You can make it as thick or creamy as you like, add any sweetener you prefer, and even mix in ube or pandan if you're feeling creative. Give it a try, your wallet and your taste buds will thank you.
Jump to:

Why You'll Love This Recipe
- Cost-effective: Make twice the amount of yogurt compared to store-bought prices
- Customizable: Control sweetness and thickness to your preference
- Probiotic-rich: Fresh probiotics for gut health
- Versatile: Perfect for both sweet and savory applications
- Zero preservatives: Pure, natural ingredients only
Ingredients
Goat milk is the star of this recipe because it's naturally easier to digest than cow milk, with smaller fat molecules and less lactose. Many people who can't tolerate cow dairy find goat milk gentle on their stomachs.
When transformed into yogurt, its tangy flavor deepens while beneficial bacteria multiply, creating a probiotic-rich food that supports gut health. We use live culture yogurt as a starter because it contains the essential good bacteria that transform milk into yogurt through fermentation.
This simple combination creates a versatile, preservative-free food that's both economical and nutritious, with a creamy texture that works beautifully in both sweet and savory dishes.
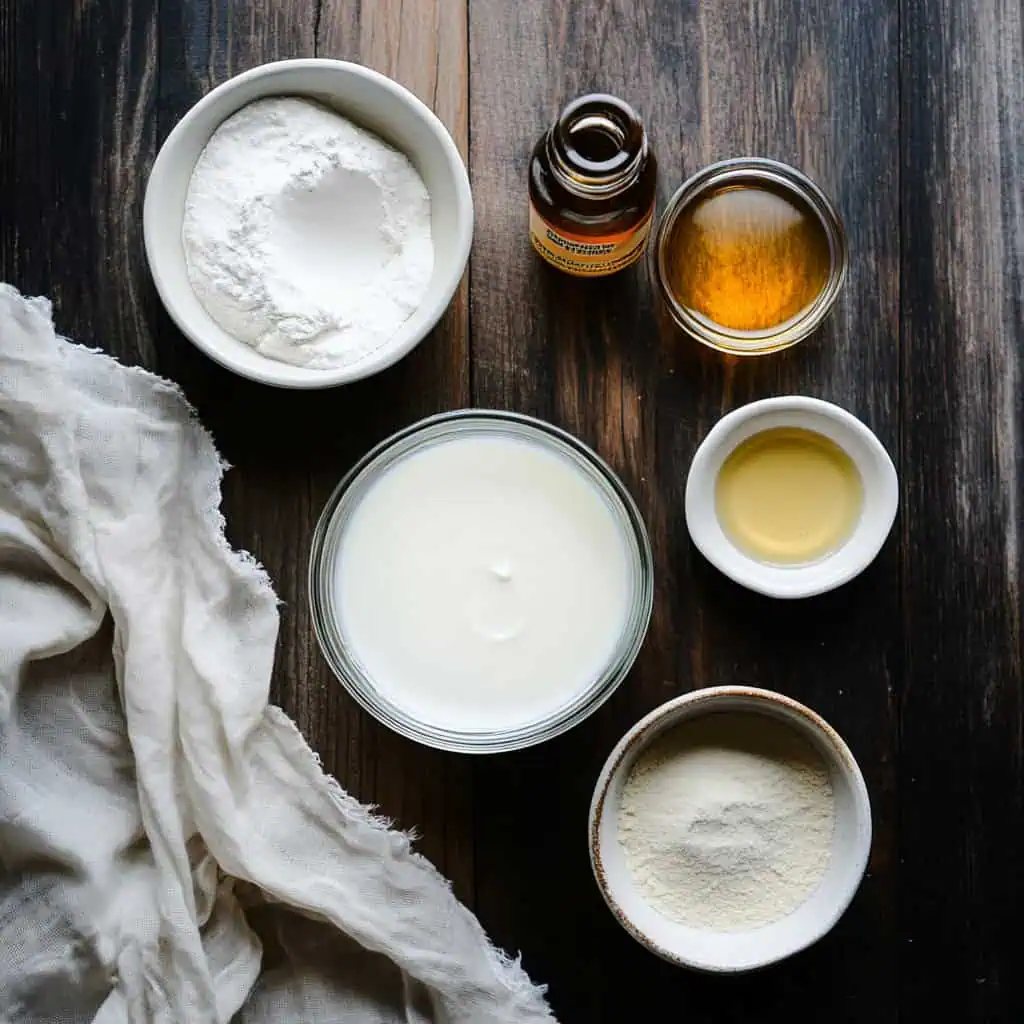
- ½ gallon whole goat's milk
- ¼ cup plain yogurt with live cultures
- Optional flavorings: pure vanilla extract, honey, fresh fruits
Equipment
- Instant Pot with yogurt setting - This is the main tool for fermenting the yogurt at a consistent temperature
- Digital cooking thermometer - Essential for checking milk temperatures during the heating and cooling process
- Fine-mesh strainer - Used to separate the whey from the yogurt for thicker consistency
- Cheesecloth or muslin cloth - Lines the strainer to catch the yogurt solids while allowing whey to drain
- Glass jars for storage - Best container option for storing finished yogurt
- Large mixing bowl - Used for the straining process
- Whisk - For gently incorporating the starter culture
- Measuring cups - For precise measurements
- Ice bath setup (Optional) - Speeds up the cooling process

How To Make
- Heat the milk: Start by heating your goat's milk in the Instant Pot. Press the sauté button and wait until the milk reaches 180°F - this takes about 5 minutes. Take the pot out and let your milk cool down to 115°F. You can make this faster by placing your pot in cold water.
- Add culture: Once your milk is at 115°F, take your ¼ cup of yogurt with live cultures and gently mix it into the milk. Close your Instant Pot lid and press the yogurt button. Set it for 8-12 hours - longer time makes thicker yogurt.
- Strain the yogurt: After the time is up, place your strainer over a bowl and line it with clean cheesecloth. Pour your yogurt mixture into the strainer and let it sit in your refrigerator. The longer you strain, the thicker your yogurt will be - anywhere from 4 hours for regular yogurt to overnight for Greek-style.
- Store: When your yogurt is as thick as you want, spoon it into clean glass jars. You can add honey, vanilla, or cooked fruit now if you'd like. Put the lids on and keep in your refrigerator. Your yogurt will stay fresh for about a week. Don't throw away the liquid that strained out - this whey is great for smoothies or baking.
Note: If your yogurt turns out too runny, next time either let it strain longer or set your Instant Pot for a longer fermentation time. Your yogurt should smell fresh and tangy - if it smells off, start fresh.

Tips from Lola's Kitchen
- Warm your jars before filling to prevent temperature shock which can affect texture
- Never disturb yogurt during fermentation as this can interrupt the culture development
- Use fresh milk within 3 days of milking for best flavor and fermentation results
- Keep all utensils meticulously clean to prevent unwanted bacteria from competing with yogurt cultures
- Sanitize your workspace by wiping counters with a vinegar solution before starting
- Be patient and give the yogurt the full time it needs to develop properly
- Save a small portion of each successful batch to use as starter for your next batch
- Use room temperature starter culture for better incorporation with the warm milk
Substitutions
- Milk options: Cow's milk or carabao milk can be used instead of goat's milk. Carabao milk will produce an exceptionally rich and creamy yogurt.
- Starter culture: Any plain yogurt with live cultures will work. Look for "active cultures" on the label.
- Thickeners: Add 2-3 tablespoons of milk powder to your milk before heating for a naturally thicker consistency.
- Sweeteners: Honey, maple syrup, coconut sugar, or stevia can all work as sweeteners.
- No Instant Pot? Use a yogurt maker, slow cooker with temperature control, or even a well-insulated container kept in a warm place.
Troubleshooting
Runny Yogurt
- Problem: Yogurt is too thin or watery
- Solution: Increase fermentation time to 10-12 hours, strain longer, or check that your starter culture is active and fresh
Grainy Texture
- Problem: Yogurt has small lumps or grainy consistency
- Solution: Ensure proper heating to 180°F to denature proteins, whisk gently but thoroughly when adding starter
Separation
- Problem: Yogurt separates into solid and liquid during fermentation
- Solution: Whisk starter more thoroughly, maintain consistent temperature, avoid moving the pot during fermentation
Strange Smell or Taste
- Problem: Yogurt smells or tastes off
- Solution: Discard and start fresh with new milk and starter; check for cleanliness of all equipment
Too Sour
- Problem: Yogurt tastes too tangy or acidic
- Solution: Reduce fermentation time; 8 hours produces milder yogurt than 12 hours
Storage & Reheating
- Store in glass containers with tight-fitting lids to maintain freshness
- Keep refrigerated at 40°F (4°C) at all times after fermentation
- Consume within 7 days for best quality and probiotic benefits
- Do not freeze if using as starter culture as this can kill some of the beneficial bacteria
- Freezing for consumption is possible but may affect texture; use frozen yogurt within 1 month
- Never reheat yogurt as high temperatures will kill the beneficial bacteria
- Store whey separately in a clean jar in the refrigerator for up to 5 days

FAQ
Can I use UHT (ultra-pasteurized) milk?
Yes, but the texture may differ slightly from yogurt made with fresh milk. UHT milk has already been heated to very high temperatures, which affects how the proteins behave during yogurt-making.
Why did my yogurt separate?
Temperature fluctuations or movement during fermentation are the most common causes. Keep your Instant Pot in a place where it won't be bumped and maintain a consistent temperature.
Can I reuse my homemade yogurt as starter?
Yes, for 2-3 batches maximum. After that, the cultures may weaken, resulting in less effective fermentation. It's best to introduce fresh commercial yogurt as starter after a few batches.
Do I need to use goat milk specifically?
No, this recipe works with cow milk too. Goat milk creates a naturally smoother yogurt with a slightly different flavor profile that some people find easier to digest.
How can I make my yogurt less tangy?
Reduce the fermentation time to 8 hours instead of 12. The longer yogurt ferments, the tangier it becomes.
Is homemade yogurt safe?
Yes, when made properly. The heating process kills harmful bacteria, and the good bacteria from the starter culture creates an acidic environment that prevents harmful bacterial growth.
What can I do with the leftover whey?
Whey is nutritious and can be used in smoothies, as a replacement for water in bread recipes, in soups, or even to water acid-loving plants.
Why is heating the milk necessary?
Heating to 180°F denatures the milk proteins, which is essential for the yogurt to set properly and achieve a good consistency.
Related
Looking for other recipes like this? Try these:


Homemade Goat Milk Yogurt Recipe
Equipment
- Instant Pot with yogurt setting
- Digital cooking thermometer
- Fine-mesh strainer
- Cheesecloth or muslin cloth
- Glass jars for storage
- Large mixing bowl
- Whisk
- Measuring cups
- Ice bath setup (Optional)
Ingredients
- ½ gallon whole goat's milk 2 litro ng gatas ng kambing
- ¼ cup plain yogurt with live cultures ¼ tasa ng yogurt na may live cultures
Optional flavorings:
- Pure vanilla extract
- Local honey Pulot
- Fresh fruits Sariwang prutas
Instructions
- Start by heating your goat's milk in the Instant Pot. Press the sauté button and wait until the milk reaches 180°F - this takes about 5 minutes. Take the pot out and let your milk cool down to 115°F. You can make this faster by placing your pot in cold water.
- Once your milk is at 115°F, take your ¼ cup of yogurt with live cultures and gently mix it into the milk. Close your Instant Pot lid and press the yogurt button. Set it for 8-12 hours - longer time makes thicker yogurt.
- After the time is up, place your strainer over a bowl and line it with clean cheesecloth. Pour your yogurt mixture into the strainer and let it sit in your refrigerator. The longer you strain, the thicker your yogurt will be - anywhere from 4 hours for regular yogurt to overnight for Greek-style.
- When your yogurt is as thick as you want, spoon it into clean glass jars. You can add honey, vanilla, or cooked fruit now if you'd like. Put the lids on and keep in your refrigerator. Your yogurt will stay fresh for about a week. Don't throw away the liquid that strained out - this whey is great for smoothies or baking.
- Remember: If your yogurt turns out too runny, next time either let it strain longer or set your Instant Pot for a longer fermentation time. Your yogurt should smell fresh and tangy - if it smells off, start fresh.
Tips from Lola's Kitchen
- Warm your jars before filling to prevent temperature shock
- Never disturb yogurt during fermentation
- Use fresh milk within 3 days of milking
- Keep all utensils meticulously clean
- Fresh carabao milk can be substituted for richer yogurt
Nutrition
The Story Behind Our Homemade Goat Milk Yogurt
Making yogurt at home isn't just about saving money - it's about connecting with an ancient tradition that spans cultures and centuries. While many Filipinos might think yogurt is a modern grocery store item, its story goes back over 6,000 years. Nomadic tribes discovered that milk carried in animal skin bags would naturally ferment into this creamy, tangy food we now know as yogurt.
In the Philippines, our relationship with yogurt has evolved alongside our dairy industry. With the rise of small dairy farms, especially those raising native goats in regions like Batangas and Nueva Ecija, fresh milk has become more accessible to home cooks. This has sparked a renewed interest in homemade dairy products, particularly among health-conscious Filipinos looking for probiotic-rich foods.
What makes goat milk yogurt special is its unique profile. Goat's milk is naturally easier to digest than cow's milk, making it a fantastic option for many people with sensitive stomachs. It's also naturally homogenized, meaning the cream doesn't separate like it does in cow's milk. This gives our homemade yogurt a consistently smooth, creamy texture that's perfect for everything from breakfast parfaits to marinades for your favorite inihaw recipes.
The best part about making yogurt at home is how it brings together modern convenience (thank you, Instant Pot!) with traditional fermentation methods. My Lola would be amazed to see how we can now make perfectly consistent yogurt without having to monitor temperatures all day. Yet the basic process - heating milk, adding cultures, and letting time work its magic - remains the same as it has for thousands of years.
Today, this recipe has become a staple in many Filipino kitchens, where we've given it our own twist. Some families swirl in ube halaya for a distinctly Filipino flavor, while others top it with fresh mangoes and a drizzle of local honey. It's become more than just yogurt - it's a way to combine our love for traditional cooking methods with modern health consciousness, all while supporting local dairy farmers.
Remember, every batch of homemade yogurt tells a story - of patient fermentation, of passing down kitchen wisdom, and of making something special with your own hands. Whether you're a first-time yogurt maker or a seasoned home cook, this recipe connects you to both ancient traditions and modern Filipino cooking innovation.


Comments
No Comments