Let me share my family's favorite Hopiang Hapon recipe that I've been making for years. These sweet bean-filled pastries remind me of my childhood days when I'd buy them from our local bakery for merienda.
Back then, I thought only professional bakers could make these delicious treats. But now, as a home cook who's made this countless times, I can tell you it's surprisingly simple. All you need are basic ingredients like red monggo beans, flour, and a bit of patience.If you can make lumpia, you can definitely make these golden, flaky pastries that your whole family will love.
After many tries in my own kitchen, I've broken down all the steps to make it super easy to follow. The best part is when my kids get that same excited look I used to have whenever they smell these baking in the oven. Whether you miss the taste of authentic Hopiang Hapon or want to surprise your family with something special, this recipe is for you. And don't worry, you don't need to be a master baker to get it right.
What is Hopiang Hapon?
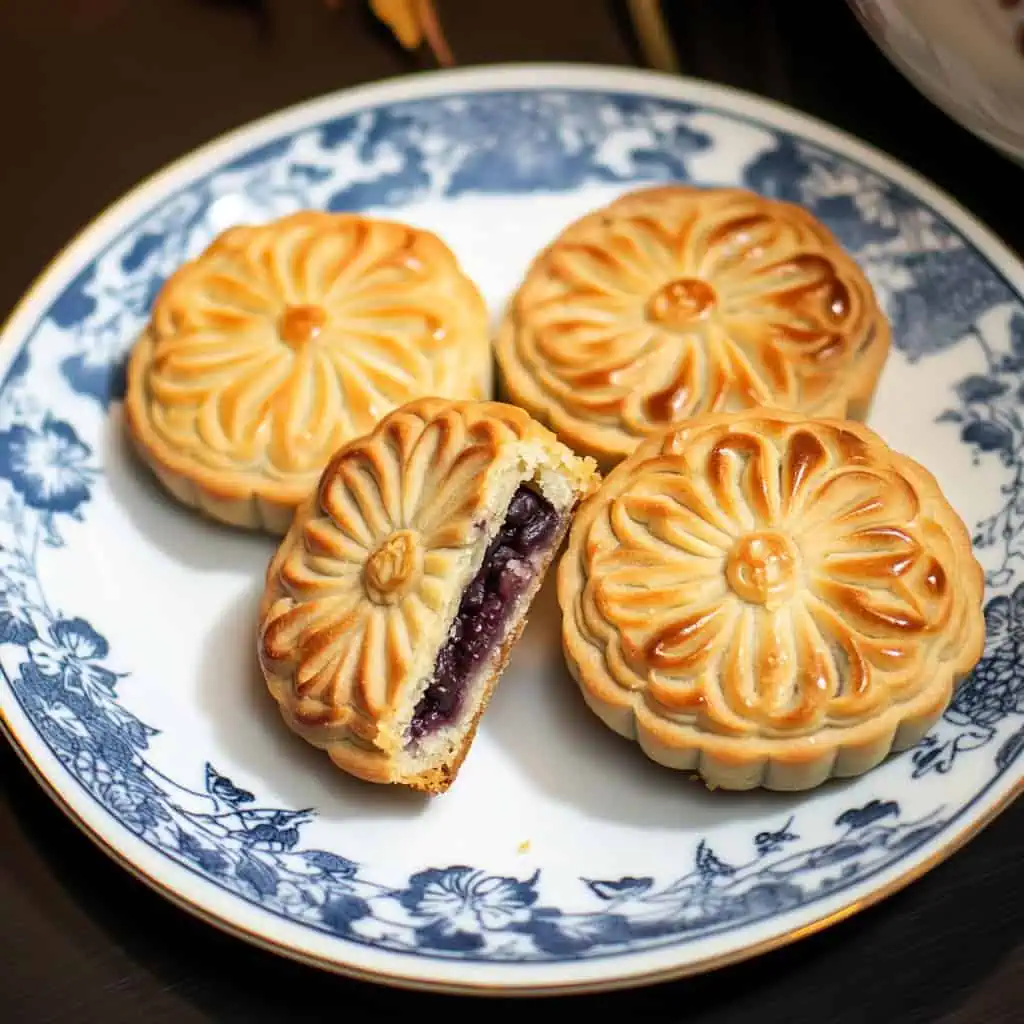
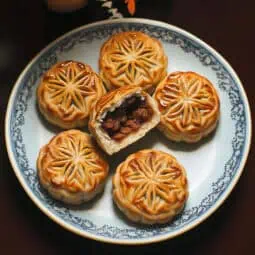
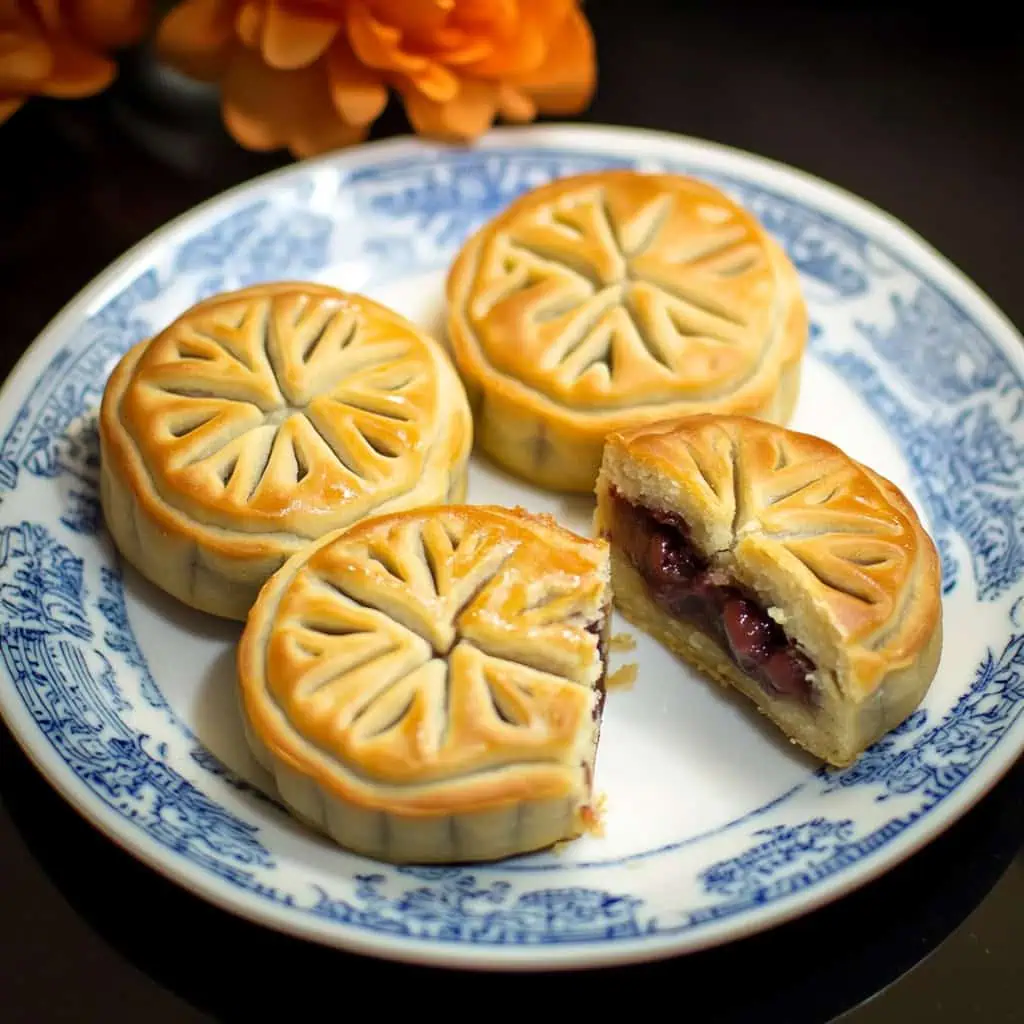
Hopiang Hapon is a delightful Filipino-Japanese fusion pastry featuring a flaky, tender crust encasing a sweet red bean filling. A variant of traditional Chinese mooncakes, these palm-sized treats are distinguished by their beautiful surface patterns and use of Filipino red mung beans (pulang monggo) instead of traditional lotus paste.
When baked to perfection, they develop a gorgeous golden-brown exterior that gives way to a rich, sweet interior perfumed with the earthy notes of red beans—creating an irresistible snack that's perfect with afternoon tea or coffee.
Jump to:
Why You'll Love This Recipe
- Authentic taste that rivals commercial bakeries
- Perfect balance of flaky crust and sweet filling
- Make restaurant-quality hopia at home
- Great for gifting or selling
- Customizable filling options
- Budget-friendly alternative to store-bought
- Preservative-free and freshly made
Ingredients
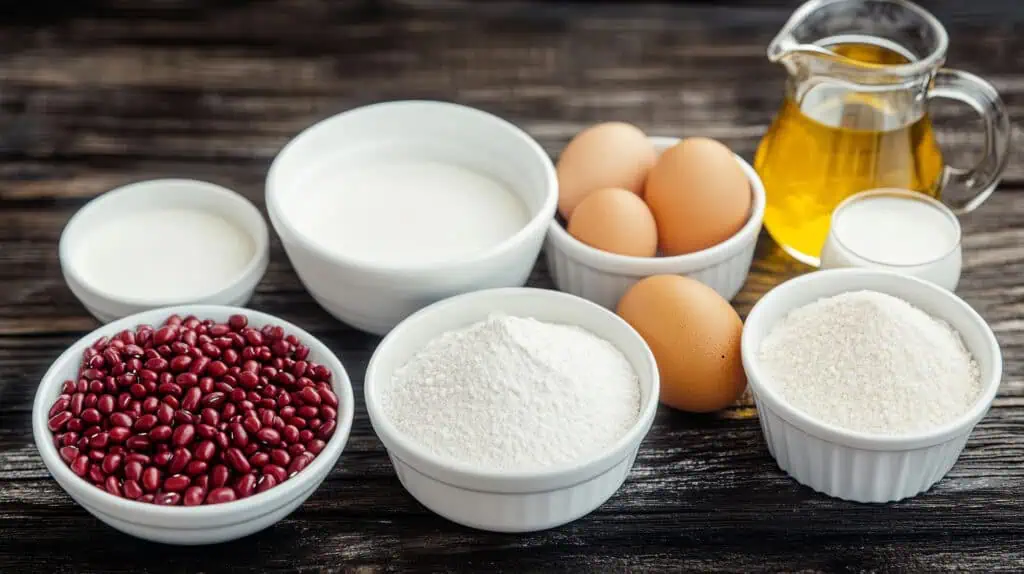
Each ingredient in this recipe serves a specific purpose for authentic Hopiang Hapon. Red beans create the sweet, earthy filling that defines this pastry, while vegetable oil and sugar help transform them into a smooth, glossy paste.
The dough uses lard rather than butter to achieve that signature flaky texture that shatters perfectly with each bite. The egg wash gives the finished hopia its beautiful golden sheen that signals it's been properly baked.
These simple ingredients work together to create the perfect balance of crisp exterior and sweet, tender filling that makes Hopiang Hapon so beloved.
For the Red Bean Filling:
- 500g sweet red beans (pulang monggo)
- 8 cups water
- ¾ cup vegetable oil
- 1-¾ cups refined sugar
- ¼ teaspoon salt
For the Soft Dough:
- 2 cups all-purpose flour
- 5 tablespoons lard
- 10 tablespoons water
- ¼ teaspoon salt
For the Egg Wash:
- 1 egg yolk
- 2 tablespoons milk
- Pinch of salt
Equipment
- Digital kitchen scale - For precise measurements that ensure consistent results
- Chinese mooncake mold (hopia mold) - Creates the traditional decorative patterns on top
- Rolling pin - Essential for flattening dough to the proper thickness
- Heavy-bottom saucepan - Provides even heat distribution when cooking bean paste
- Baking sheets - Ensures even baking of multiple hopia at once
- Parchment paper - Prevents sticking and makes cleanup easier
- Fine-mesh strainer - For washing and draining beans properly
- Mixing bowls - To keep ingredients separate and organized
- Pastry brush - For applying egg wash evenly across the pastries
How To Make
- Prepare the beans (start night before): Wash the red mung beans thoroughly until the water runs clear. Soak them in plenty of cold water for 4-6 hours or overnight.
- Cook the beans: After soaking, drain and rinse the beans one more time. Transfer to a pot with 8 cups of fresh water. Bring to a boil over high heat, then lower to medium-low and cook for 30-40 minutes until beans are easily squished between your fingers. Drain completely.
- Make the filling: Return cooked beans to the pot. Add vegetable oil, sugar, and salt. Cook over medium-low heat, stirring constantly with a wooden spoon until the mixture becomes very thick (about 15-20 minutes). You'll know it's ready when drawing a line through the mixture with your spoon leaves a clear path. Transfer filling to a bowl and cool completely (about 1 hour).
- Prepare the dough: In a large bowl, mix flour and salt. Add room temperature lard in small pieces, using your fingertips to work it into the flour until the mixture resembles sand. Slowly add room temperature water while mixing. Knead gently for 3-4 minutes until you have a smooth dough that doesn't stick to your hands. Cover with plastic wrap and let rest for 30 minutes at room temperature.
- Preheat and prepare: Set your oven to 350°F (180°C) and line baking sheets with parchment paper. In a small bowl, mix egg yolk, milk, and a pinch of salt for your egg wash.
- Portion and shape: Divide the cooled filling into 20 equal portions and roll each into a ball. Do the same with your dough, keeping the pieces covered while you work.
- Assemble: Take one piece of dough and roll it into a thin circle about 4 inches wide. Place a ball of filling in the center. Carefully bring the edges up and over the filling, pinching to seal completely without gaps.
- Mold: Dust your mooncake mold with a little flour. Place the filled dough ball into the mold with the sealed side down, press firmly, then tap gently to release. Place on your lined baking sheet with the pattern facing up, leaving about 2 inches between each hopia.
- Bake: Bake for 15 minutes, then remove from oven. Let cool for 5 minutes, then brush the entire surface with egg wash. Return to the oven for another 8-10 minutes until golden brown.
- Cool: Allow hopia to cool completely on the baking sheet for at least 1 hour before moving them.

Tips from Lola's Kitchen
- Room temperature ingredients produce the best results
- Never skip bean soaking time as it ensures even cooking
- Keep dough covered when not in use to prevent drying out
- For dry dough, add water one teaspoon at a time
- For shiny finish, apply egg wash twice during baking
- Patience is key - let filling cool completely before assembly
- For perfect pattern transfer, ensure your mold is clean between each use
- Consistent dough thickness creates even baking and beautiful results
- When filling gets too runny, continue cooking until it holds its shape
Substitutions
- No red mung beans? Use regular mung beans with a few drops of red food coloring
- Lard alternative: Substitute with vegetable shortening or unsalted butter (texture will be slightly different)
- Egg-free version: Replace egg wash with milk or condensed milk wash
- Lower sugar option: Use monk fruit sweetener (adjust to taste, about ⅔ the amount)
- Gluten-sensitive: Try rice flour blend (note: texture will be different)
- Vegetable oil: Coconut oil works well but will add a slight coconut flavor
Troubleshooting
- Filling too wet? Cook longer to reduce moisture content. The filling should hold its shape when rolled
- Dough cracking? Add a few drops of water and knead briefly until smoother
- Hopia browning too quickly? Lower oven temperature by 20°F and place rack in middle position
- Filling leaking during baking? Ensure proper sealing and use slightly thicker dough at the edges
- Pattern not visible after baking? Press more firmly when using the mold and ensure egg wash isn't too thick
- Dough too sticky? Add a small amount of flour and chill for 10 minutes before working with it
- Pastry not flaky enough? Make sure lard is properly incorporated but still visible in small pieces
Storage & Reheating
- Room temperature: Store in an airtight container for 3-4 days
- Refrigerator: Keeps well for up to 1 week
- Freezer: Uncooked hopia can be frozen for up to 3 months (thaw in refrigerator before baking)
- Reheating: Warm in oven at 300°F (150°C) for 5 minutes for best texture and flavor
- To maintain crispness: Don't cover hopia until completely cooled
- For gifting: Package in paper boxes rather than plastic for better texture preservation
FAQ
Can I make the filling ahead of time?
Yes! The filling can be made up to 3 days ahead and stored in the refrigerator. Just bring it to room temperature before shaping.
Why isn't my hopia shiny like bakery versions?
Double-brush with egg wash and ensure proper baking temperature. Some bakeries also add a little sugar to their egg wash for extra shine.
Can I make mini versions of these pastries?
Absolutely! Just divide the dough and filling into smaller portions and adjust baking time to 15-18 minutes total.
How can I make a quick version using store-bought paste?
Use ready-made anko (红豆沙) available in Asian markets. You'll need about 500g for this recipe.
Can I use a fork to create patterns if I don't have a mold?
Yes! While not traditional, you can create simple patterns using a fork or toothpick. Some home bakers use bottle caps for circular patterns.
Why does my filling taste different from bakery versions?
Commercial bakeries often add flavorings like vanilla or pandan. Try adding ½ teaspoon of vanilla extract to your filling.
How can I tell when the beans are cooked enough?
They should mash easily between your fingers with no hard centers. Undercooked beans will make a grainy filling.
Can I make these without a kitchen scale?
While volume measurements are provided, weight measurements give the most consistent results, especially for the filling.
Related
Looking for other recipes like this? Try these:


Hopiang Hapon (Japanese-Style Hopia)
Equipment
- Digital kitchen scale (timbangan) for precise measurements
- Chinese mooncake mold (hopia mold) creates traditional patterns
- Rolling Pin for flattening dough
- Heavy-bottom saucepan (Kaserola) for cooking bean paste
- Baking sheet (cookie sheet) for even baking
- Parchment Paper prevents sticking
- Fine-mesh strainer (salaan) for washing beans
- Mixing bowls (mangkok) for separate ingredients
- Pastry brush for egg wash application
Ingredients
For the Red Bean Filling
- 500 g sweet red beans pulang monggo
- 8 cups water tubig
- ¾ cup vegetable oil mantika
- 1-¾ cups refined sugar asukal
For the Soft Dough
- 2 cups all-purpose flour harina
- 5 tablespoons lard mantika ng baboy
- 10 tablespoons water tubig
- ¼ teaspoon salt asin
For the Egg Wash
- 1 egg yolk pula ng itlog
- 2 tablespoons milk gatas
Instructions
- Start the night before or early morning by washing the red mung beans until the water runs clear. Soak them in plenty of cold water for 4-6 hours or overnight.
- After soaking, drain the beans and rinse them one more time. Put them in a pot with 8 cups of fresh water. Turn the heat to high and bring to a boil. Once boiling, lower the heat to medium-low and cook for about 30-40 minutes. You'll know the beans are ready when you can easily squish them between your fingers. Drain all the water using a strainer.
- Put the cooked beans back in the pot. Add the vegetable oil, sugar, and salt. Cook over medium-low heat, stirring constantly with a wooden spoon. Keep cooking and stirring until the mixture becomes very thick, about 15-20 minutes. You'll know it's ready when you can draw a line through the mixture with your spoon and the line stays clear. Put this filling in a bowl and let it cool completely, about 1 hour.
- While the filling cools, make your dough. Mix the flour and salt in a large bowl. Add the room temperature lard in small pieces. Use your fingertips to work the lard into the flour until it looks like sand. Slowly add the room temperature water while mixing with your hand. Knead gently for 3-4 minutes until you have a smooth dough that doesn't stick to your hands. Cover the dough with plastic wrap and let it rest for 30 minutes on your counter.
- Now preheat your oven to 350°F (180°C). Line your baking sheets with parchment paper. Mix the egg yolk, milk, and pinch of salt in a small bowl for your egg wash.
- Divide your cooled filling into 20 equal portions and roll each into a ball. Do the same with your dough - divide it into 20 pieces and keep them covered while you work.
- Take one piece of dough and roll it into a circle about 4 inches wide and as thin as a coin. Put a ball of filling in the center. Carefully bring the edges of the dough up and over the filling, pinching them together to seal completely. Make sure there are no holes or gaps.
- Dust your mooncake mold with a little flour. Put the filled dough ball into the mold with the sealed side down, press firmly, then tap gently to release. Place on your lined baking sheet with the pattern facing up. Leave about 2 inches of space between each hopia.
- Bake for 15 minutes, then take them out of the oven. Let them cool for 5 minutes, then brush the entire surface with your egg wash. Put them back in the oven for another 8-10 minutes until they're golden brown.
- Let the hopia cool completely on the baking sheet for at least 1 hour before moving them. Store them in an airtight container at room temperature for up to 2 days, or in the refrigerator for up to 5 days. If you want to serve them warm, heat them in the oven at 300°F (150°C) for 5 minutes.
Tips from Lola's Kitchen
- Always use room temperature ingredients for best results
- Don't skip the bean soaking time - it ensures even cooking
- Keep dough covered when not in use to prevent drying
- If dough feels too dry, add water 1 teaspoon at a time
- For shiny finish, double-brush with egg wash
- Let hopia cool completely before storing to maintain crispness
Nutrition
The Story Behind Hopiang Hapon
Long before trendy fusion desserts hit Manila's food scene, Hopiang Hapon (Japanese Hopia) was already bridging culinary traditions in the streets of the Philippines. This special pastry showcases how Filipino bakers masterfully adapted Asian flavors to local tastes, combining the Japanese love for sweet red bean paste (anko) with the Filipino's passion for monggo-based treats.
Unlike its cousin, the traditional Chinese mooncake, Hopiang Hapon started its journey on humble griddles in small Filipino bakeries. Local bakers discovered that the combination of flaky pastry and sweet red mung bean filling perfectly matched Filipino merienda cravings. While Chinese hopia usually features lotus seed paste, our version embraces pulang monggo (red mung beans), making it uniquely suited to Filipino tastes and more affordable for daily snacking.
What makes Hopiang Hapon truly special is how it became a regular part of Filipino afternoon merienda culture. From busy Binondo bakeries to small sari-sari stores in provinces, these golden pastries earned their place alongside pandesal and ensaymada as beloved Filipino snacks. The tradition of serving these with hot coffee or salabat (ginger tea) has been passed down through generations, making it more than just a snack – it's a taste of Filipino childhood memories.
Today, while famous shops like Eng Bee Tin continue to sell these treats, many Filipino families are rediscovering the joy of making Hopiang Hapon at home. Modern bakers have adapted the traditional griddle-cooking method to work with home ovens, making it easier than ever to create these pastries in our own kitchens. Whether enjoyed fresh from the oven or shared as pasalubong, Hopiang Hapon remains a testament to the Filipino talent for making foreign flavors feel uniquely our own.
Did you know? While traditional Japanese anko is made with azuki beans, Filipino bakers cleverly substituted local red mung beans, creating a similar taste while using ingredients that were more readily available in the Philippines. This adaptation not only made the treats more affordable but also gave birth to a distinctly Filipino-Japanese fusion pastry that has stood the test of time.


Comments
No Comments