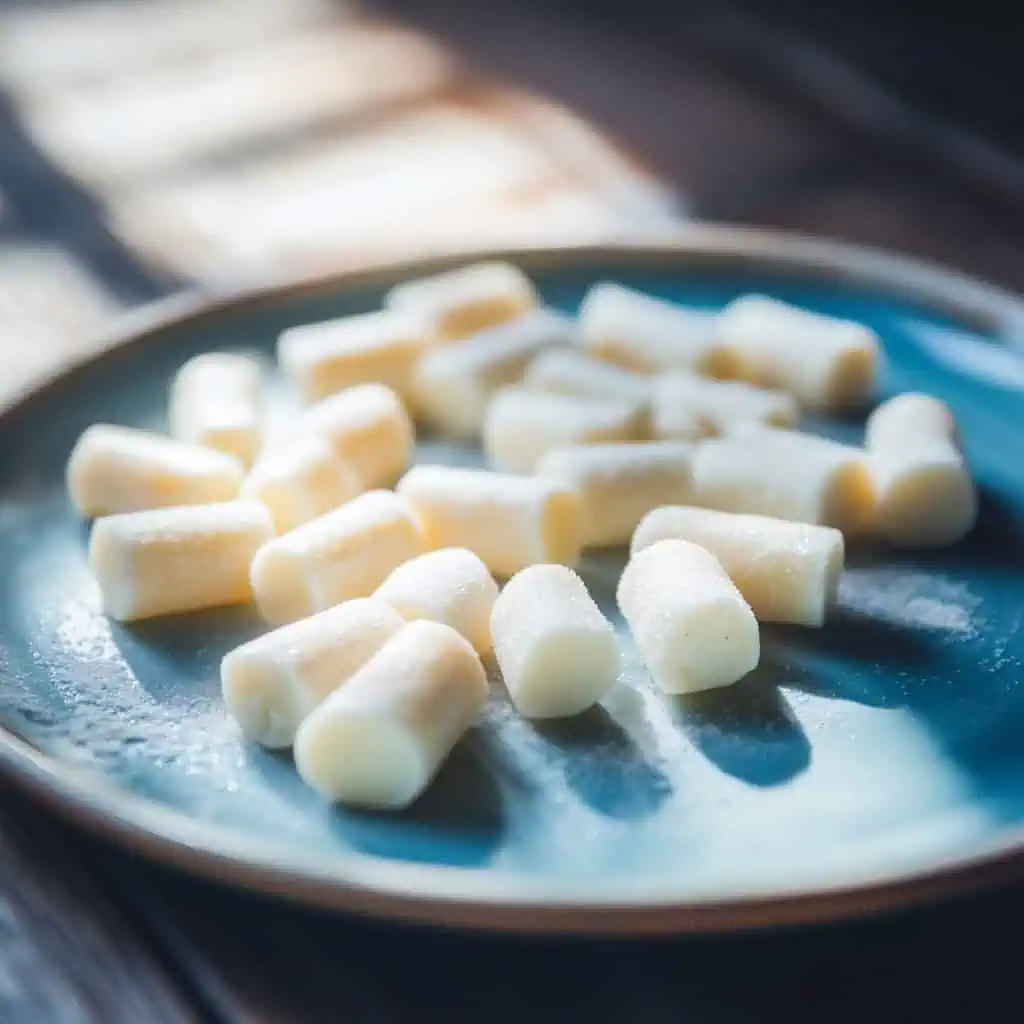
I grew up watching my Lola make Pastillas de Leche in her small kitchen, and now I make these creamy Filipino milk candies for my own family. While some might think homemade pastillas are hard to make, they really only need five simple ingredients and some patience.
Yes, you'll need to stir the milk mixture for a while (this is perfect for catching up on your favorite Netflix show!), but the result is worth every minute - soft, sweet candies that taste just like the ones from Bulacan. Every time I make these, my kids gather in the kitchen hoping to be the first to taste test.
Once you try these homemade pastillas, I promise you'll never want to buy them from the store again.
Cultural Notes
Pastillas de leche originated in Bulacan, where dairy farming was prevalent. The recipe showcases Filipino ingenuity in preserving milk through candy-making, creating a beloved treat that's now a staple in Filipino celebrations.
Jump to:
Why You'll Love This Recipe
- Authentic taste that rivals traditional Bulacan pastillas
- Made with real milk for superior creaminess and flavor
- Perfect handmade gift for special occasions
- No artificial preservatives or additives
- Customizable sweetness level
- Great project for bonding with family
Ingredients
The ingredients in this Pastillas de Leche recipe are carefully chosen to create the most authentic Filipino milk candy experience. Fresh carabao or whole cow's milk provides the rich base that gives pastillas their signature creaminess, while granulated sugar adds just the right sweetness without overpowering the dairy flavor.
The lime or calamansi zest adds a subtle brightness that balances the richness and enhances the overall taste. Unsalted butter enriches the texture, creating that melt-in-your-mouth quality traditional pastillas are known for. The addition of full cream powdered milk helps achieve the perfect consistency while intensifying the milky flavor.
Together, these five simple ingredients transform through the slow cooking process into a beloved Filipino delicacy that has stood the test of time.
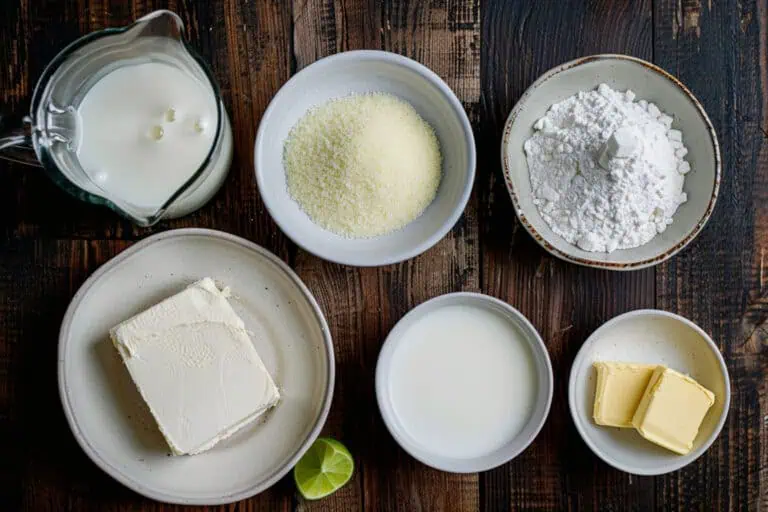
- 5 cups fresh carabao milk or whole cow's milk
- 1 cup granulated sugar
- ½ teaspoon lime or calamansi zest
- 2 tablespoons unsalted butter
- ¾ cup full cream powdered milk
For Coating:
- ⅓ cup granulated sugar
Equipment
- Wide non-stick skillet: Essential for even heat distribution and preventing milk from burning. The wide surface area helps the milk reduce faster.
- Wooden spoon: Prevents scratching your pan and helps you feel the mixture's consistency changing as it cooks.
- Candy thermometer (optional): Helps achieve perfect consistency if you're new to candy making.
- Kitchen scale: For precise measurements that ensure consistent results.
- Small plates: One for cooling the mixture and another for the sugar coating.
- Wax paper or Japanese paper (Papel de hapon): Traditional wrapping that completes the authentic experience.
- Airtight container: For proper storage to maintain freshness.
How To Make
- Start by pouring 5 cups of fresh milk (carabao or whole cow's milk) into a wide non-stick pan. Add ⅔ cup of sugar and stir until the sugar completely dissolves. Set your stove to low heat - this is very important as high heat will make your milk curdle.
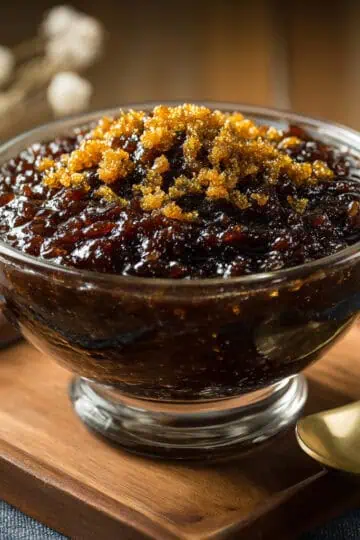
- Keep the heat on low and let the mixture simmer gently. You'll need to stir it regularly with a wooden spoon, making sure to scrape the bottom and sides of the pan to prevent the milk from sticking or burning. This step takes patience - about 2 ½ hours. You're waiting for the milk to reduce and become a thin paste. Think of it as a relaxing kitchen meditation!
- While your milk is reducing, prepare your lime or calamansi by zesting half a piece. Once your milk mixture has thickened to a paste-like consistency (you'll notice it's much thicker than when you started), add the zest and stir it in well.
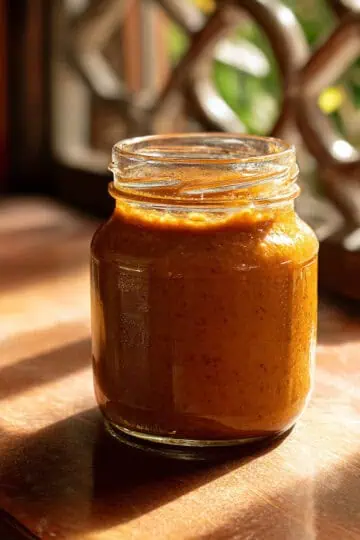
- Now add 2 tablespoons of butter and ¾ cup of full cream powdered milk. Keep stirring until everything is smooth and well combined. No lumps should be visible. Continue cooking for another 3 to 5 minutes - you'll know it's ready when the mixture starts pulling away from the sides of the pan and forms a soft dough.
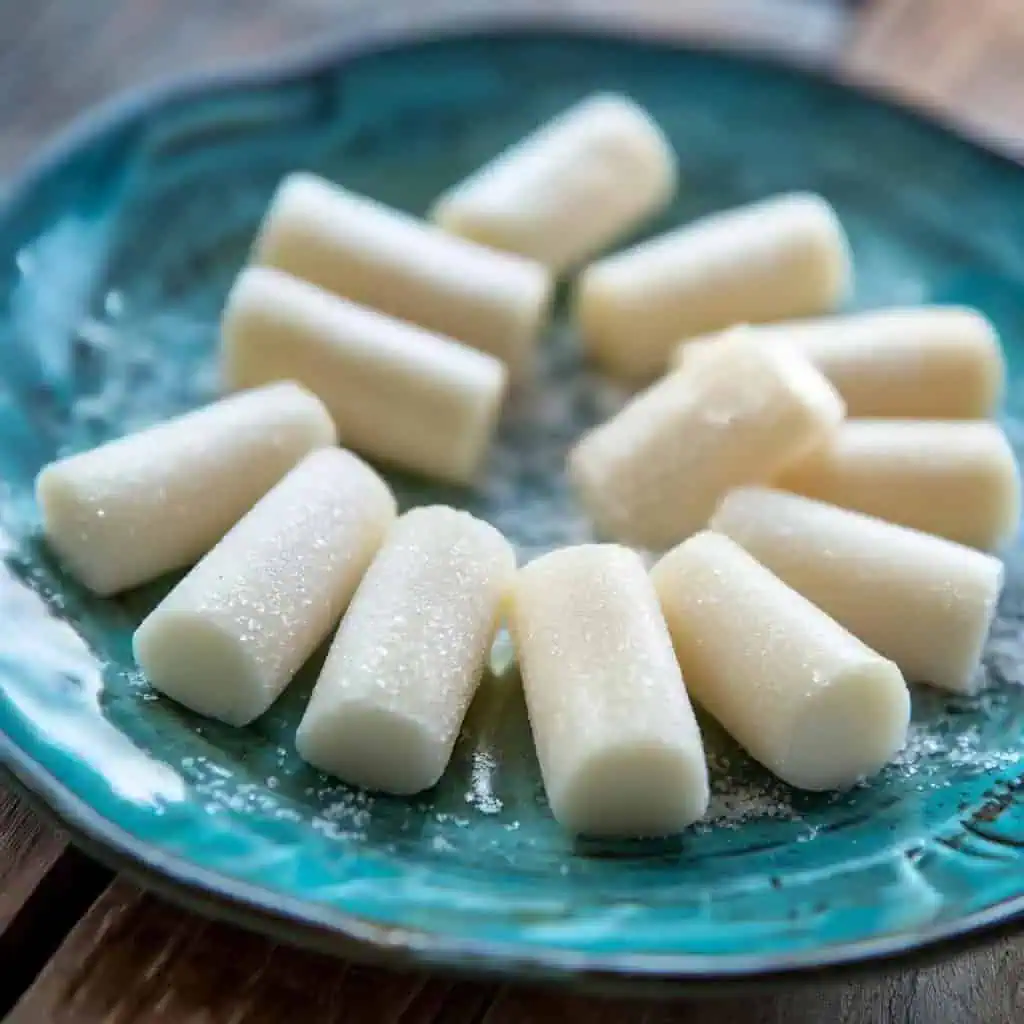
- Transfer your pastillas mixture to a lightly oiled plate and let it cool until you can comfortably touch it. While waiting, prepare your remaining ⅓ cup of sugar in a shallow plate for coating.
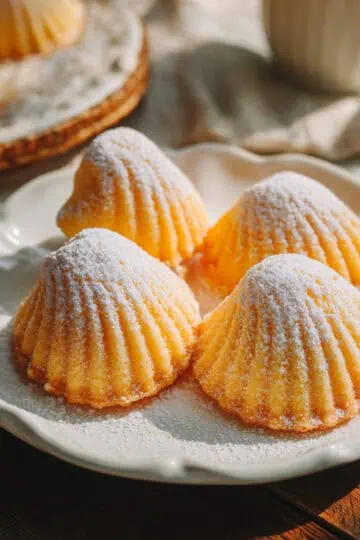
- Once the mixture is cool enough to handle, divide it into about 40 portions. Roll each portion between your palms to form logs about 1 inch long. If the mixture feels too sticky, you can lightly oil your hands or let the mixture cool a bit more.
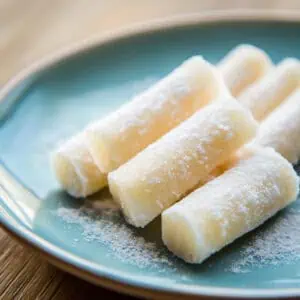
- Roll each pastillas log in sugar until completely coated. Wrap them individually in Japanese paper (papel de hapon) or wax paper, twisting the ends to secure. Your homemade pastillas can now be stored in an airtight container at room temperature for up to 3 days.
Remember: The key to perfect pastillas is patience and low heat. If your mixture becomes lumpy or curdles, your heat was probably too high. Keep stirring and keep that heat low - you'll be rewarded with smooth, creamy pastillas that taste just like the ones from Bulacan.

Tips from Lola's Kitchen
- Never rush the process - the slow reduction of milk creates that authentic flavor and texture.
- Test the consistency by placing a small amount of the mixture on a cold plate. If it holds its shape without spreading too much, it's ready.
- Stir in a figure-eight pattern to ensure all parts of the mixture are being moved and nothing sticks to the bottom.
- If using cow's milk instead of carabao milk, you might need to add 1-2 extra tablespoons of powdered milk for richness.
- Allow the mixture to cool slightly before adding powdered milk to prevent lumps.
- Keep a bowl of ice water nearby to dip your fingertips in if the mixture gets too hot while rolling.
- For perfect uniformity, use a small cookie scoop or measuring spoon to portion out the mixture.
- When wrapping, twist one end first, then roll the candy inside the paper before twisting the other end.
Substitutions
- Carabao milk: Use whole cow's milk plus an extra tablespoon of butter for richness.
- Lime/calamansi zest: Lemon zest works well, or try orange zest for a different flavor profile.
- Unsalted butter: Salted butter can be used if you reduce the added sugar by a tablespoon.
- Full cream powdered milk: Regular powdered milk works but may result in a less creamy texture.
- Granulated sugar: Caster sugar dissolves faster if available.
- For a dairy-free version: Use coconut cream and coconut condensed milk (note: this creates a different but delicious treat).
Troubleshooting
- Mixture curdled: Heat was too high. For minor curdling, strain through a fine mesh sieve. For major curdling, you may need to start over.
- Too soft or won't set: Continue cooking longer. The mixture needs to reach the soft ball stage (235°F-240°F if using a candy thermometer).
- Too hard: Either cooked too long or too much powdered milk was added. Next time, reduce cooking time or add a tablespoon of fresh milk to soften.
- Grainy texture: Sugar might have crystallized. Make sure sugar dissolves completely at the beginning and avoid stirring vigorously once the mixture starts to thicken.
- Burns easily: Pan is too thin or heat is uneven. Use a heavy-bottomed pan and rotate it occasionally if your stove has hot spots.
- Too sweet: Reduce sugar by ¼ cup next time or balance with an extra squeeze of citrus juice.
Storage & Reheating
- Room temperature: Pastillas will stay fresh for 2-3 days in an airtight container.
- Refrigeration: Store for up to 1 week. The sugar coating may absorb moisture and become tacky, so keep them wrapped.
- Freezing: Not recommended as the texture will change.
- To refresh: If pastillas become hard, place them in a container with a slice of bread overnight. The moisture from the bread will soften them slightly.
- Best practices: Layer with wax paper between each piece to prevent sticking.
- Note: As these contain fresh milk and no preservatives, watch for any signs of spoilage and consume within the recommended timeframe.

FAQ
Why does my mixture curdle?
Cooking at too high a temperature is the main culprit. Maintain low, gentle heat throughout the entire process and stir frequently.
Can I use condensed milk to speed up the process?
Traditional pastillas use fresh milk for a reason. Condensed milk creates a different texture and taste. While there are quick recipes using condensed milk, they don't capture the authentic flavor profile of true Bulacan pastillas.
How do I know when the mixture is cooked enough?
The mixture should leave a clean trail when you drag your wooden spoon across the bottom of the pan. It should form a soft, pliable dough that pulls away from the sides. If using a candy thermometer, it should reach 235°F-240°F.
Can I make half the recipe?
Yes, but be aware that the cooking time will be shorter, and you'll need to watch it more carefully to prevent scorching. A wider pan helps compensate for smaller quantities.
Why add citrus zest?
The subtle citrus note cuts through the richness of the milk and adds complexity to the flavor. It's a traditional addition that balances the sweetness.
My pastillas are too sticky to roll. What went wrong?
The mixture might need to cool more, or it wasn't cooked long enough. Let it cool further, or if necessary, return it to the pan with a bit more powdered milk and cook briefly.
Can I add flavors like vanilla or almond extract?
While not traditional, you can add ½ teaspoon of extract when adding the zest for a personal touch.
How do I achieve the perfect shape?
Roll the pastillas between your palms with gentle pressure. For uniform size, divide the mixture into equal portions using a kitchen scale.
Are these safe for children to help make?
Children can help with rolling and wrapping once the mixture has cooled completely. The cooking process requires adult supervision due to the hot mixture.
My pastillas hardened too quickly while I was shaping them. How can I fix this?
Warm the mixture slightly in the microwave for 5-10 seconds or place it over a bowl of warm water to soften.
Related
Looking for other recipes like this? Try these:


Authentic Pastillas de Leche (Filipino Milk Candies)
Equipment
- Wide non-stick skillet (Makapal na kawali) Essential for even heat distribution and preventing milk from burning
- Wooden spoon (sandok na kahoy) Prevents scratching and helps feel the mixture's consistency
- Candy thermometer (optional) Helps achieve perfect consistency
- Kitchen scale For precise measurements
- Small plates for rolling
- Wax paper or Japanese paper (Papel de hapon) for wrapping
- Airtight container for storage
Ingredients
For the Pastillas:
- 5 cups fresh carabao milk or whole cow's milk Gatas ng kalabaw o gatas ng baka
- 1 cup granulated sugar Asukal
- ½ teaspoon lime or calamansi zest Balat ng dayap o kalamansi
- 2 tablespoons unsalted butter Mantikilya
- ¾ cup full cream powdered milk Gatas na pulbos
For Coating:
- ⅓ cup granulated sugar
Instructions
- Start by pouring 5 cups of fresh milk (carabao or whole cow's milk) into a wide non-stick pan. Add ⅔ cup of sugar and stir until the sugar completely dissolves. Set your stove to low heat - this is very important as high heat will make your milk curdle.
- Keep the heat on low and let the mixture simmer gently. You'll need to stir it regularly with a wooden spoon, making sure to scrape the bottom and sides of the pan to prevent the milk from sticking or burning. This step takes patience - about 2 ½ hours. You're waiting for the milk to reduce and become a thin paste. Think of it as a relaxing kitchen meditation!
- While your milk is reducing, prepare your lime or calamansi by zesting half a piece. Once your milk mixture has thickened to a paste-like consistency (you'll notice it's much thicker than when you started), add the zest and stir it in well.
- Now add 2 tablespoons of butter and ¾ cup of full cream powdered milk. Keep stirring until everything is smooth and well combined. No lumps should be visible. Continue cooking for another 3 to 5 minutes - you'll know it's ready when the mixture starts pulling away from the sides of the pan and forms a soft dough.
- Transfer your pastillas mixture to a lightly oiled plate and let it cool until you can comfortably touch it. While waiting, prepare your remaining ⅓ cup of sugar in a shallow plate for coating.
- Once the mixture is cool enough to handle, divide it into about 40 portions. Roll each portion between your palms to form logs about 1 inch long. If the mixture feels too sticky, you can lightly oil your hands or let the mixture cool a bit more.
- Roll each pastillas log in sugar until completely coated. Wrap them individually in Japanese paper (papel de hapon) or wax paper, twisting the ends to secure. Your homemade pastillas can now be stored in an airtight container at room temperature for up to 3 days.
- Remember: The key to perfect pastillas is patience and low heat. If your mixture becomes lumpy or curdles, your heat was probably too high. Keep stirring and keep that heat low - you'll be rewarded with smooth, creamy pastillas that taste just like the ones from Bulacan!
Tips from Lola's Kitchen
- Use full-fat milk only - low-fat will result in grainy texture
- Never raise the heat above low - patience is key
- The mixture is ready when it leaves a clean trail when you drag your spoon
- Slightly wet hands make rolling easier
- Cool mixture slightly if too sticky to handle
Nutrition
The Story Behind Pastillas de Leche
Growing up in the Philippines, everyone knows Bulacan as the sweet capital of our country. But did you know that Pastillas de Leche's story starts with the humble carabao farmers of San Miguel, Bulacan? Back in the Spanish colonial period, these farmers had an interesting problem - they had too much carabao's milk! The carabaos were mainly used for farming, but they also produced rich, creamy milk that needed to be used before it spoiled.
The clever women of Bulacan found a delicious solution. They discovered that by slowly cooking the fresh milk with sugar, they could create sweet, creamy candies that would last much longer than fresh milk. These became what we now know and love as Pastillas de Leche. The name itself tells its Spanish colonial roots - 'pastillas' meaning tablets or lozenges, and 'de leche' meaning 'of milk.'
What made Bulacan's pastillas special was the use of carabao's milk, which is naturally creamier and richer than cow's milk. The farmers' wives would spend hours stirring the milk mixture over low heat, carefully watching until it reached that perfect soft, chewy consistency. They'd shape the candies by hand and wrap them in delicate papel de hapon (Japanese paper), creating the signature twist ends we still see today.
Today, San Miguel, Bulacan remains famous for its pastillas, with many families still using recipes passed down through generations. While modern versions might use cow's milk or even powdered milk, traditional pastillas makers in Bulacan still pride themselves on using pure carabao's milk, keeping this sweet tradition alive. The dedication to this time-honored process is what makes pastillas more than just candy - it's a piece of Filipino heritage you can taste.
Making pastillas at home connects us to this rich history. While it takes time and patience (just like the original makers knew), the result is a treat that's both deliciously sweet and culturally meaningful. Whether you're making them for a special occasion or just craving a taste of tradition, each bite of homemade pastillas carries a story of Filipino ingenuity and the sweet legacy of Bulacan's dairy farmers.

Comments
No Comments