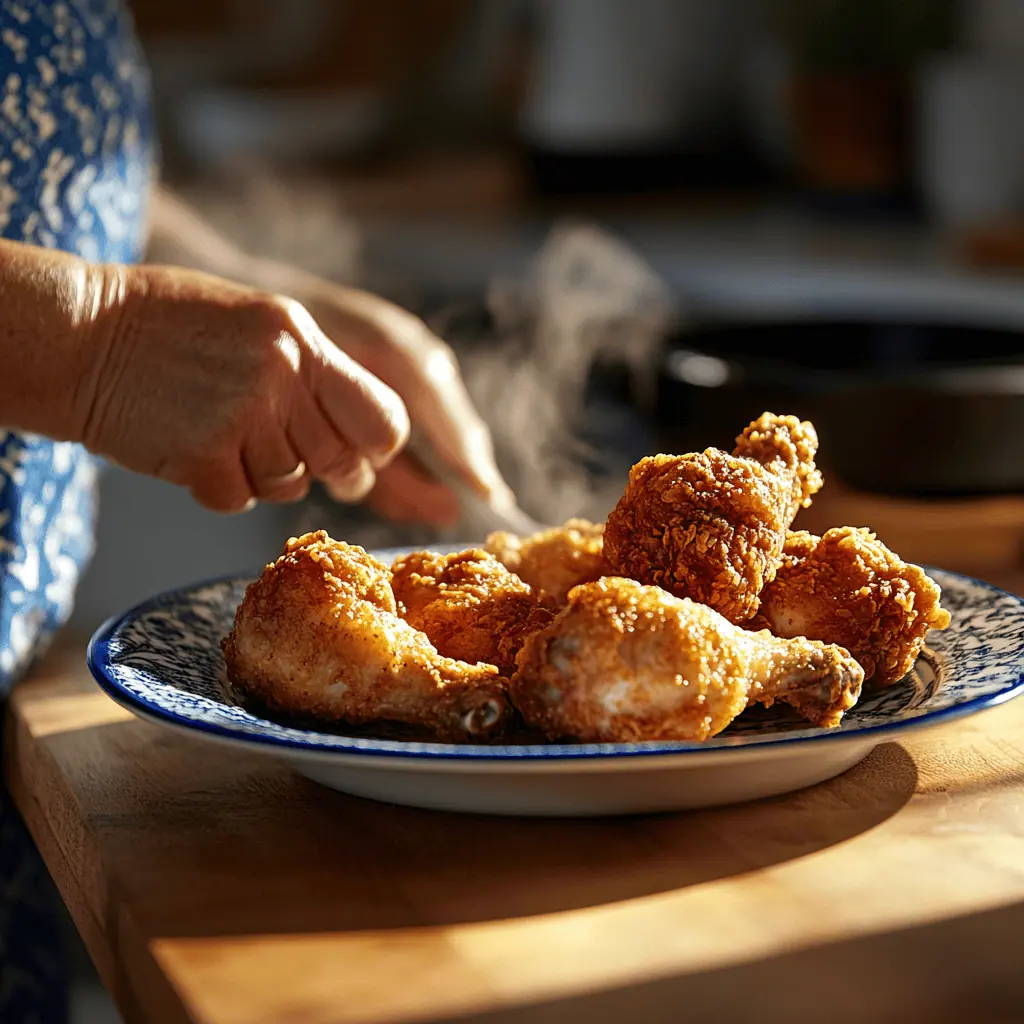
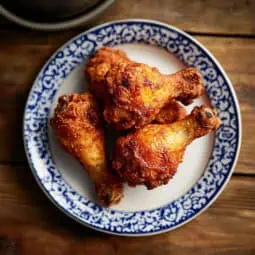
You know how we Filipinos can debate for hours about Chickenjoy vs. McDo, but let me tell you about a homemade fried chicken recipe that made my family forget about fastfood altogether. This Crispy Soy Chicken recipe changed my weekend cooking game completely.
As someone who grew up in a household that celebrated every occasion with either Jollibee or Max's, discovering how to make this Chinese-Filipino style fried chicken was like finding a culinary jackpot. The skin is sinfully crispy, while the meat stays juicier than your Tita's latest chismis. That sweet-savory soy sauce coating hits differently.
I've tried every fried chicken recipe out there, from Korean to Japanese, but this one holds a special place in my kitchen repertoire. It's my go-to "pulutan" when friends come over, my partner's requested baon, and my kids' new favorite (sorry, Chickenjoy).
You don't need to be a chef to make this. Just follow my tried-and-tested tips from countless cooking sessions, and you'll have everyone thinking you've been secretly training in Binondo's best restaurants. Ready to level up your fried chicken game? Let's get cooking!
Jump to:
Why You'll Love This Recipe
- Perfect Texture Contrast: Achieve restaurant-quality crispiness outside while maintaining incredibly juicy meat inside
- Make-Ahead Friendly: Can be prepared in stages, perfect for busy families
- Budget-Friendly Luxury: Create Chinese restaurant-quality dish at home for a fraction of the cost
- Foolproof Method: Detailed step-by-step instructions ensure success every time
- Versatile Dish: Perfect for both casual family dinners and special occasions
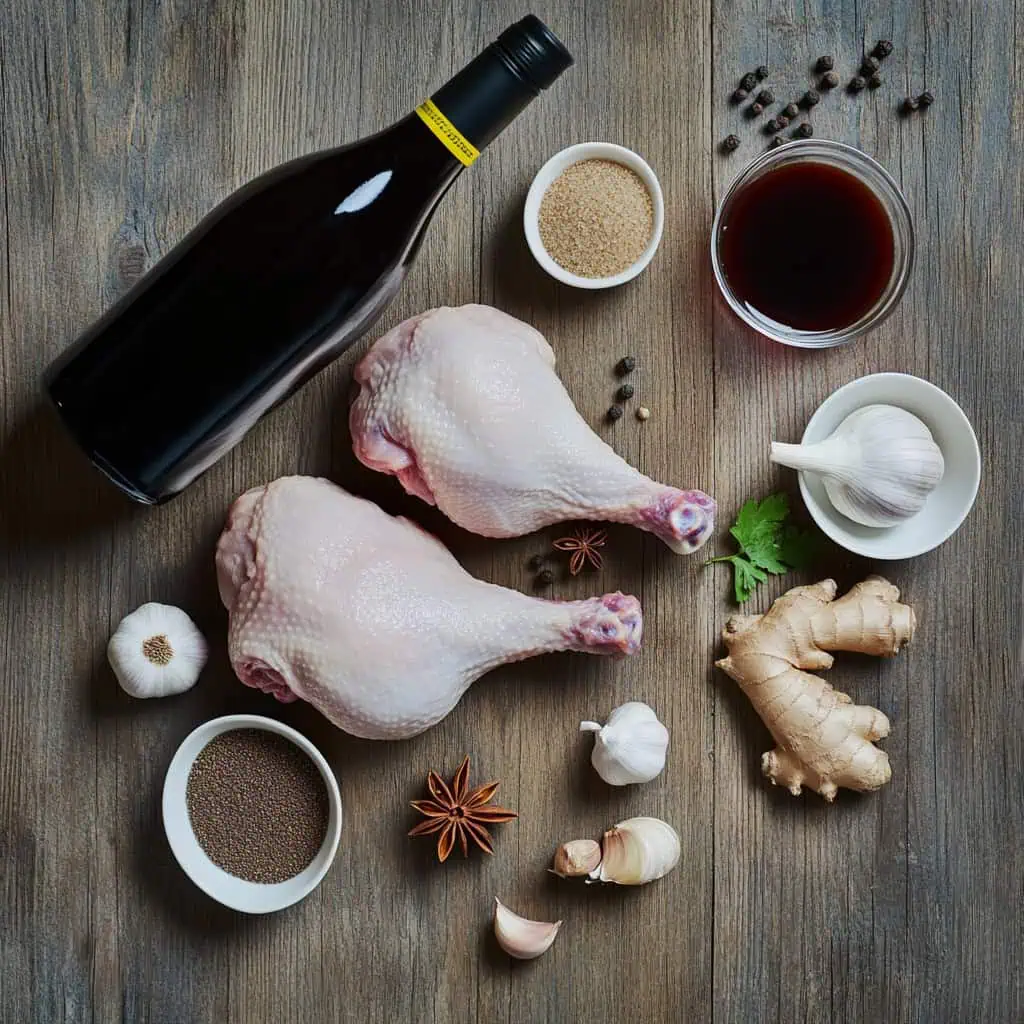
Ingredients
This recipe's magic comes from the perfect balance of ingredients. Chicken leg quarters provide juicy dark meat that won't dry out during the two-stage cooking process. The combination of light and dark soy sauce creates depth of flavor and beautiful color, while Chinese rice wine adds complexity.
Star anise, cinnamon, garlic, and ginger infuse the meat with aromatic warmth. Brown sugar balances the saltiness with gentle sweetness and helps caramelize the skin during frying. This carefully selected blend creates chicken that's fragrant, flavorful, and irresistibly crispy.
For the Chicken:
- 4 chicken leg quarters
- Salt for rubbing
For the Poaching Liquid:
- 2 cups chicken stock or water
- ½ cup light soy sauce
- ¼ cup dark soy sauce
- ¼ cup Chinese rice wine
- ¼ cup brown sugar
- 3 whole star anise
- 1 cinnamon stick
- 4 cloves garlic, peeled and smashed
- 1 thumb-sized ginger, peeled and smashed
- ¼ teaspoon black pepper
For Frying:
- Canola oil or vegetable oil for deep frying
Equipment
- Deep, narrow pot or Dutch oven: For poaching the chicken in the aromatic soy liquid without using excessive amounts of liquid. The narrow shape ensures the chicken remains fully submerged during cooking.
- Wire rack: Essential for proper air circulation during the drying process, preventing the chicken from becoming soggy on the bottom.
- Kitchen thermometer: Helps maintain precise oil temperature during frying, resulting in perfectly crispy skin without burning.
- Tongs: For safely handling the chicken during poaching and frying without piercing the skin.
- Paper towels: Used to thoroughly dry the chicken before refrigeration, a crucial step for achieving maximum crispiness.
- Heavy-bottomed frying pan or wok: Distributes heat evenly for consistent frying results.
- Slotted spoon: Allows for easy removal of chicken while leaving oil behind.
- Baking sheet: Provides stable support for the wire rack during refrigeration.
How To Make
- Start by thoroughly cleaning your chicken leg quarters. Use paper towels to pat them completely dry. Rub kosher salt evenly across all pieces of chicken, making sure to get under the skin when possible. Let the salted chicken rest at room temperature for 15 minutes.
- While the chicken is resting, prepare your poaching liquid. In a deep pot or Dutch oven, combine your chicken stock, light soy sauce, dark soy sauce, Chinese rice wine, and brown sugar. Add your aromatics: the whole star anise, cinnamon stick, crushed garlic cloves, sliced ginger, and black pepper. Set your stove to high heat and bring this mixture to a boil at 200°C. Once boiling, reduce the heat to medium-low (about 160°C) and let it simmer for 5 minutes until the liquid becomes fragrant.
- Gently lower your chicken pieces into the simmering liquid. The liquid temperature will drop - wait until it returns to a gentle simmer at 180°C. Reduce the heat to maintain a steady temperature of 160°C. Cook the chicken for 20-25 minutes, occasionally turning the pieces for even cooking. The chicken is done when a thermometer inserted into the thickest part reads 165°F or 74°C.
- Remove the chicken from the poaching liquid using tongs. Place them on a wire rack and pat them thoroughly dry with paper towels. This drying step is crucial for achieving crispy skin. Place the rack with the chicken in your refrigerator, uncovered, and let it air dry for 6-12 hours or overnight. The cold air helps dehydrate the skin, which will make it extra crispy when fried.
- When ready to fry, remove the chicken from the refrigerator 30 minutes before cooking to take the chill off. Heat your frying oil in a deep pot to exactly 350°F or 177°C. Carefully lower the chicken pieces into the hot oil. Maintain the oil temperature between 325°F and 350°F (163°C-177°C) - use your thermometer to monitor this carefully. Fry each piece for 3-5 minutes per side until the skin is deeply golden brown and crispy.
- Transfer the fried chicken to a clean wire rack to drain excess oil. Let the chicken rest for 5-10 minutes before serving. This resting period allows the juices to redistribute throughout the meat, ensuring each bite is juicy.
- Serve hot with steamed rice and your choice of dipping sauce. A mix of vinegar, soy sauce, and chili makes an excellent accompaniment.

Tips from Lola's Kitchen
- Pat completely dry: Before refrigerating, make sure to pat the chicken extra dry with paper towels. Any remaining moisture will prevent the skin from getting that glass-like crispiness.
- Overnight drying is essential: Don't rush this step! The longer air-drying time in the refrigerator (minimum 6 hours, ideally overnight) is what creates that incredible crackly skin texture.
- Use dark soy sauce: This ingredient gives the chicken its beautiful amber color and adds depth to the flavor profile that light soy sauce alone can't achieve.
- Save that poaching liquid: After poaching, strain and freeze the liquid for future use. It makes an incredible base for noodle soups, braised dishes, or even as a marinade for other proteins.
- Maintain oil temperature: Use a thermometer to keep your oil between 325°F-350°F. Too hot, and the skin burns before the chicken heats through; too cool, and it becomes greasy.
- Work in batches: Don't overcrowd your frying pan. Fry 2-3 pieces at a time to maintain proper oil temperature and ensure even cooking.
- Room temperature before frying: Always let the refrigerated chicken sit at room temperature for 30 minutes before frying to ensure even cooking from outside to inside.
- Double frying option: For extra crispiness, you can fry once at 325°F for 3 minutes, rest for 5 minutes, then fry again at 350°F for 2 minutes.
- Position matters: Place chicken skin-side up first when frying to allow the skin to expand and crisp properly.
Substitutions
- Chinese rice wine: If unavailable, substitute with dry sherry, mirin (reduce other sweeteners), or additional chicken stock.
- Dark soy sauce: Can be replaced with regular soy sauce plus 1 teaspoon of molasses to add color and richness.
- Star anise: Substitute with ¼ teaspoon Chinese five-spice powder, which contains star anise as its primary ingredient.
- Fresh ginger: In a pinch, use 1 teaspoon ground ginger, though fresh is strongly preferred for better flavor.
- Chicken leg quarters: This recipe works with other chicken cuts, but dark meat with skin works best. If using a whole chicken, cut into pieces and adjust cooking times accordingly.
- Brown sugar: White sugar plus 1 teaspoon molasses will provide a similar flavor profile.
- Canola oil: Any neutral high-smoke point oil like peanut oil, vegetable oil, or corn oil works well.
- Chicken stock: Water works as a substitute, but the flavor won't be as rich. Consider adding a chicken bouillon cube if using water.
Troubleshooting
Skin not crispy enough?
- Make sure the chicken is completely dry before refrigerating and frying
- Verify your oil temperature is hot enough (325°F-350°F)
- Don't overcrowd the frying pan – fry in batches
- Consider the double-frying method mentioned in tips
Meat too dry?
- Use a thermometer to avoid overcooking during the poaching step
- Maintain proper oil temperature during frying
- Allow the meat to rest for 5-10 minutes before cutting or serving
- Consider brining the chicken for 2 hours before starting the recipe
Poaching liquid too salty?
- Add more water or unsalted chicken stock to dilute
- Balance with additional brown sugar to create sweet-savory harmony
- Next time, use low-sodium soy sauce varieties
- Reduce overall soy sauce quantities by 25%
Chicken browning too quickly during frying?
- Your oil is too hot – reduce temperature to 325°F
- Add chicken to oil more gradually to prevent temperature spikes
- Consider double-frying at lower temperatures as mentioned in tips
Oil splattering excessively?
- Ensure chicken is completely dry before frying
- Let chicken come to room temperature before frying
- Use a deeper pot with higher sides
- Lower chicken pieces into oil very slowly using tongs
Storage & Reheating
Storage:
- Refrigerator: Store cooled leftovers in an airtight container for 3-4 days.
- Freezer: For longer storage, wrap individual pieces tightly in plastic wrap, then aluminum foil, and freeze for up to 2 months.
Reheating:
- Oven method (best for maintaining crispiness):
- Preheat oven to 400°F (200°C)
- Place chicken on a wire rack over a baking sheet
- Heat for 10-15 minutes until heated through and crispy
- Air fryer method (quick and excellent results):
- Preheat air fryer to 370°F (188°C)
- Arrange chicken pieces in a single layer
- Heat for 5-7 minutes until crispy and thoroughly heated
- Avoid microwave: While convenient, microwaving will make the skin soggy and the meat rubbery.
FAQ
Can I use chicken breast instead of leg quarters?
Yes, but you'll need to reduce the poaching time to prevent the meat from drying out. Bone-in, skin-on chicken breasts work best if you're making this substitution. Poach only until the internal temperature reaches 160°F, as they'll continue cooking during frying.
How do I know when the chicken is fully cooked?
The most reliable method is using a meat thermometer – the internal temperature should reach 165°F (74°C) at the thickest part of the meat. If you don't have a thermometer, cut into the thickest part near the bone – the meat should be opaque with no pink juices.
Can I make this in an air fryer instead of deep-frying?
Absolutely! After the refrigeration step, preheat your air fryer to 400°F (200°C) and cook for 12-15 minutes, flipping halfway through. While the skin won't be quite as crispy as deep-frying, it's a healthier alternative that still delivers excellent results.
How do I store the leftover poaching liquid?
Strain the liquid through a fine-mesh sieve to remove solids, cool completely, then transfer to airtight containers. It can be refrigerated for up to 1 week or frozen for up to 3 months. Use it as a flavor base for soups, noodles, or to poach other proteins.
Why is refrigerating overnight so important?
This critical step allows the skin to dry thoroughly, which is essential for achieving that signature crispy texture. The cold, dry environment of the refrigerator draws moisture out of the skin, setting it up for the perfect crunch when fried. Think of it as creating the conditions for the ultimate transformation during frying.
Can I prepare this dish in advance for a party?
Yes! This recipe is perfect for entertaining because you can complete the poaching and refrigeration steps up to 2 days ahead. On the day of your event, simply bring the chicken to room temperature and fry just before serving. This gives you freshly fried chicken with minimal last-minute work.
Is there a way to reduce the sodium content?
To make a lower-sodium version, use low-sodium soy sauce, reduce the total amount of soy sauce by ¼, and increase the aromatics (more ginger, garlic, star anise) to maintain flavor depth. You can also rinse the chicken briefly after poaching, before the drying step.
Can I reuse the oil after frying?
Yes, but proper straining is key. After the oil has completely cooled, strain through a fine-mesh sieve lined with cheesecloth to remove any particles. Store in a clean, airtight container away from light and heat. For best results, don't reuse oil more than 2-3 times.
What's the ideal frying temperature and how do I maintain it?
The ideal temperature range is 325°F-350°F (163°C-177°C). To maintain this temperature, use a heavy-bottomed pot that retains heat well, fry in smaller batches, and let the oil return to temperature between batches. A candy/deep-fry thermometer is invaluable for monitoring.
How can I make this dish spicy?
Add 2-3 dried red chilies and a tablespoon of chili oil to the poaching liquid for heat that penetrates the meat. Alternatively, create a spicy dipping sauce with soy sauce, vinegar, minced garlic, and fresh chopped chilies. For serious heat lovers, add a teaspoon of chili powder to the salt rub before poaching.
Related
Looking for other recipes like this? Try these:


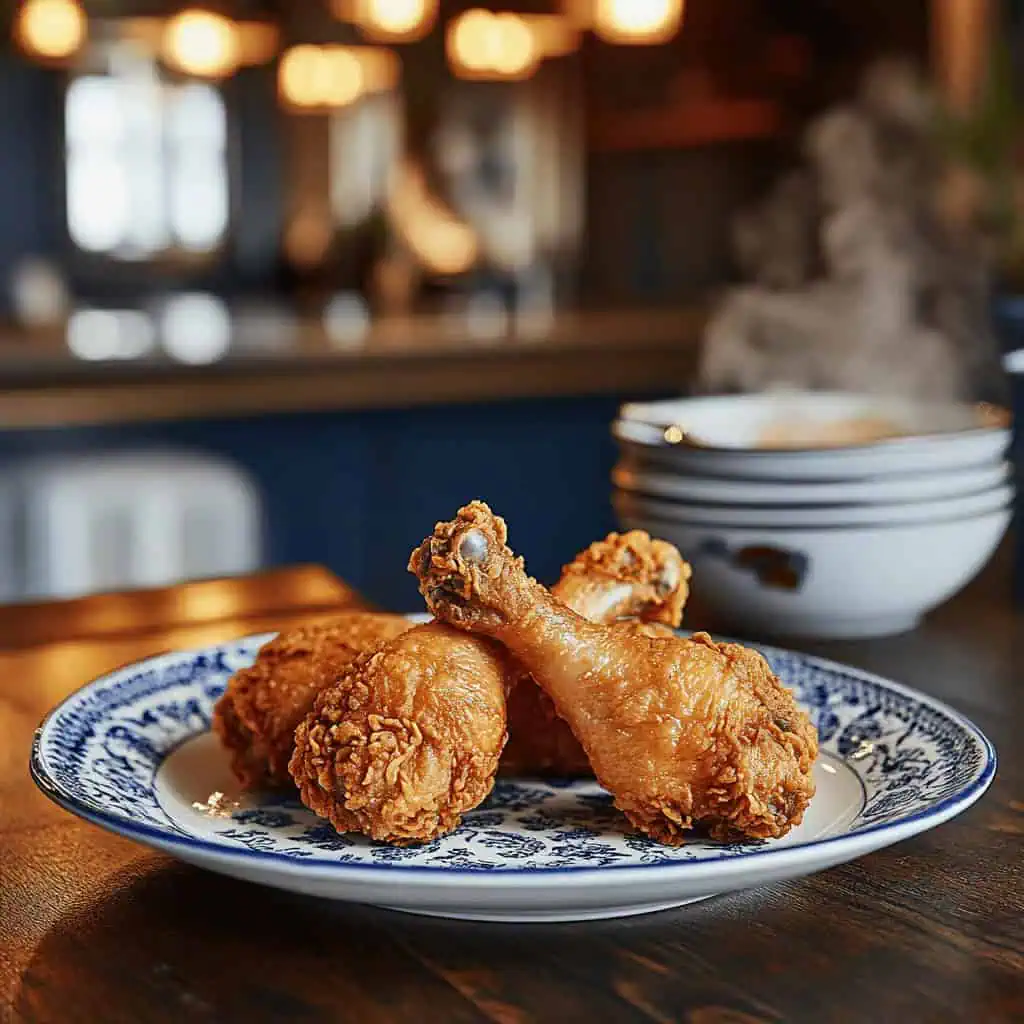
Crispy Soy Chicken (Manok na Pritong may Toyo)
Equipment
- Deep, narrow pot (kaserola)
- Wire rack (Parilya)
- Kitchen thermometer (optional but recommended)
- Tongs [Sipit]
- Paper towels
Ingredients
For the Chicken
- 4 chicken leg quarters hita at paa ng manok
- Salt for rubbing asin
For the Poaching Liquid (Sabaw na Papakuluan)
- 2 cups chicken stock or water sabaw ng manok
- ½ cup light soy sauce toyo
- ¼ cup dark soy sauce toyo
- ¼ cup Chinese rice wine
- ¼ cup brown sugar asukal na kayumanggi
- 3 whole star anise sangke
- 1 cinnamon stick kanela
- 4 cloves garlic peeled and smashed (bawang)
- 1 thumb-sized ginger peeled and smashed (luya)
- ¼ teaspoon black pepper paminta
For Frying
- Canola oil or vegetable oil for deep frying mantika
Instructions
- Start by thoroughly cleaning your chicken leg quarters (linisin mabuti ang mga hita at paa ng manok). Use paper towels to pat them completely dry (kailangang tuyuin ng mabuti gamit ang paper towel). Rub kosher salt evenly across all pieces of chicken (pahiran ng asin ang bawat piraso ng manok), making sure to get under the skin when possible. Let the salted chicken rest at room temperature for 15 minutes (palamiginin ng labinlimang minuto).
- While the chicken is resting, prepare your poaching liquid (maghanda ng sabaw na papakuluan). In a deep pot or Dutch oven, combine your chicken stock, light soy sauce (manipis na toyo), dark soy sauce (maitim na toyo), Shaoxing wine, and brown sugar (asukal na kayumanggi). Add your aromatics: the whole star anise (sangke), cinnamon stick (kanela), crushed garlic cloves (durog na bawang), sliced ginger (hiwang luya), and black pepper (paminta). Set your stove to high heat and bring this mixture to a boil at 200°C. Once boiling, reduce the heat to medium-low (about 160°C) and let it simmer for 5 minutes until the liquid becomes fragrant (hanggang mabango).
- Gently lower your chicken pieces into the simmering liquid (dahan-dahang ilagay ang manok sa mainit na sabaw). The liquid temperature will drop - wait until it returns to a gentle simmer at 180°C. Reduce the heat to maintain a steady temperature of 160°C. Cook the chicken for 20-25 minutes, occasionally turning the pieces for even cooking (paikutin paminsan-minsan ang manok para maluto ng pantay). The chicken is done when a thermometer inserted into the thickest part reads 165°F or 74°C (luto na ang manok kapag umabot sa 74°C ang init sa loob).
- Remove the chicken from the poaching liquid using tongs (hanguin ang manok gamit ang sipit). Place them on a wire rack and pat them thoroughly dry with paper towels (patuyuing mabuti gamit ang paper towel). This drying step is crucial for achieving crispy skin (importanteng hakbang ito para maging malutong ang balat). Place the rack with the chicken in your refrigerator, uncovered (ilagay sa ref nang hindi natatakpan), and let it air dry for 6-12 hours or overnight. The cold air helps dehydrate the skin, which will make it extra crispy when fried.
- When ready to fry, remove the chicken from the refrigerator 30 minutes before cooking to take the chill off (ilabas sa ref tatlumpung minuto bago prituhin). Heat your frying oil in a deep pot to exactly 350°F or 177°C (initin ang mantika hanggang 177°C). Carefully lower the chicken pieces into the hot oil (dahan-dahang ihulog ang manok sa mainit na mantika). Maintain the oil temperature between 325°F and 350°F (163°C-177°C) - use your thermometer to monitor this carefully. Fry each piece for 3-5 minutes per side until the skin is deeply golden brown and crispy (hanggang maging golden brown at malutong ang balat).
- Transfer the fried chicken to a clean wire rack to drain excess oil (patuyuan ng mantika sa parilya). Let the chicken rest for 5-10 minutes before serving (palamiginin ng 5-10 minuto bago ihain). This resting period allows the juices to redistribute throughout the meat, ensuring each bite is juicy (para manatiling malambot at malasa ang karne).
- Serve hot with steamed rice (mainit na kanin) and your choice of dipping sauce. A mix of vinegar, soy sauce, and chili (suka, toyo, at sili) makes an excellent accompaniment. If storing leftovers, let the chicken cool completely before refrigerating in an airtight container (palamiginin bago ilagay sa lalagyan at iref). Leftovers will stay crispy when reheated in an oven at 400°F (200°C) for 10-15 minutes or in an air fryer at 370°F (188°C) for 5-7 minutes.
- Remember that the key to perfect crispy skin lies in thorough drying (ang susi sa malutong na balat ay ang maayos na pagpapatuyo) and maintaining proper oil temperature during frying (at ang tamang init ng mantika sa pagpiprito). If your chicken browns too quickly, your oil is too hot. If it takes longer than 5 minutes per side to brown, your oil isn't hot enough. Always use your thermometer to ensure perfect results (palaging gamitin ang termometro para sa perpektong resulta).
Tips from Lola's Kitchen
- Pat the chicken extra dry before refrigerating for maximum crispiness
- Don't skip the overnight drying - it's the secret to crispy skin!
- Use dark soy sauce for better color and flavor depth
- Save the poaching liquid for future use (can be frozen)
- Don't overcrowd the frying pan - work in batches if needed
Nutrition
The Story Behind Crispy Soy Chicken
Growing up in Manila's bustling Binondo district, I've always been fascinated by how Chinese cooking techniques seamlessly blend with Filipino flavors. This Crispy Soy Chicken (Manok na Pritong may Toyo) is a perfect example of that delicious cultural intersection, inspired by both traditional Chinese soy sauce chicken and the Filipino passion for perfectly crispy fried dishes.
While the original Chinese soy sauce chicken (豉油鸡 or si yau kai) is poached and served with its tender skin intact, this version adds an extra step that Filipinos adore – the quest for that satisfying crunch. It's a technique I discovered during my weekly trips to Chowking, where their own spin on this dish captivated countless Filipino families seeking that perfect combination of juicy meat and crispy skin.
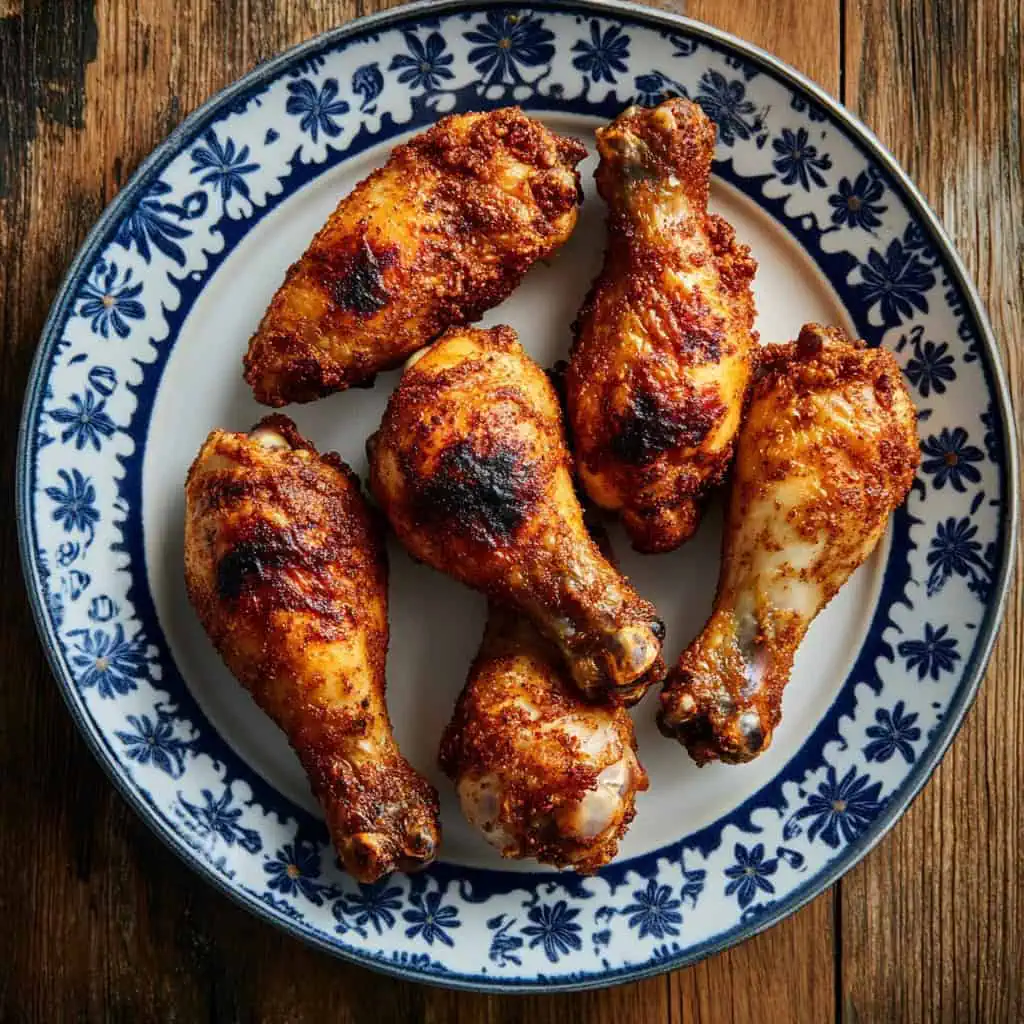
What makes this recipe truly special is its double-cooking method, a technique that's similar to the preparation of our beloved crispy pata. The chicken first absorbs the complex flavors of star anise, cinnamon, and two types of soy sauce during a gentle poach. Then, much like the secret behind Cantonese crispy duck, the meat is air-dried in the refrigerator – a crucial step that removes excess moisture and guarantees that coveted crackly skin.
The final deep-frying step is pure Filipino influence, transforming what would traditionally be a tender-skinned Chinese dish into something that delivers that signature Filipino "lutong" (crispiness) we crave. This fusion approach has made this dish a staple at countless Filipino family gatherings, where it's often served alongside both pancit canton and steaming white rice, bridging two culinary traditions on a single plate.
Today, you'll find variations of this dish across Metro Manila, from humble carinderias to high-end Chinese restaurants, but this home-cooked version combines the best techniques I've learned over years of perfecting the recipe. It's a testament to how Filipino cuisine continues to evolve, embracing influences while adding our own distinctive touch to create something uniquely delicious.

Comments
No Comments