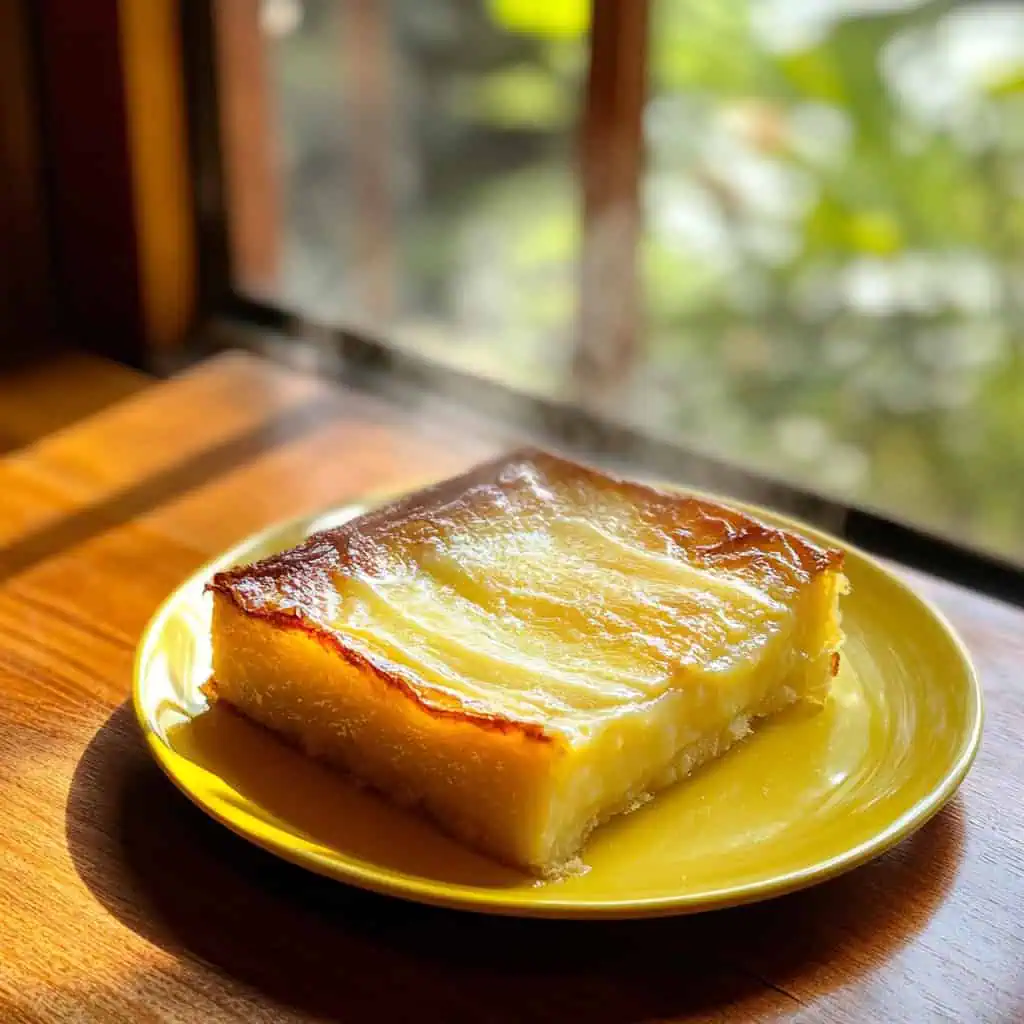
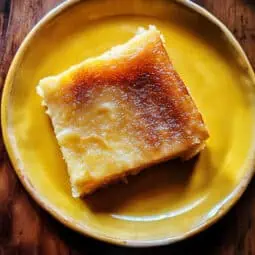
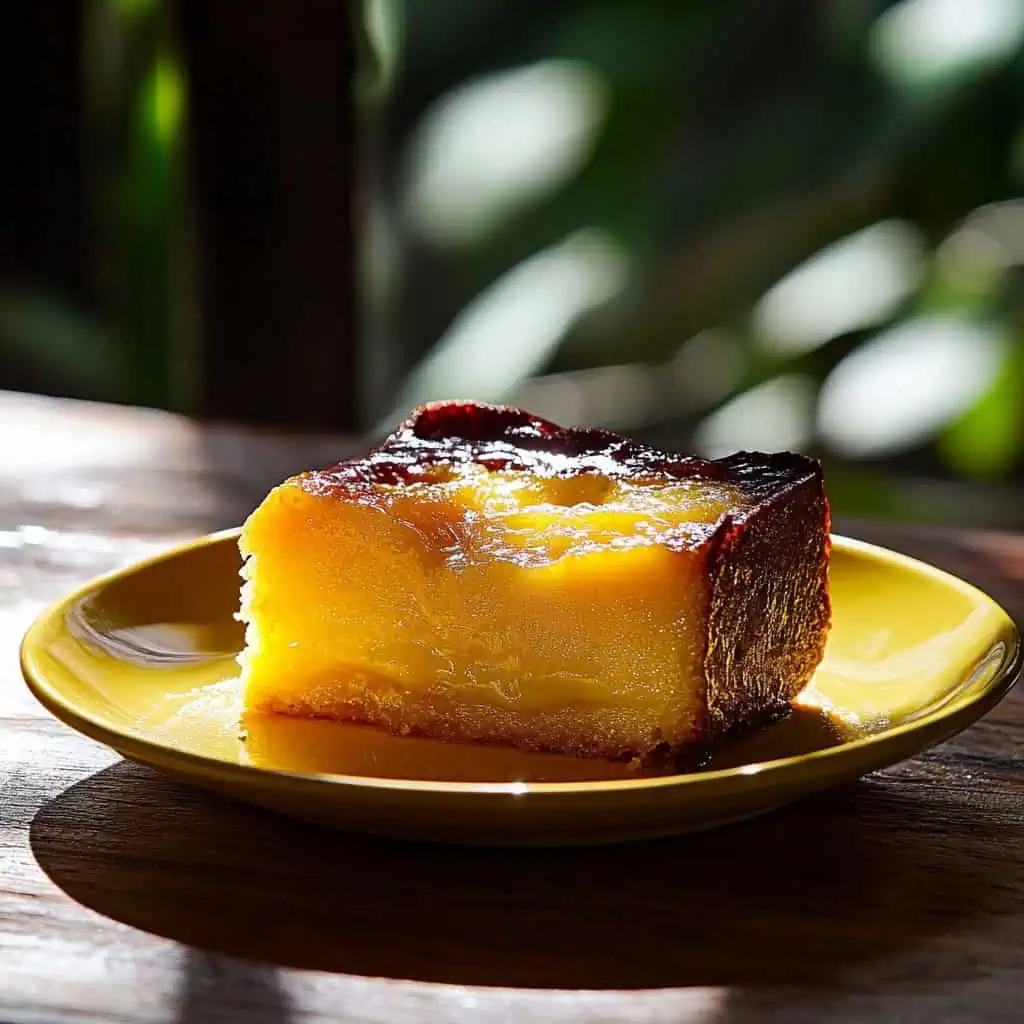
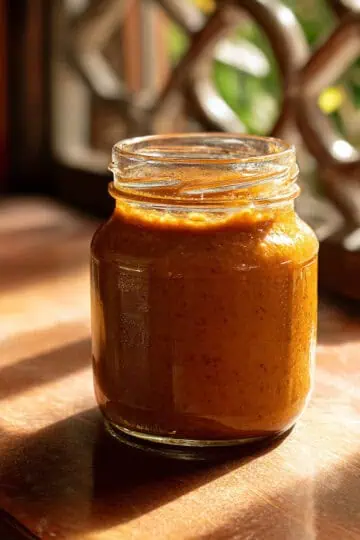
Let me share my family's treasured cassava cake recipe with you. I learned it from my mother. The magic of this dessert lies in its soft, creamy base and golden custard topping. It's simpler to make than you might think!
After years of baking this cake for family parties and potlucks, I've broken down all the steps to help you create the perfect cassava cake right in your kitchen. Whether you're craving a taste of home or trying Filipino desserts for the first time, this recipe won't disappoint.
Jump to:
Why You'll Love This Recipe
- Perfect balance of sweetness and coconut flavor
- Incredibly moist and tender texture
- Make-ahead friendly for special occasions
- Pantry-friendly ingredients
- Authentically Filipino with modern conveniences
- Foolproof instructions for consistent results
Ingredients
This recipe combines cassava flour (for its unique chewy texture), coconut milk and macapuno (for authentic Filipino flavor), and eggs (for structure and binding) with the perfect balance of sweeteners. The custard topping ingredients create that signature golden crown that makes cassava cake irresistible.
Each component plays an essential role in achieving the ideal balance of sweetness, moisture, and authentic taste that has made this dessert beloved for generations.
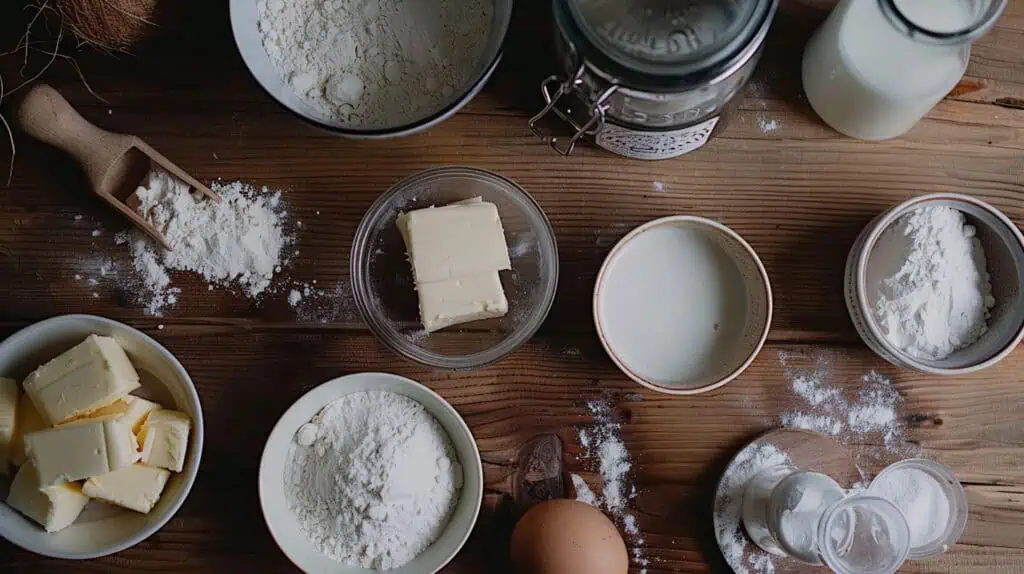
For the Cake Base:
- 2 cups cassava flour
- 1 cup granulated sugar
- ½ cup evaporated milk
- ½ cup coconut milk
- 1 cup young coconut/macapuno
- 2 large eggs, separated
- 2 teaspoons baking powder
- ½ cup unsalted butter, softened
- ½ teaspoon vanilla extract
For the Custard Topping:
- 3 egg yolks
- ⅓ cup sweetened condensed milk
- ⅔ cup coconut milk
Equipment
- Stand mixer or hand mixer - For properly creaming butter and sugar and achieving light, fluffy texture
- 9x13 inch baking pan - Provides the ideal depth and surface area for even baking
- Fine-mesh sieve - Essential for sifting dry ingredients to remove lumps
- Rubber spatula - For folding in egg whites without deflating the batter
- Mixing bowls (3 pieces) - Separate bowls needed for different components of the recipe
- Measuring cups and spoons - For precise measurements
- Whisk - For combining custard ingredients smoothly
- Oven thermometer - Ensures accurate baking temperature
How To Make
- Prepare oven and pan: Position your oven rack in the middle and preheat to 325°F (160°C). Lightly grease a 9x13 inch baking pan with butter.
- Sift dry ingredients: Combine cassava flour and baking powder by sifting them together into a bowl to remove any lumps and ensure a tender cake texture.
- Cream butter and sugar: In a large mixing bowl, beat the softened butter until smooth and creamy (about 2 minutes). Gradually add sugar while mixing and continue beating until the mixture becomes light and fluffy (about 3 more minutes).
- Add wet ingredients: Separate your eggs, keeping both yolks and whites. Add the egg yolks one at a time to your butter mixture, beating well after each addition. Gradually incorporate your sifted flour mixture and milks (both evaporated and coconut), mixing gently in one direction. Stir in vanilla extract and macapuno.
- Beat egg whites: In a clean, dry bowl, beat egg whites until they form stiff peaks – when lifted, the peaks should stand straight up without folding over.
- Fold in egg whites: Gently fold the beaten whites into your batter in three portions, using a light hand to maintain the air in the mixture.
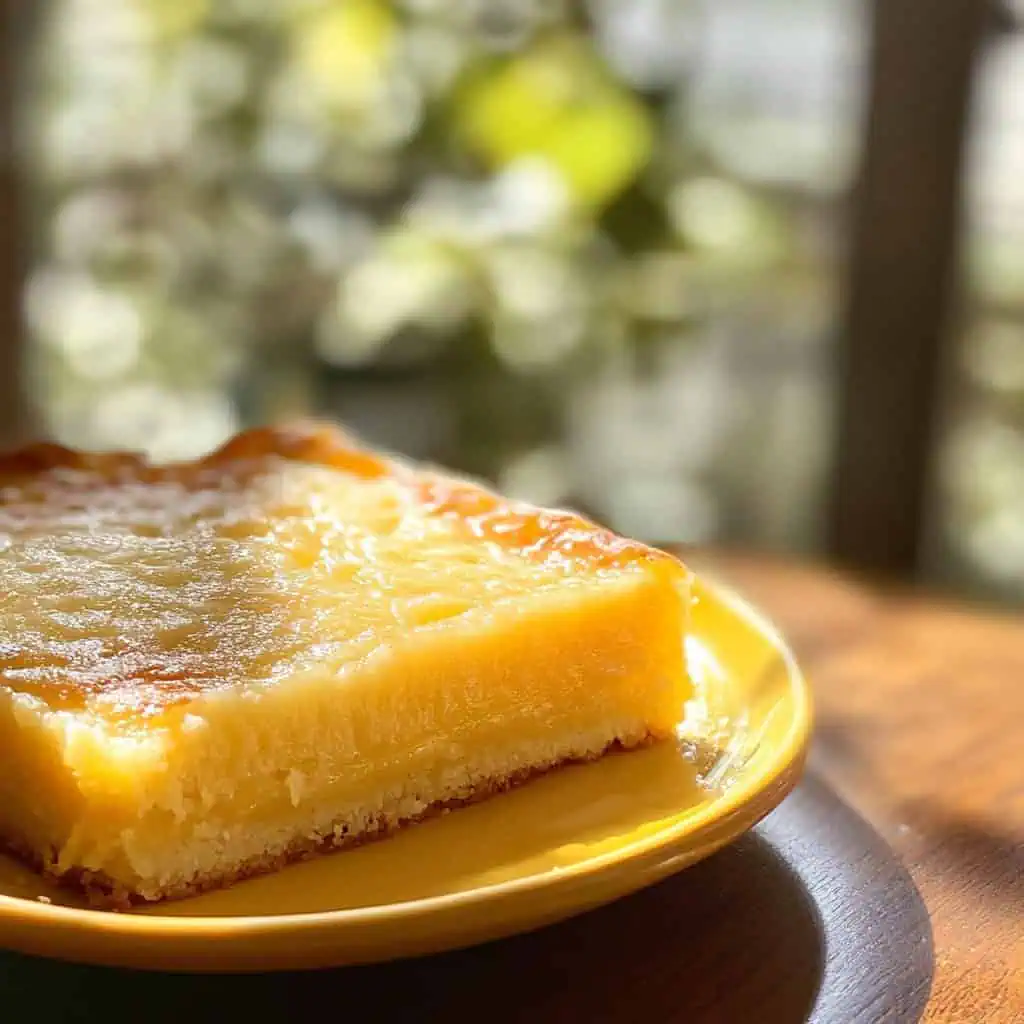
- First bake: Pour your batter into the greased pan and bake for 20-30 minutes. The cake is ready for the next step when the top is set but not completely done.
- Prepare topping: While the cake bakes, mix all topping ingredients together: egg yolks, sweetened condensed milk, and coconut milk. Once the cake base is set, remove it from the oven and pour your topping mixture evenly over it.
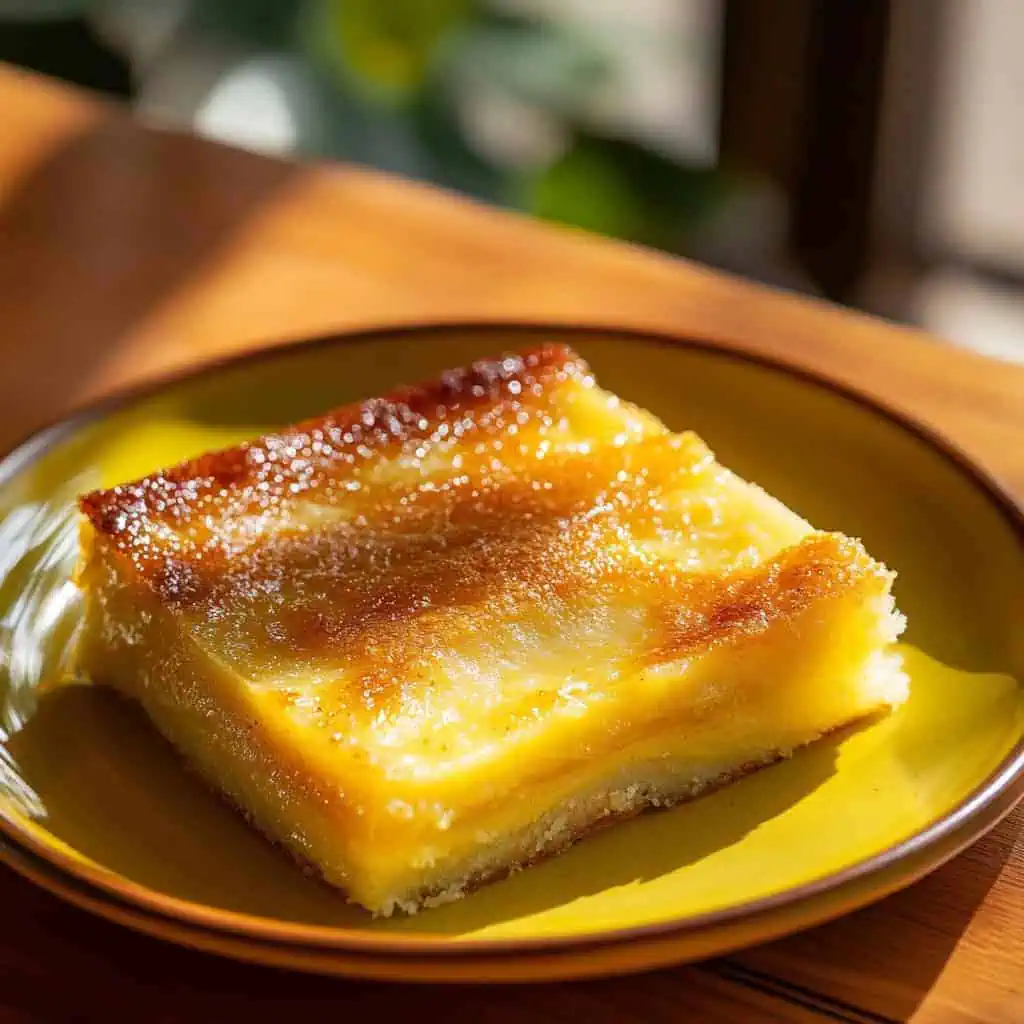
- Final bake: Return the cake to the oven for another 20-30 minutes. Your cassava cake is done when the topping turns a beautiful golden brown and the center barely jiggles when gently shaken.
- Cool completely: Allow your cake to cool completely before cutting for cleaner slices and better flavor development. Serve at room temperature.

Tips from Lola's Kitchen
- Bring all ingredients to room temperature before starting for a smoother, more cohesive batter
- When separating eggs, ensure no yolk contaminates the whites or they won't whip properly
- Beat egg whites in a clean, dry, grease-free bowl for maximum volume
- Don't overbeat the mixture after adding flour to avoid developing gluten, which causes toughness
- Use fresh coconut milk rather than canned for authentic flavor
- The custard topping may look slightly loose when hot but will set as it cools
- For perfect slices, use a knife dipped in hot water and wiped clean between cuts
Substitutions
- Cassava flour: Use 2.5 cups fresh grated cassava (squeezed of excess moisture)
- Evaporated milk: Substitute with whole milk or half-and-half
- Macapuno: Replace with freshly grated young coconut or coconut flakes soaked in simple syrup
- Butter: Use margarine or coconut oil (reduce by 1 tablespoon if using coconut oil)
- Vanilla extract: Try coconut extract or a combination of both for enhanced flavor
- Sweetened condensed milk: Combine ¼ cup heavy cream with 2 tablespoons sugar as an alternative
Troubleshooting
- Cake too dense or heavy: Egg whites were not beaten sufficiently or were deflated during folding. Make sure to beat to stiff peaks and fold gently.
- Topping cracks or separates: Oven temperature too high. Lower by 25°F and consider using a water bath for more gentle, even heating.
- Top browns too quickly: Cover loosely with aluminum foil while baking.
- Center not setting: Add 5-10 minutes baking time at a reduced temperature of 300°F.
- Cake sticks to pan: Allow to cool for 15 minutes, then run a thin knife around the edges before attempting to remove.
- Batter seems too thick: Add 1-2 tablespoons more coconut milk, but avoid making it too runny.
Storage & Reheating
- Room temperature: Keeps up to 2 days in an airtight container in a cool place
- Refrigerator: Stores well for up to 1 week in a covered container
- Freezer: Can be frozen for up to 3 months (without topping) - wrap individual pieces in plastic wrap then place in freezer bag
- Reheating: Microwave for 20-30 seconds or warm in oven at 300°F for 5-10 minutes until just heated through
- Best practice: For optimal flavor and texture, bring refrigerated cake to room temperature before serving
FAQ
Why did my cake turn out gummy?
This usually happens when the batter is overmixed, the oven temperature is too low, or the cake is underbaked. Make sure to mix just until ingredients are combined and check that your oven is properly calibrated.
Can I use frozen grated cassava?
Yes, but you must thaw completely and drain thoroughly before using. Squeeze out excess moisture using a cheesecloth or clean kitchen towel and adjust the liquid content in the recipe accordingly.
How do I know when the cake is perfectly done?
The topping should be golden brown (not dark brown) and a toothpick inserted in the center should come out clean. The center may still have a slight jiggle, similar to set custard, but should not be liquid.
Can I make this ahead for a party?
Absolutely! In fact, many Filipinos believe cassava cake tastes better the day after baking, as the flavors have time to meld. Make 1-2 days ahead and store in the refrigerator, bringing to room temperature before serving.
My cassava cake always sinks in the middle. How can I prevent this?
This often happens due to opening the oven door too early or drastic temperature changes. Avoid opening the oven door during the first 20 minutes of baking and allow the cake to cool gradually in the turned-off oven with the door slightly ajar.
Is cassava flour the same as tapioca flour?
No, although both come from the cassava plant, they are processed differently. Tapioca flour is more refined and extracted from the starch, while cassava flour uses the whole root. For this recipe, only use cassava flour.
Can I reduce the sugar without affecting the texture?
You can reduce the sugar by up to 25% without significantly impacting the texture, though it will change the flavor balance. Consider adding a pinch of salt to enhance the remaining sweetness.
Related
Looking for other recipes like this? Try these:


Filipino Cassava Cake Recipe
Equipment
- Stand mixer or hand mixer
- 9x13 inch baking pan
- Fine-Mesh Sieve
- Rubber spatula
- Mixing bowls (3 pieces)
- Measuring cups and spoons
- Whisk
- Oven thermometer
Ingredients
For the Cake Base:
- 2 cups cassava flour
- 1 cup granulated sugar asukal
- ½ cup evaporated milk gatas
- ½ cup coconut milk gata ng niyog
- 1 cup young coconut/macapuno buko/macapuno
- 2 large eggs separated (itlog, ihiwalay ang pula at puti)
- 2 teaspoon baking powder
- ½ cup unsalted butter softened (mantikilya)
- ½ teaspoon vanilla extract
For the Custard Topping:
- 3 egg yolks 3 pula ng itlog
- ⅓ cup sweetened condensed milk kondensadang gatas
- ⅔ cup coconut milk gata ng niyog
Instructions
- Start by placing your oven rack in the middle position and preheating your oven to 325°F (160°C). While the oven heats, lightly grease a 9x13 inch baking pan with butter.
- Take your cassava flour and baking powder and sift them together into a bowl. This removes any lumps and helps make your cake tender.
- In your large mixing bowl, beat the softened butter until it's smooth and creamy, about 2 minutes. Add your sugar little by little while mixing, and keep beating until the mixture becomes light and fluffy, about 3 more minutes.
- Separate your eggs, keeping both the yolks and whites. Add the egg yolks one at a time to your butter mixture, beating well after each one. Now start adding your sifted flour mixture and milks (both evaporated and coconut) a little at a time, mixing gently in one direction. Stir in your vanilla extract and macapuno.
- In a clean, dry bowl, beat your egg whites until they form stiff peaks – when you lift the beater, the peaks should stand straight up. Now comes the gentle part: fold these beaten whites into your batter in three portions, using a light hand to keep the air in the mixture.
- Pour your batter into your greased pan and pop it in the oven for 20-30 minutes. You'll know it's ready for the next step when the top is set but not completely done.
- While your cake is in its first bake, mix all your topping ingredients together: egg yolks, sweetened condensed milk, and coconut milk. Once the cake is set, take it out of the oven and pour your topping mixture evenly over it.
- Return the cake to the oven for another 20-30 minutes. Your cassava cake is done when the topping turns a beautiful golden brown and the center barely jiggles when you gently shake the pan.
- Let your cake cool completely before cutting – this makes for cleaner slices and lets the flavors develop. Serve at room temperature and enjoy your homemade cassava cake.
Tips from Lola's Kitchen
- Room temperature ingredients create a smoother batter
- Don't overbeat the mixture after adding flour to avoid a tough cake
- Use fresh coconut milk for the best flavor
- Test doneness with a toothpick inserted in the center
- Let the cake cool completely for clean slices
Nutrition
The Story Behind Cassava Cake
Cassava cake, known as bibingkang cassava in the Philippines, has a rich history that spans generations of Filipino home bakers. This beloved kakanin (native rice cake) actually doesn't use rice at all – instead, it relies on cassava, a root crop that has been a staple in Philippine cuisine for centuries. Spanish colonizers discovered that locals were already making simple cassava desserts when they arrived in the 1500s.
What makes this dessert truly special is how it showcases Filipino ingenuity in the kitchen. Originally, cassava cake was steamed in banana leaves, creating a simple but satisfying treat. Over time, Filipino cooks began adding coconut milk, eggs, and condensed milk – ingredients that became widely available during the American period. The custard topping, now a hallmark of modern cassava cake, was a brilliant addition that transformed this humble dessert into something extra special.
Today, you'll find cassava cake at every Filipino celebration, from fiestas to family gatherings. Each region has its own twist – some add cheese on top, others include coconut sport (macapuno), and some families guard secret ingredients that make their version unique. In Filipino homes, this dessert isn't just about satisfying a sweet tooth; it's about continuing a delicious tradition that connects us to our heritage.

Comments
No Comments