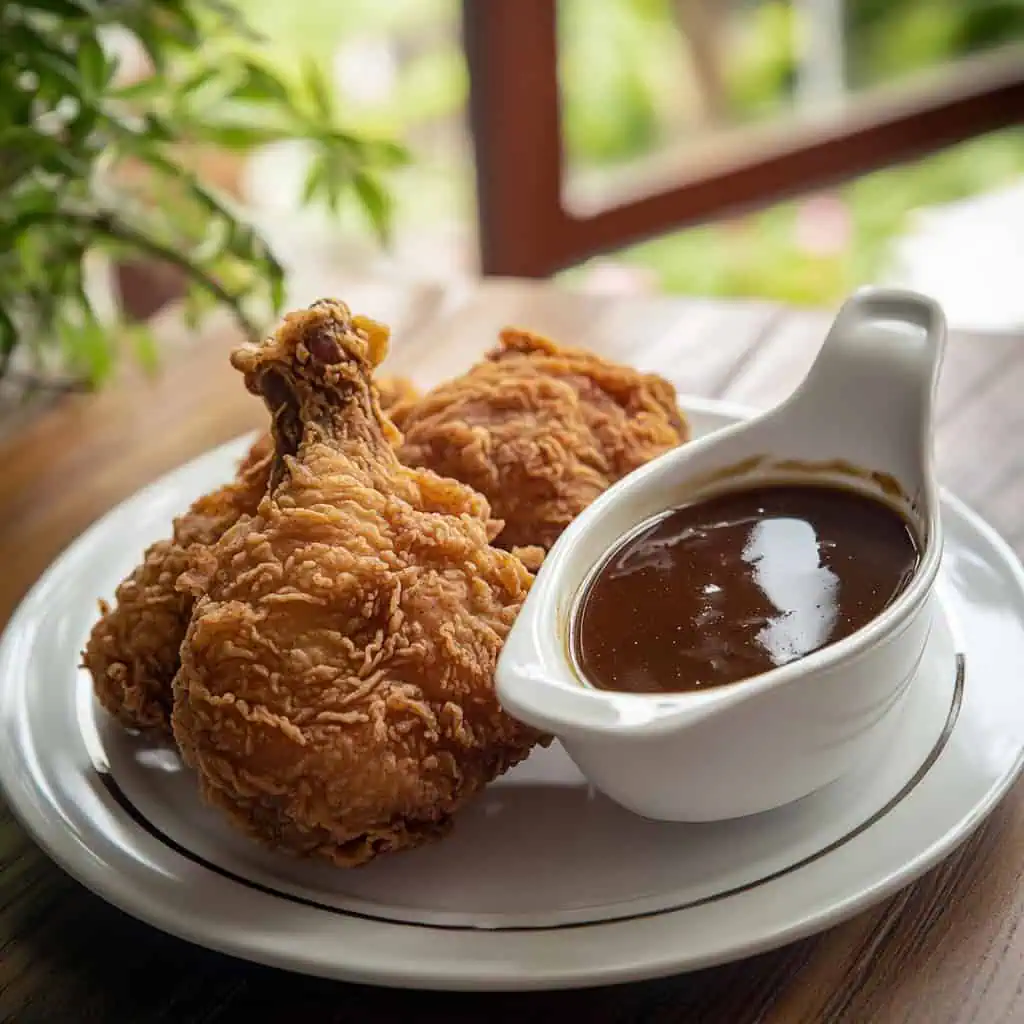
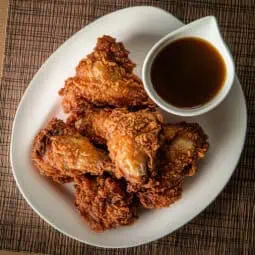
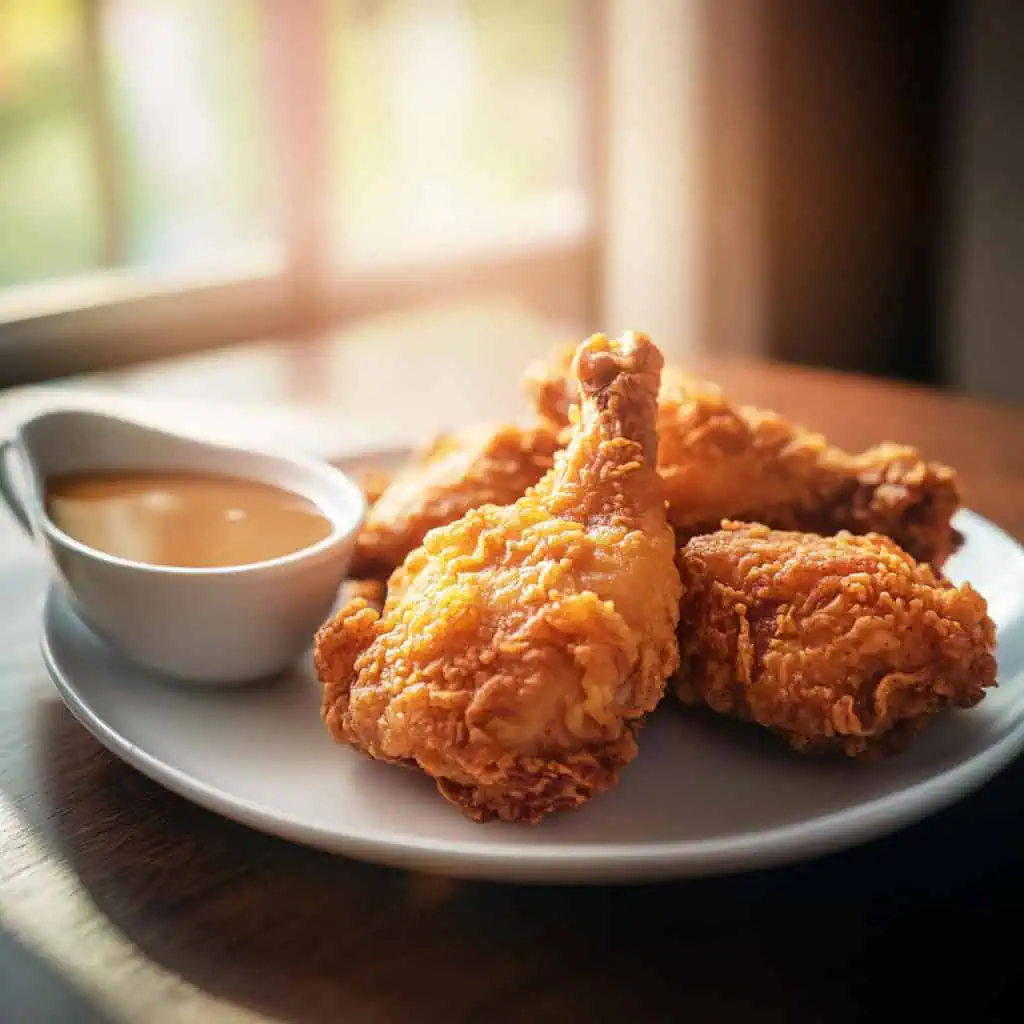
Every Filipino knows that Jollibee's Chickenjoy isn't just another fried chicken, it's an institution. This iconic dish, with its distinctively crispy exterior and remarkably juicy interior, has earned its place as the Philippines' most beloved fast-food offering.
After extensive testing and refinement, this recipe captures the essence of what makes Chickenjoy special: a precise 30-minute garlic brine, a carefully calibrated blend of seasonings, and a double-breading technique that delivers that signature crunch.
While Jollibee guards their original recipe closely, this version brings together accessible ingredients and time-tested methods to recreate that unmistakable flavor profile. From the five-spice powder that adds subtle warmth to the rich, creamy gravy that completes each serving, every element has been thoughtfully developed to honor the original while making it achievable in home kitchens.
This homemade Jollibee Chickenjoy recipe offers a window into why millions consider Chickenjoy their ultimate comfort food.
Jump to:
Why You'll Love This Recipe
- Authentic Filipino Fast-Food Experience: Recreate the iconic Jollibee taste at home
- Perfect Crunch Factor: Double-breading technique ensures that signature crispy exterior
- Juicy Interior: Special brining process keeps the meat incredibly moist
- Restaurant-Quality Gravy: Rich, creamy sauce that rivals the original
- Cost-Effective: Make multiple servings for the price of one restaurant order
- Family-Friendly: A crowd-pleasing recipe that even picky eaters will love
Ingredients
This recipe carefully selects ingredients that capture Chickenjoy's iconic taste and texture. The garlic-infused brine quickly tenderizes the chicken while adding the first layer of flavor. The combination of cornstarch and flour creates that perfect light yet crunchy coating, while five-spice powder adds the subtle warmth that makes Chickenjoy distinctive.
MSG (optional) provides that characteristic savory depth that keeps you coming back for more. Shortening, rather than regular oil, ensures the coating stays crispy longer without getting soggy. Finally, the signature gravy uses chicken drippings and cream to achieve that rich, velvety consistency that Jollibee fans instantly recognize.
These ingredients work together to recreate the perfect balance of crispiness, juiciness, and Filipino-inspired flavors that have made Chickenjoy a global sensation.
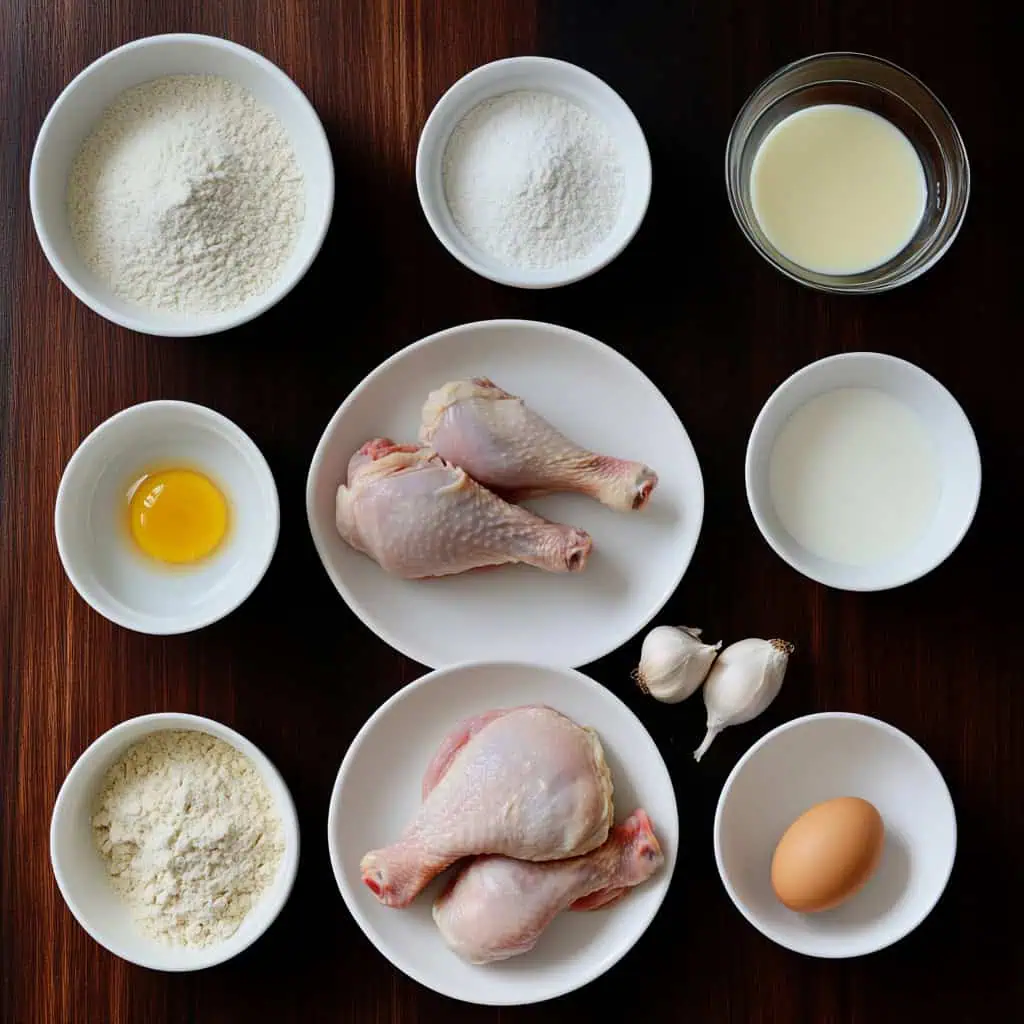
For the Chicken:
- 12 pieces chicken legs
- 1½ cups whole milk
- 1 large egg, beaten
For the Brine:
- 6 cloves garlic, minced
- 2 cups warm water
- 2 tablespoons salt
- 1 teaspoon MSG (optional but recommended for authentic taste)
For the Coating Mix:
- 1½ cups cornstarch
- 1½ cups all-purpose flour
- 1½ teaspoons salt
- 3 tablespoons garlic powder
- 2 tablespoons onion powder
- 1 teaspoon five-spice powder
- 1 teaspoon MSG (optional)
- Shortening for deep frying
For the Signature Gravy:
- 3 tablespoons leftover coating mix
- 2 cups rich chicken stock
- 1½ cups chicken drippings
- ¼ cup whole milk
- 2 tablespoons heavy cream
Equipment
- Large Dutch Oven or Deep Fryer: For maintaining consistent oil temperature and providing sufficient depth for frying chicken pieces without crowding
- Digital Thermometer: Essential for precise oil temperature measurement, ensuring perfect crispiness without burning
- Large Mixing Bowls: For setting up separate breading stations (brine, egg wash, and coating)
- Wire Rack: Crucial for allowing excess oil to drain while keeping chicken crispy after frying
- Heavy-bottom Saucepan: For making the smooth, lump-free gravy
- Kitchen Tongs: For safely handling chicken during the frying process
- Paper Towels: For draining excess oil from chicken pieces
- Measuring Cups and Spoons: For accurate measurements of ingredients
- Whisk: For thoroughly mixing batter and ensuring a smooth, consistent gravy
How To Make
- First, make your brine by mixing warm water, minced garlic, salt, and MSG in a large ziplock bag. Add the chicken legs, seal well, and refrigerate for exactly 30 minutes - no longer, or the chicken will be too salty.
- While waiting, mix milk and beaten egg in a bowl. In another large container with a lid, combine cornstarch, flour, salt, garlic powder, onion powder, five-spice powder, and MSG if using. This is your coating mix.
- Start heating your shortening in a deep pot or fryer. You need about 3 inches of oil, heated to 350°F (180°C). Use a thermometer to check the temperature.
- After 30 minutes, take the chicken out of the brine and throw the liquid away. Pat each piece dry with paper towels.
- Take one piece of chicken at a time. Dip it in the milk-egg mixture, let the excess drip off. Put it in the coating mix container, cover, and shake well to coat. For extra crispiness, you can dip it again in the milk mixture and coat again with flour.
- When your oil is hot, carefully put 4-5 pieces of chicken in. Don't overcrowd or the oil temperature will drop. Fry for 12-15 minutes, turning occasionally, until golden brown. Check that the internal temperature reaches 165°F (74°C). Place on a wire rack to drain.
- While the chicken fries, make your gravy. In a pot over medium heat, mix 3 tablespoons of your leftover coating mix with chicken stock, chicken drippings, milk, and cream. Keep whisking until it thickens how you like it.
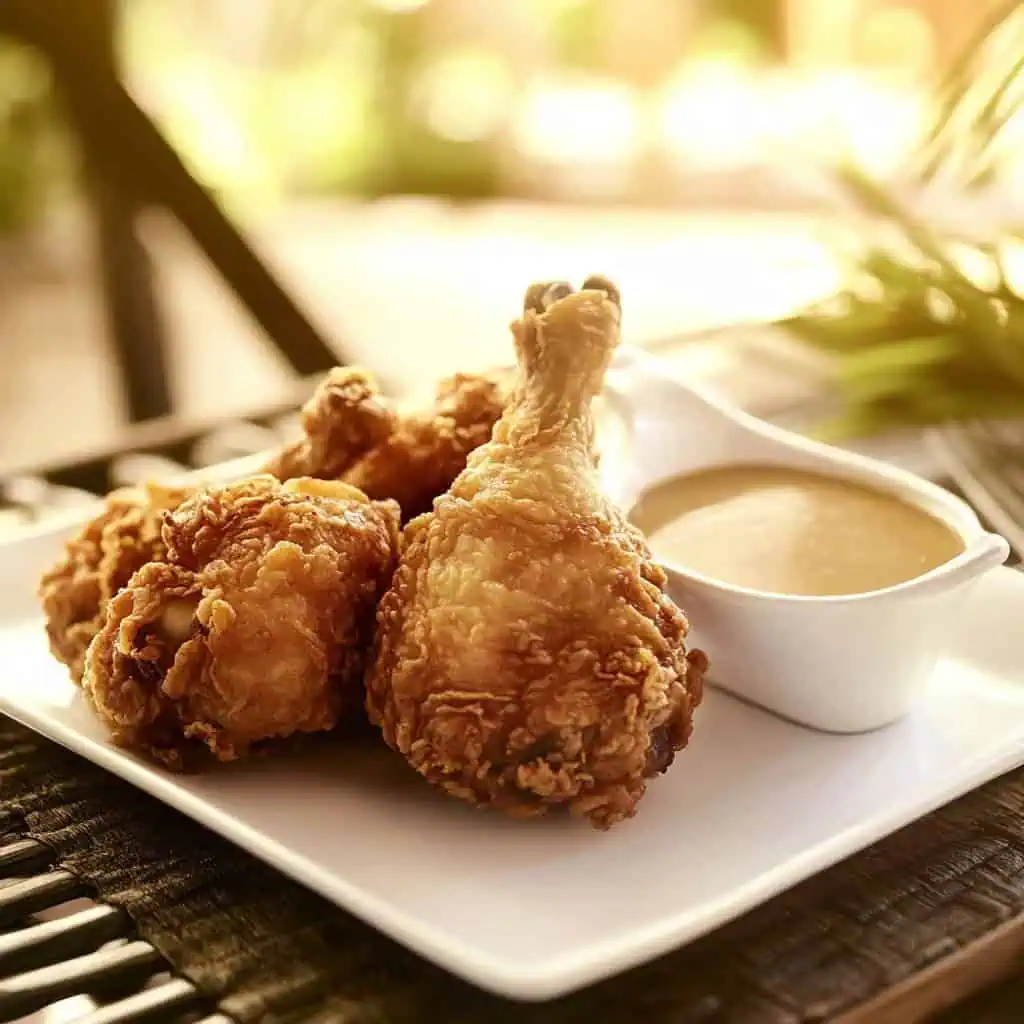
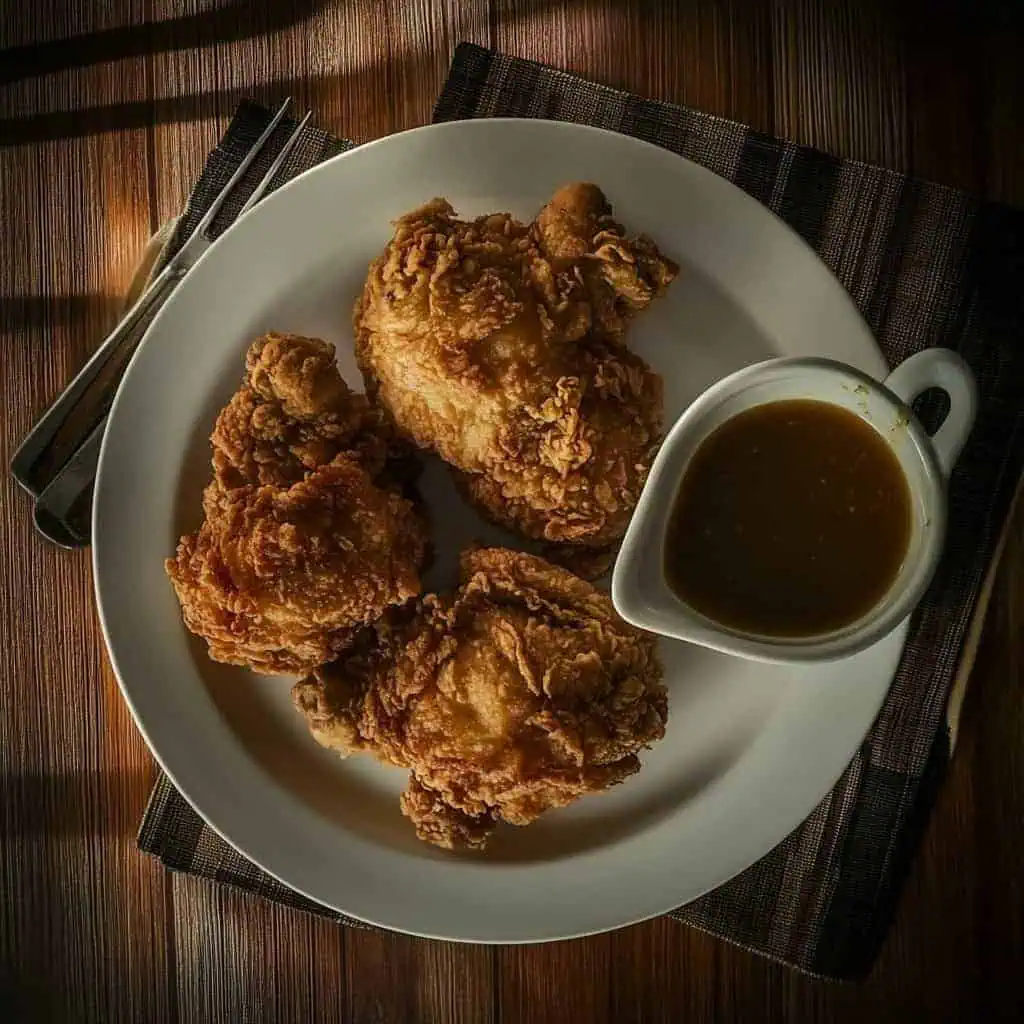
- Let the chicken rest for 5 minutes on the wire rack - this keeps it crispy. Serve hot with rice and warm gravy on the side. Give everyone their own small bowl of gravy for dipping.

Tips from Lola's Kitchen
- Use fresh chicken: Fresh chicken produces the juiciest results with the best flavor. Avoid using frozen chicken if possible, but if you must, ensure it's completely thawed and patted dry.
- Proper brining technique: Pat chicken dry before brining for better absorption of flavors. Never exceed the 30-minute brining time to prevent overly salty chicken.
- Double-coating magic: For that extra crispy layer that Chickenjoy is famous for, double-dip your chicken. The first coating provides a base, while the second creates those signature crunchy bits.
- Temperature matters: Let chicken rest at room temperature for 15 minutes before frying to ensure even cooking from the outside in.
- Shortening secret: Professional kitchens use shortening instead of oil for that distinctive Chickenjoy taste. It creates a crispier exterior that stays crunchy longer.
- Oil temperature management: Maintain steady oil temperature by using a thermometer and frying in small batches. Let oil return to 350°F between batches.
- Resting period: Always let fried chicken rest on a wire rack for 5 minutes before serving. This allows the crust to set and excess oil to drain, resulting in crispier chicken.
Substitutions
- MSG alternatives: If you prefer to avoid MSG, substitute with 1 tablespoon mushroom powder or 1 teaspoon chicken bouillon for that umami flavor.
- Oil options: While shortening gives the most authentic taste, you can use vegetable oil, canola oil, or peanut oil with good results.
- Chicken cuts: Prefer different cuts? Chicken thighs, wings, or even breast pieces work well with this recipe. Just adjust cooking times accordingly (wings will cook faster, breasts will take longer).
- Five-spice substitute: Don't have five-spice? Create your own by mixing ¼ teaspoon each of ground cinnamon, cloves, and black pepper with a pinch of star anise if available.
- Dairy-free gravy: Replace milk and cream with coconut milk or unsweetened almond milk for a dairy-free version of the gravy.
Troubleshooting
- Coating falls off while frying: Ensure chicken is completely dry before dipping in egg wash, and press coating firmly onto chicken. Let coated chicken rest for 5 minutes before frying.
- Chicken not crispy enough: Oil temperature is likely too low. Maintain 350°F consistently and don't overcrowd the fryer.
- Chicken too dark or burnt: Oil temperature is too high. Reduce heat and monitor with a thermometer. Consider using a deeper pot for more temperature stability.
- Meat not juicy enough: Brining time may have been too short or the chicken was overcooked. Stick to exact brining time and verify internal temperature reaches exactly 165°F.
- Gravy too thin: Continue simmering to reduce liquid, or whisk in 1 teaspoon of coating mix at a time until desired thickness is achieved.
- Gravy too thick: Gradually add warm chicken stock, 1 tablespoon at a time, while whisking continuously until you reach desired consistency.
- Gravy with lumps: Strain through a fine-mesh sieve or blend with an immersion blender for smooth consistency.
Storage & Reheating
- Refrigeration: Store leftover chicken in an airtight container in the refrigerator for up to 3 days. Keep gravy separate in its own container.
- Best reheating method: Reheat chicken in a preheated oven at 350°F (180°C) for 10-15 minutes until hot and crispy again. Place on a wire rack over a baking sheet for best results.
- Avoid microwave: Never microwave fried chicken as it makes the coating soggy and ruins the texture.
- Gravy storage: Refrigerate gravy for up to 5 days. Reheat in a small saucepan over low heat, adding a splash of chicken stock if needed to thin it out.
- Not recommended for freezing: The coating on fried chicken doesn't freeze well and loses its crispiness upon thawing.
FAQ
Can I use an air fryer for this recipe?
Yes, but the texture will differ from traditional deep-fried Chickenjoy. Preheat your air fryer to 400°F (200°C) and cook for 20-25 minutes, turning halfway through. Spray chicken with oil occasionally for better browning.
Why is brining limited to exactly 30 minutes?
Longer brining can make the meat too salty and affect its texture. The 30-minute timeframe has been tested to provide optimal flavor infusion without over-salting.
Can I make this recipe in advance for a party?
It's best served fresh. If needed, prepare the coating mix ahead and store separately. You can also brine the chicken earlier in the day, then bread and fry just before serving.
How do I maintain oil temperature during frying?
Use a reliable thermometer and fry in small batches to prevent dramatic temperature drops. Allow oil to return to 350°F between batches. Using a heavy Dutch oven also helps maintain consistent heat.
Can I skip the MSG completely?
Yes, though the flavor profile will be slightly different from authentic Chickenjoy. Consider using alternatives like mushroom powder, nutritional yeast, or additional garlic powder to enhance umami flavors.
Is there a way to make this healthier?
While it won't be exactly like traditional Chickenjoy, you can reduce calories by removing the chicken skin before brining and using an air fryer. The flavor will still be good, though less authentic.
Can I use the same brine for multiple batches?
No, always discard brine after use for food safety reasons. The brine contains raw chicken juices and can harbor bacteria if reused.
What's the best way to serve Chickenjoy for a complete Jollibee experience?
Serve with steaming white rice, Filipino-style sweet spaghetti, and fresh cucumber slices. Include individual portions of gravy for dipping and banana ketchup on the side.
Related
Looking for other recipes like this? Try these:


Homemade Chickenjoy (Jollibee-Style Fried Chicken)
Equipment
- Large Dutch Oven or Deep Fryer (Kaldero o Deep Fryer) For maintaining consistent oil temperature
- Digital Thermometer Essential for precise oil temperature
- Large Mixing Bowls (Mangkok) For breading stations
- Wire rack (cooling rack) Ensures chicken stays crispy after frying
- Heavy-bottom saucepan (Kaserola) For making the gravy
- Kitchen tongs (Sipit) For safely handling chicken
- Paper towels For draining excess oil
- Measuring cups and spoons (Panukat) For accurate measurements
- Whisk (wire beater) For mixing batter and gravy
Ingredients
For the Chicken (Manok):
- 12 pieces chicken legs Drumsticks/Paa ng Manok
- 1½ cups whole milk Gatas
- 1 large egg beaten (Itlog)
For the Brine (Pampalambot):
- 6 cloves garlic minced (Bawang, tinadtad)
- 2 cups warm water Mainit na tubig
- 2 tablespoons salt Asin
- 1 teaspoon MSG Vetsin - Optional but recommended for authentic taste
For the Coating Mix:
- 1½ cups cornstarch Corn Starch
- 1½ cups all-purpose flour Harina
- 1½ teaspoons salt Asin
- 3 tablespoons garlic powder Bawang na pulbos
- 2 tablespoons onion powder Sibuyas na pulbos
- 1 teaspoon five-spice powder Five-spice
- 1 teaspoon MSG Optional
- Shortening for deep frying Mantika
For the Signature Gravy (Sarsa):
- 3 tablespoons leftover coating mix
- 2 cups rich chicken stock Sabaw ng manok
- 1½ cups chicken drippings Mantika ng inihaw na manok
- ¼ cup whole milk Gatas
- 2 tablespoons heavy cream Cream
Instructions
- First, make your brine by mixing warm water, minced garlic, salt, and MSG in a large ziplock bag. Add the chicken legs, seal well, and refrigerate for exactly 30 minutes - no longer, or the chicken will be too salty.
- While waiting, mix milk and beaten egg in a bowl. In another large container with a lid, combine cornstarch, flour, salt, garlic powder, onion powder, five-spice powder, and MSG if using. This is your coating mix.
- Start heating your shortening in a deep pot or fryer. You need about 3 inches of oil, heated to 350°F (180°C). Use a thermometer to check the temperature.
- After 30 minutes, take the chicken out of the brine and throw the liquid away. Pat each piece dry with paper towels.
- Take one piece of chicken at a time. Dip it in the milk-egg mixture, let the excess drip off. Put it in the coating mix container, cover, and shake well to coat. For extra crispiness, you can dip it again in the milk mixture and coat again with flour.
- When your oil is hot, carefully put 4-5 pieces of chicken in. Don't overcrowd or the oil temperature will drop. Fry for 12-15 minutes, turning occasionally, until golden brown. Check that the internal temperature reaches 165°F (74°C). Place on a wire rack to drain.
- While the chicken fries, make your gravy. In a pot over medium heat, mix 3 tablespoons of your leftover coating mix with chicken stock, chicken drippings, milk, and cream. Keep whisking until it thickens how you like it.
- Let the chicken rest for 5 minutes on the wire rack - this keeps it crispy. Serve hot with rice and warm gravy on the side. Give everyone their own small bowl of gravy for dipping.
- Remember: keep your oil temperature steady at 350°F, don't marinate longer than 30 minutes, and always fry in small batches for the crispiest chicken.
Tips from Lola's Kitchen
- Always use fresh chicken for best results
- Pat chicken dry before brining for better absorption
- Double-coating creates extra crunchiness
- Rest chicken at room temperature for 15 minutes before frying
- Use shortening instead of oil for authentic taste
- Never skip the brining step - it's crucial for juiciness
Nutrition
The Story Behind Jollibee Chickenjoy
The story of Chicken Joy begins in 1978 in a humble ice cream parlor turned fast-food restaurant in Cubao, Philippines. What started as one family's dream to serve delicious, accessible food would eventually become Jollibee's crown jewel and the Philippines' most iconic fried chicken. This perfectly crispy, uniquely seasoned chicken has become so beloved that it's now affectionately known simply as "Chickenjoy" - one word that captures the pure happiness it brings to millions.
Unlike American-style fried chicken, which typically features a heavily spiced, buttermilk-based preparation, Chickenjoy revolutionized Filipino fast food with its distinctive marinade and coating system. The secret lies in its delicate balance of garlic, pepper, and that mysterious blend of seasonings that makes it unmistakably Filipino. But what truly sets it apart isn't just the chicken - it's the gravy. This signature sauce, simultaneously light yet rich, has become so legendary that Filipinos worldwide consider it an essential part of the Chickenjoy experience.
Today, Jollibee serves over 2 million pieces of Chickenjoy daily across their global locations. The dish has garnered international acclaim, with food critics and celebrities praising its unique flavor profile. Anthony Bourdain famously declared it "the best fried chicken chain in the world," while American food websites regularly feature it in their "must-try" lists. Such is its cultural impact that when Jollibee opens in a new city, Filipinos queue for hours, sometimes days, just to taste this comfort food from home.
The devotion to Chickenjoy goes beyond mere fast food preference - it's a cultural phenomenon that represents Filipino cuisine's ability to create something uniquely its own. In many ways, it's become a symbol of Filipino innovation and success, proving that local flavors can compete with and even surpass international fast-food giants. From Dubai to Rome, New York to London, wherever there's a Jollibee, there's a piece of Filipino culinary pride being served, one crispy piece at a time.
What makes this homemade version special is its attention to the details that make Chickenjoy distinctive. While the original recipe remains a closely guarded secret, this recipe captures the essence of what makes it special - that perfect crunch, the juicy meat, and most importantly, that signature gravy that keeps Filipinos coming back for more. Whether you're a Filipino living abroad craving a taste of home, or simply someone who appreciates exceptional fried chicken, this recipe brings that signature Jollibee joy right to your kitchen.
This recipe has been tested and refined countless times to achieve that distinctive Chickenjoy flavor profile. While it may not be exactly the same as the original (some secrets are meant to stay secret!), it delivers all the key elements that make Chickenjoy a global phenomenon: the perfectly crispy exterior, the juicy, flavorful meat, and that irreplaceable gravy that ties it all together.
Comments
No Comments