I used to grab these crispy kikiams almost daily from my favorite street cart outside our local market, dipping them in that addictively sweet and spicy sauce while still hot. Finally, I decided to learn how to make them at home.
This recipe brings all that street food magic right into your kitchen, with perfectly seasoned pork and shrimp wrapped in crispy bean curd sheets. You can make a big batch and freeze them, so you'll always have some ready whenever those street food cravings hit.
What is Kikiam?
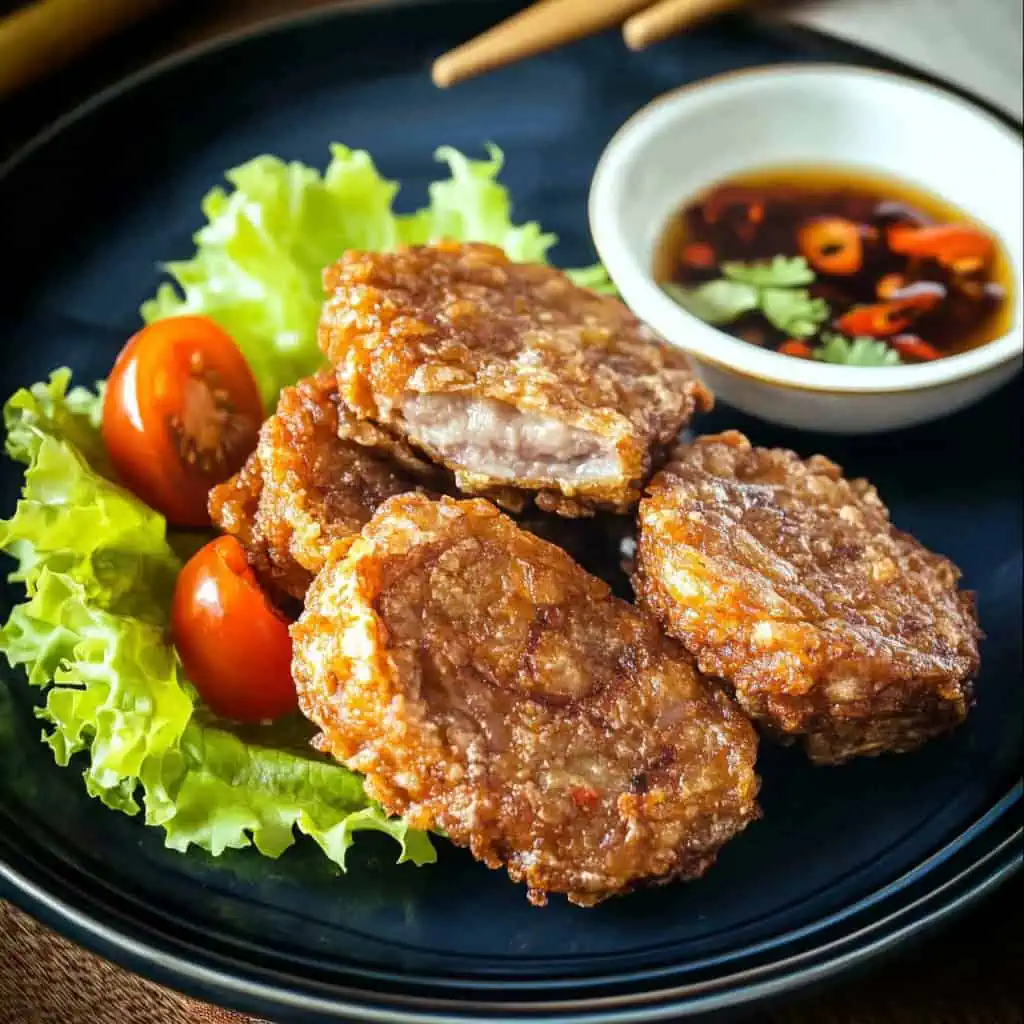
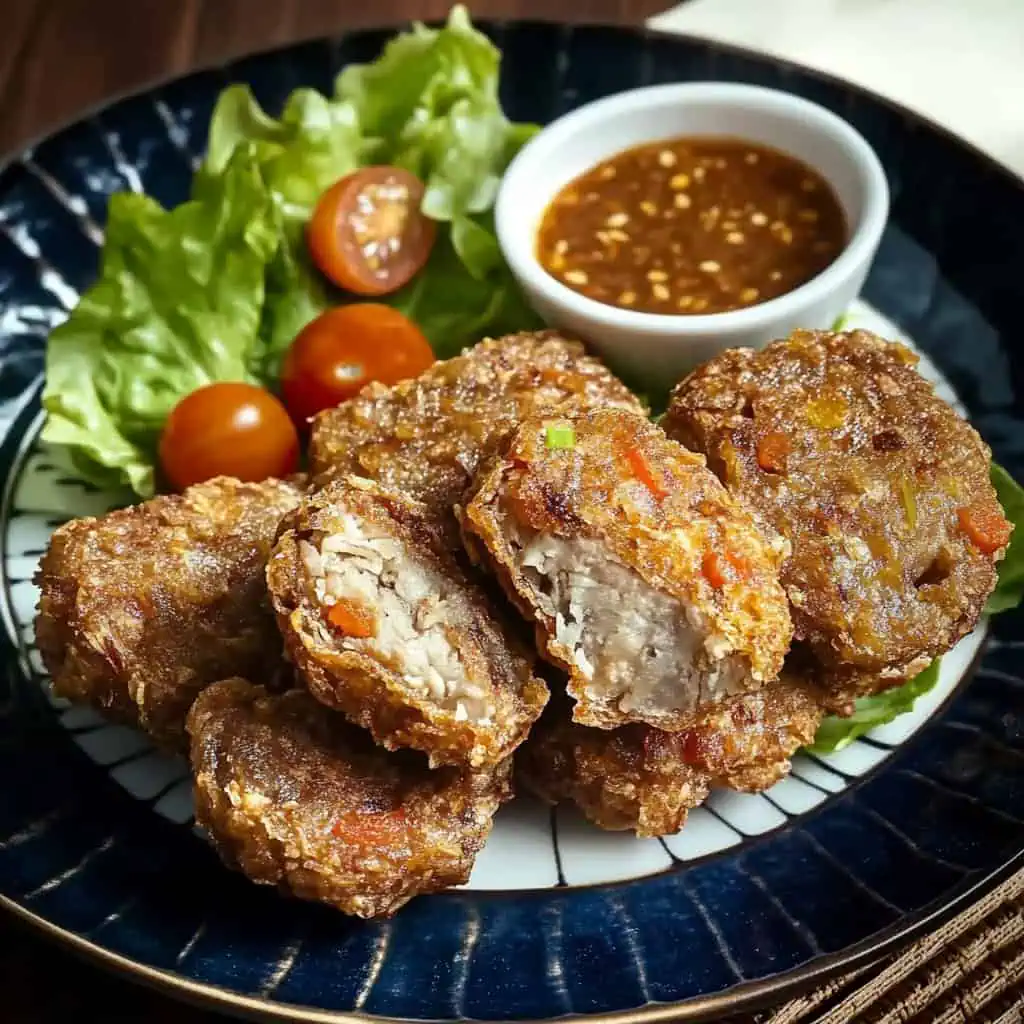
Kikiam (Que-kiam) is a beloved Filipino-Chinese street food featuring seasoned ground pork, shrimp, and vegetables wrapped in thin bean curd sheets. The rolls are steamed until tender, then fried until crispy. This adaptation of Chinese Ngoh hiang combines the warmth of five-spice powder with the satisfying crunch of water chestnuts and carrots, creating a versatile dish that's equally delicious as an appetizer, main course, or addition to noodle dishes and soups.
Jump to:
Why You'll Love This Recipe
- Authentic Filipino-Chinese street food flavor at home
- Make-ahead friendly - perfect for batch cooking
- Versatile - can be used in multiple dishes
- Crispy exterior with juicy, flavorful filling
- Restaurant-quality results with simple ingredients
- Budget-friendly party food option
- Freezer-friendly for up to 3 months
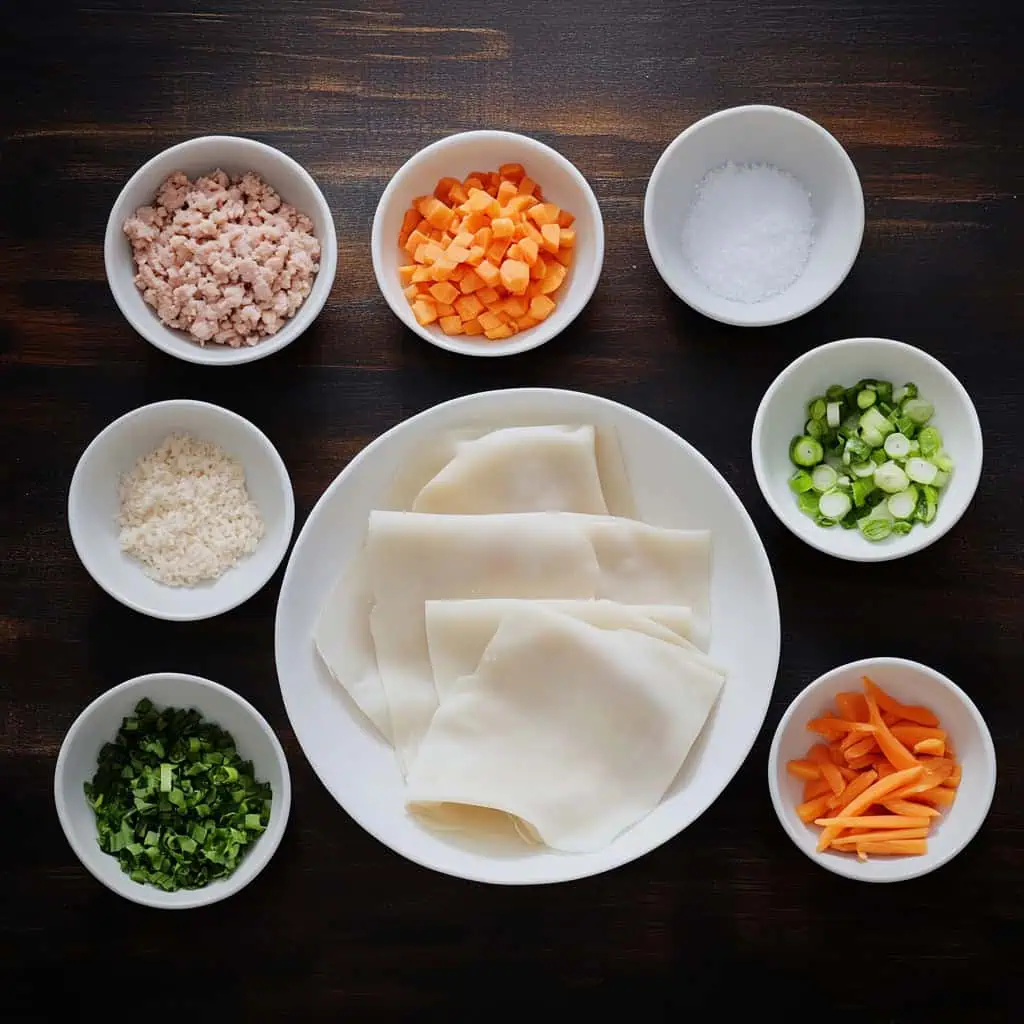
Ingredients
These ingredients create the perfect balance of flavors and textures that make kikiam so irresistible. Fatty ground pork provides richness, while shrimp adds natural sweetness.
Water chestnuts and carrots create essential crunch, while five-spice powder delivers the authentic aromatic profile. Bean curd sheets achieve that signature crispy-yet-tender wrapper that sets kikiam apart from other street foods.
The dipping sauce combines sweet, savory, and spicy elements that perfectly complement the meaty rolls – creating that addictive street food experience in every bite.
For the Meat Rolls:
- 1 pound (454g) ground pork - Choose at least 20% fat content for juicier kikiam
- ½ pound (227g) shrimp, peeled and minced - Adds sweetness and texture to the filling
- 1 large carrot, finely chopped - Provides natural sweetness and vibrant color
- 1 cup water chestnuts, finely chopped - Creates essential crunch in every bite
- ½ cup green onions, chopped - Adds mild onion flavor without overpowering
- 1 tablespoon Chinese five-spice powder - The signature flavor profile of authentic kikiam
- 2 teaspoons salt - Enhances all flavors in the mixture
- ½ teaspoon black pepper - Adds subtle heat and depth
- 1 tablespoon cornstarch - Acts as a binder to hold the filling together
- 2 tablespoons water - Helps create a paste with the cornstarch
- 3 bean curd sheets - Creates the distinctive wrapper that becomes crispy when fried
- Canola oil for frying - High smoke point oil ideal for deep frying
For the Special Dipping Sauce:
- 2 cups water - Base for the sauce
- ½ cup soy sauce - Provides savory umami flavor
- 1 cup brown sugar - Creates the signature sweetness that balances the savory kikiam
- ¼ cup minced garlic - Adds aromatic pungency
- ¼ cup finely chopped shallots - Contributes mild sweetness and complexity
- 1 tablespoon chopped chili pepper - Adds essential heat to the sauce
- 1 tablespoon all-purpose flour - Helps thicken the sauce
- 1 tablespoon cornstarch - Creates a silky texture in the sauce
- 1 teaspoon salt - Balances and enhances flavors
- ½ teaspoon pepper - Adds subtle heat and depth
Equipment
- Steamer - Essential for cooking the rolls before frying; ensures the filling is properly cooked
- Deep heavy-bottomed pan - Provides even heat distribution for that perfect crispy exterior
- Meat thermometer - Ensures food safety by confirming the filling reaches the proper temperature
- Cutting board - Provides a stable surface for preparing ingredients
- Sharp knife - Necessary for fine chopping vegetables and mincing shrimp
- Kitchen scale - Ensures accurate measurements for consistent results
- Mixing bowls - For combining and seasoning ingredients properly
- Food processor (optional) - Can save time when finely mincing ingredients
- Paper towels - Helps absorb excess oil after frying
How To Make
- Begin by combining ground pork, minced shrimp, chopped water chestnuts, carrots, and green onions in a large bowl. Add five-spice powder, salt, and pepper. Mix well. In a separate small bowl, stir cornstarch and water until smooth, then add this mixture to the pork mixture. Stir everything until fully combined.
- Take a small portion of the mixture and fry it to test the seasoning. Adjust salt and spices to your taste if needed.
- Prepare your bean curd sheets by trimming any hard edges and cutting them to fit your steamer size. Run each sheet under warm water to moisten, then gently squeeze out excess water to make them pliable.
- Place a moistened bean curd sheet on a clean, flat surface. Spoon about one-third of the pork mixture across the bottom length of the sheet, leaving about 1 inch of space on the sides. Roll the sheet tightly around the filling to form a log about 2 inches thick. Moisten the end with water to seal, then twist the edges to lock in the filling. Repeat with remaining sheets and filling.
- Arrange the rolls in your steamer, leaving space between each one. Steam for 15-20 minutes until the center reaches 145°F (63°C). Remove carefully and let cool completely. For best results, refrigerate until fully chilled.
- Heat oil in a deep pan to 350°F (175°C). Carefully place the cooled rolls in the oil and fry in batches, turning occasionally, until golden brown and crispy on all sides. Keep the oil temperature steady between 330-355°F (165-180°C).
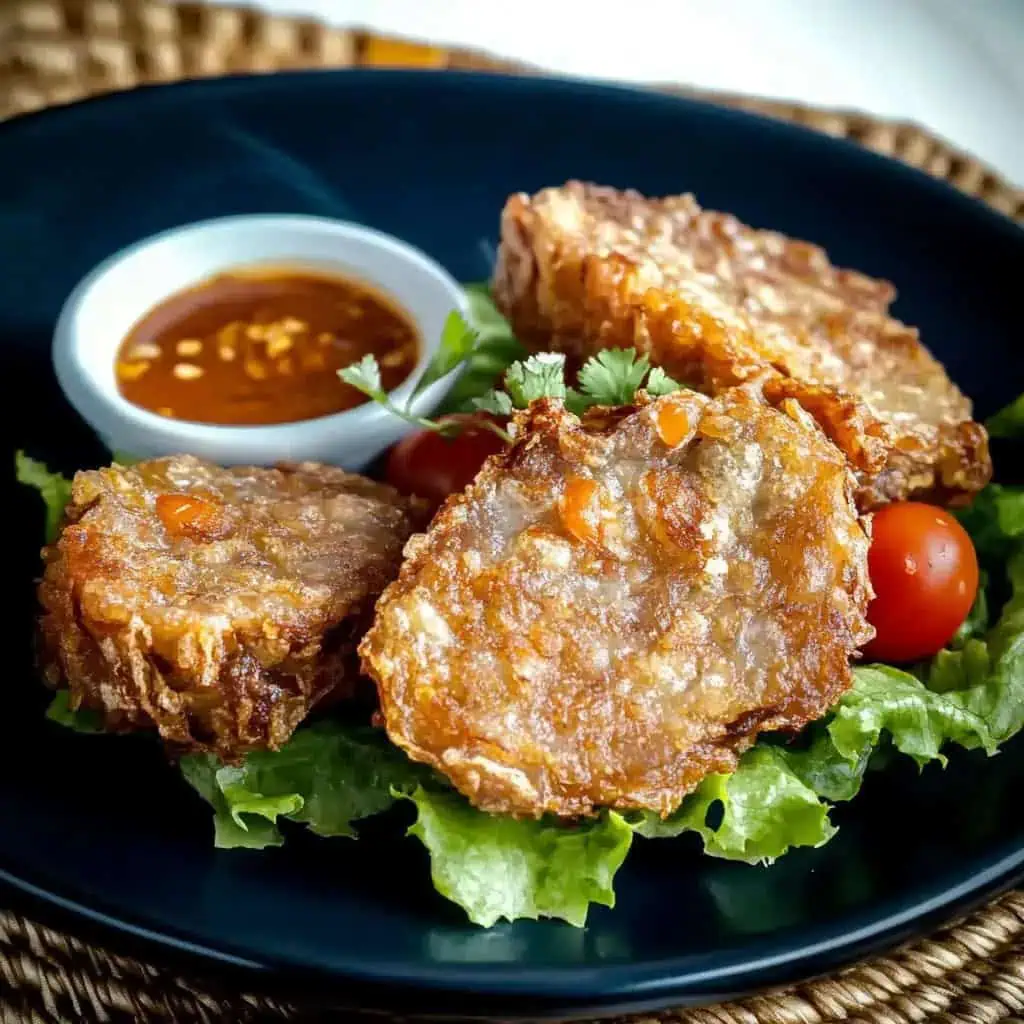
- Remove from oil and let rest on paper towels for 5 minutes before slicing diagonally into serving portions.
- For the dipping sauce, combine water, soy sauce, brown sugar, minced garlic, chopped shallots, chili pepper, flour, cornstarch, salt, and pepper in a saucepan. Whisk until smooth with no lumps. Cook over medium heat, stirring constantly, until the sauce thickens, about 3-5 minutes. Let cool before serving with your kikiam.
- Serve hot with your choice of dipping sauce. Leftover kikiam can be stored in an airtight container in the refrigerator for up to 3 days or frozen for up to 3 months.

Tips from Lola's Kitchen
- Choose the right pork: Use fatty ground pork (at least 20% fat) for juicier kikiam. Lean meat will result in dry, crumbly filling.
- Texture matters: Hand-chop ingredients rather than using a food processor for better texture control. This creates small, distinct pieces that add interest to each bite.
- Taste test first: Always fry a small portion of the filling mixture before wrapping all rolls. This allows you to adjust seasoning without wasting ingredients.
- Batch cooking: Steam extra rolls for freezing. You can freeze them either after steaming or after completely cooking them.
- Prevent oil splatters: Pat dry bean curd sheets well after moistening to prevent dangerous oil splatter when frying.
- Perfect cutting: Rest kikiam for 5 minutes after frying before cutting to maintain shape and prevent filling from spilling out.
- Oil temperature: Use a cooking thermometer to maintain proper oil temperature. Too hot and the kikiam will burn before cooking through; too cool and they'll absorb excess oil.
- Wrapper technique: When rolling, keep the bean curd sheet tight around the filling without tearing it. Any air pockets will cause the wrapper to separate during frying.
- Prep ahead: Chop all vegetables the day before and store in the refrigerator to make assembly quicker on cooking day.
Substitutions
- No bean curd sheets? Rice paper can work in a pinch, though the texture will be different. Spring roll wrappers are another alternative.
- Pork alternatives: Ground chicken thigh can replace pork for a lighter version. For a beef version, use ground chuck with at least 20% fat.
- Vegetarian option: Use finely chopped firm tofu, mushrooms, and extra vegetables instead of meat. Add 1 tablespoon of nutritional yeast for umami flavor.
- No water chestnuts? Jicama provides a similar crunch. Diced apples can also work but will add sweetness.
- Five-spice substitute: If you can't find five-spice powder, make your own with equal parts ground cinnamon, cloves, fennel seeds, star anise, and Szechuan peppercorns.
- Seafood alternatives: If shrimp is unavailable, crab meat or finely diced firm white fish can substitute.
- Low-sodium option: Reduce salt by half and use low-sodium soy sauce in the dipping sauce.
Troubleshooting
Problem: Rolls falling apart during steaming or frying
- Cause: Bean curd sheets not properly sealed or filling too loose
- Solution: Double-check sealing technique by moistening edges well. Ensure bean curd sheets are properly moistened but not too wet. Consider using toothpicks during steaming, removing before frying. Make sure the filling mixture has enough binder.
Problem: Filling too loose or crumbly
- Cause: Not enough binder or insufficient mixing
- Solution: Add more cornstarch binder (up to 1 additional tablespoon). Chill mixture for 30 minutes before wrapping to firm it up. Ensure proper mixing technique – use your hands to thoroughly combine ingredients.
Problem: Kikiam not crispy enough
- Cause: Oil temperature too low or rolls not properly dried
- Solution: Maintain oil at 350°F during frying. Ensure rolls are completely cool and dry before frying. Don't overcrowd the pan, which lowers oil temperature. Pat dry bean curd sheets thoroughly before wrapping.
Problem: Kikiam bursting open during frying
- Cause: Steam or moisture trapped in the rolls
- Solution: Let steamed rolls cool completely before frying. Ensure there are no air pockets when rolling. Make small holes with a toothpick to release steam.
Problem: Dipping sauce too thin or too thick
- Cause: Improper ratio of thickeners or cooking time
- Solution: For thin sauce, mix 1 teaspoon cornstarch with 1 tablespoon cold water and add to simmering sauce. For thick sauce, add water 1 tablespoon at a time until desired consistency.
Storage & Reheating
Refrigerator Storage:
- Store steamed, unfried kikiam for up to 3 days
- Store fully cooked kikiam for up to 3 days
- Keep in airtight containers separated by parchment paper to prevent sticking
Freezer Storage:
- Freeze steamed, unfried kikiam for up to 3 months
- Wrap individually in plastic wrap, then place in freezer bags
- Label with date and contents
- For fully cooked kikiam, freeze for up to 2 months
Room Temperature:
- Never leave kikiam at room temperature for more than 4 hours (2 hours in hot weather)
- If serving at a party, keep no more than 2 hours on serving table
Reheating Methods:
From refrigerated (steamed, unfried):
- Deep fry directly at 350°F for 5-6 minutes until golden and crispy
From refrigerated (fully cooked):
- Oven: Preheat to 400°F, bake for 7-10 minutes until hot and crispy
- Air fryer: 370°F for 3-4 minutes
- Microwave: 30 seconds (will soften the exterior), then crisp in a pan if desired
From frozen (steamed, unfried):
- Thaw overnight in refrigerator, then fry as directed
- Or fry from frozen at 325°F for 7-8 minutes (lower temperature prevents burning while interior thaws)
From frozen (fully cooked):
- Thaw overnight in refrigerator
- Reheat in oven at 375°F for 10-12 minutes
- Air fryer at 350°F for 5 minutes
FAQ
Can I make kikiam without a steamer?
Yes, you can use a makeshift steamer with a deep pot, metal rack, and water. Place the rolls on a heat-proof plate above the water level, cover with a lid, and steam. Alternatively, you can use a metal colander placed over a pot of boiling water.
Why does my kikiam burst during frying?
This usually happens when the oil is too hot or the rolls weren't cooled properly after steaming. Make sure to cool the steamed rolls completely, ideally overnight in the refrigerator. Also, check that your oil stays between 330-355°F during frying.
Can I use an air fryer instead of deep frying?
Yes, spray the steamed and cooled rolls with oil and air fry at 400°F for 8-10 minutes, turning halfway through. The texture won't be identical to deep-fried, but it will still be delicious and much lower in oil.
How do I know when the filling is cooked?
Use a meat thermometer to ensure the center reaches 145°F during steaming. The pork should no longer be pink, and the mixture should feel firm when pressed.
Can I prepare this in advance for a party?
Yes, you can steam the rolls up to 2 days ahead and store them in the refrigerator. Fry just before serving for the best texture. You can also completely prepare them (steam and fry) and reheat in a 350°F oven for 5-7 minutes before serving.
Is kikiam gluten-free?
Traditional kikiam is not gluten-free because bean curd sheets often contain wheat. For a gluten-free version, use rice paper wrappers and ensure your soy sauce and five-spice powder are certified gluten-free.
How can I make the dipping sauce less sweet?
Simply reduce the brown sugar to ½ cup and add an extra tablespoon of soy sauce for a more savory balance. You can also add 1 tablespoon of rice vinegar for a tangier profile.
Can I make mini kikiam for appetizers?
Absolutely! Cut the bean curd sheets into smaller squares and use about 2 tablespoons of filling per piece. Reduce steaming time to 10-12 minutes and frying time to 2-3 minutes per batch.
How do I prevent my hands from getting sticky when making kikiam?
Keep a small bowl of cold water nearby to dip your fingers in occasionally. This prevents the mixture from sticking to your hands. You can also wear food-safe gloves.
Why is my filling gray instead of reddish like street vendors'?
Many commercial versions use food coloring. For a natural color, add 1 teaspoon of paprika or annatto powder (atsuete) to your mixture.
Related
Looking for other recipes like this? Try these:


Homemade Kikiam Recipe
Equipment
- Steamer Essential for cooking the rolls before frying
- Deep heavy-bottomed pan (Kawaling malalim) For achieving the perfect crispy exterior
- Meat thermometer To ensure food safety
- Cutting board (Sangkalan) For preparing ingredients
- Sharp knife (matalim na kutsilyo) For fine chopping
- Kitchen scale For accurate measurements
- Mixing bowls (mangkok) For combining ingredients
- Food processor (optional) For finely mincing ingredients
- Paper towels For draining excess oil
Ingredients
For the Meat Rolls:
- 1 pound 454g ground pork (Giniling na baboy)
- ½ pound 227g shrimp, peeled and minced (Hipon)
- 1 large carrot finely chopped
- 1 cup water chestnuts finely chopped (Kastanyas)
- ½ cup green onions chopped (Sibuyas na Mura)
- 1 tablespoon Chinese five-spice powder
- 2 teaspoons salt Asin
- ½ teaspoon black pepper Paminta
- 1 tablespoon cornstarch Cornstarch
- 2 tablespoons water Tubig
- 3 bean curd sheets
- Canola oil for frying
For the Special Dipping Sauce:
- 2 cups water
- ½ cup soy sauce Toyo
- 1 cup brown sugar Asukal na pula
- ¼ cup minced garlic Bawang
- ¼ cup finely chopped shallots Sibuyas tagalog
- 1 tablespoon chopped chili pepper Siling labuyo
- 1 tablespoon all-purpose flour Harina
- 1 tablespoon cornstarch
- 1 teaspoon salt
- ½ teaspoon pepper
Instructions
- Begin by combining ground pork, minced shrimp, chopped water chestnuts, carrots, and green onions in a large bowl. Add five-spice powder, salt, and pepper. Mix well. In a separate small bowl, stir cornstarch and water until smooth, then add this mixture to the pork mixture. Stir everything until fully combined.
- Take a small portion of the mixture and fry it to test the seasoning. Adjust salt and spices to your taste if needed.
- Prepare your bean curd sheets by trimming any hard edges and cutting them to fit your steamer size. Run each sheet under warm water to moisten, then gently squeeze out excess water to make them pliable.
- Place a moistened bean curd sheet on a clean, flat surface. Spoon about one-third of the pork mixture across the bottom length of the sheet, leaving about 1 inch of space on the sides. Roll the sheet tightly around the filling to form a log about 2 inches thick. Moisten the end with water to seal, then twist the edges to lock in the filling. Repeat with remaining sheets and filling.
- Arrange the rolls in your steamer, leaving space between each one. Steam for 15-20 minutes until the center reaches 145°F (63°C). Remove carefully and let cool completely. For best results, refrigerate until fully chilled.
- Heat oil in a deep pan to 350°F (175°C). Carefully place the cooled rolls in the oil and fry in batches, turning occasionally, until golden brown and crispy on all sides. Keep the oil temperature steady between 330-355°F (165-180°C).
- Remove from oil and let rest on paper towels for 5 minutes before slicing diagonally into serving portions.
- For the dipping sauce, combine water, soy sauce, brown sugar, minced garlic, chopped shallots, chili pepper, flour, cornstarch, salt, and pepper in a saucepan. Whisk until smooth with no lumps. Cook over medium heat, stirring constantly, until the sauce thickens, about 3-5 minutes. Let cool before serving with your kikiam.
- Serve hot with your choice of dipping sauce. Leftover kikiam can be stored in an airtight container in the refrigerator for up to 3 days or frozen for up to 3 months.
Tips from Lola's Kitchen
- Use fatty ground pork (at least 20% fat) for juicier kikiam
- Hand-chop ingredients for better texture control
- Always do a taste test before wrapping all rolls
- Steam extra rolls for freezing
- Pat dry bean curd sheets well to prevent oil splatter
- Rest 5 minutes before cutting to maintain shape
Nutrition
The Story Behind Kikiam
Growing up in the bustling streets of Binondo, Manila's historic Chinatown, I discovered that every bite of kikiam tells a story of cultural fusion that spans generations. This beloved street food, known locally as que-kiam or kikiam, traces its roots to the Hokkien Chinese dish Ngoh Hiang (五香), which literally translates to "five-spice." As Chinese merchants settled in the Philippines during the pre-colonial period, they brought with them not just their trading goods but also their rich culinary traditions.
What makes Filipino kikiam particularly special is how it adapted to local tastes while maintaining its Chinese essence. The original Ngoh Hiang from Fujian Province typically includes a complex mix of minced meat, prawns, and chestnuts, but Filipino hawkers simplified the recipe to make it more accessible for street food vending. The key elements remained: the distinctive five-spice powder, the bean curd wrapper (locally called tawpe), and the technique of steaming before frying that creates that irresistible texture.
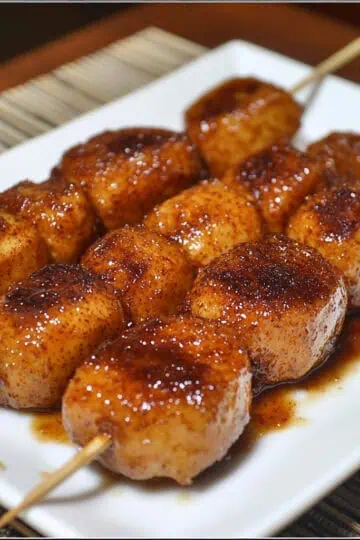
Today, you'll find kikiam vendors in almost every corner of the Philippines, often alongside fish balls and squid balls, all served with the signature sweet-spicy sauce that's uniquely Filipino. It's fascinating how this humble meat roll has evolved from being a traditional Chinese celebration dish to becoming a beloved Filipino street food staple that brings comfort to busy workers, students, and families alike.
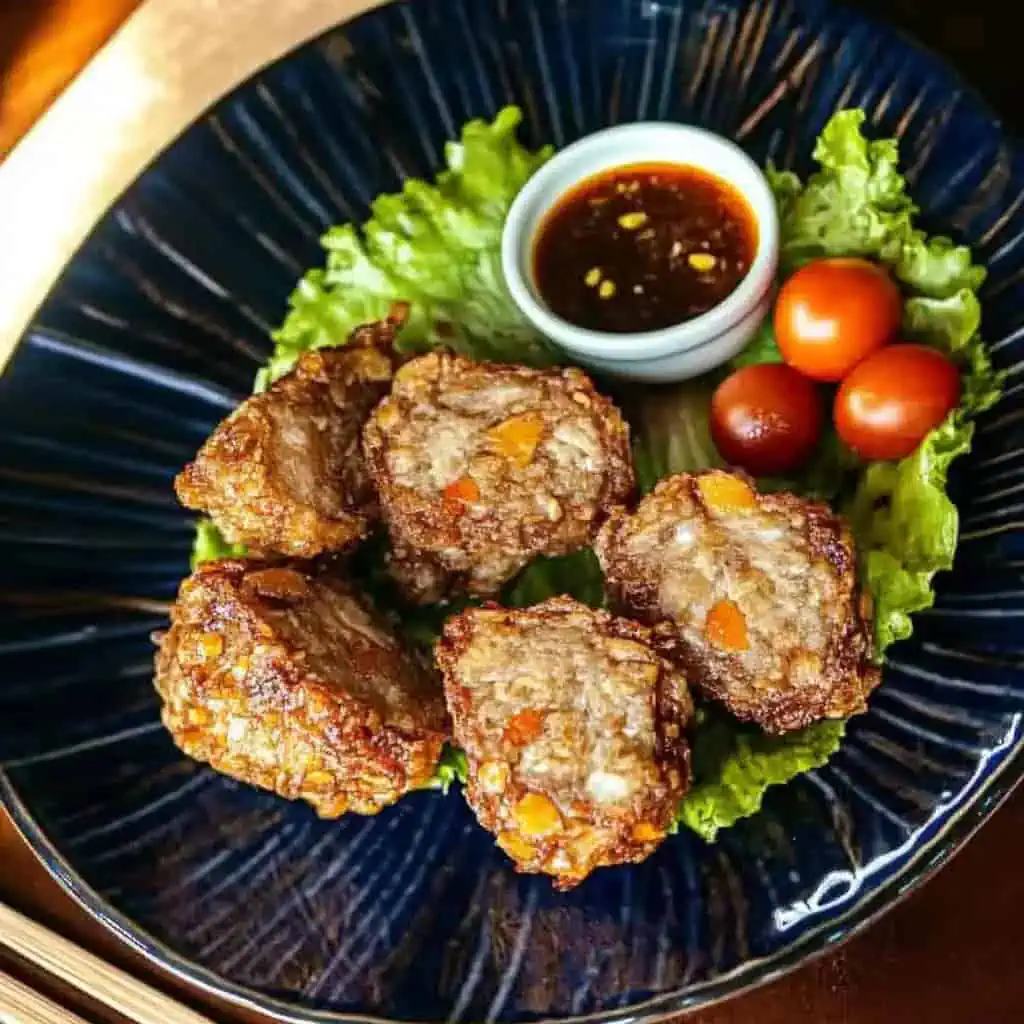
What sets authentic kikiam apart from mass-produced versions is the careful balance of textures and flavors. The crispy exterior gives way to a tender, perfectly seasoned filling where you can taste each component - the savory ground pork, the sweet bits of carrots, the crunch of water chestnuts, and that subtle hint of five-spice that ties everything together. It's this attention to detail that has kept this dish alive in Filipino cuisine for centuries.
Making kikiam at home connects us to this rich cultural heritage, allowing us to recreate not just the flavors but also the story of how different cultures can come together on a plate. Whether you're enjoying it as a quick snack, adding it to your pancit, or serving it at family gatherings, each bite of kikiam is a testament to the enduring legacy of Filipino-Chinese cuisine.


Comments
No Comments