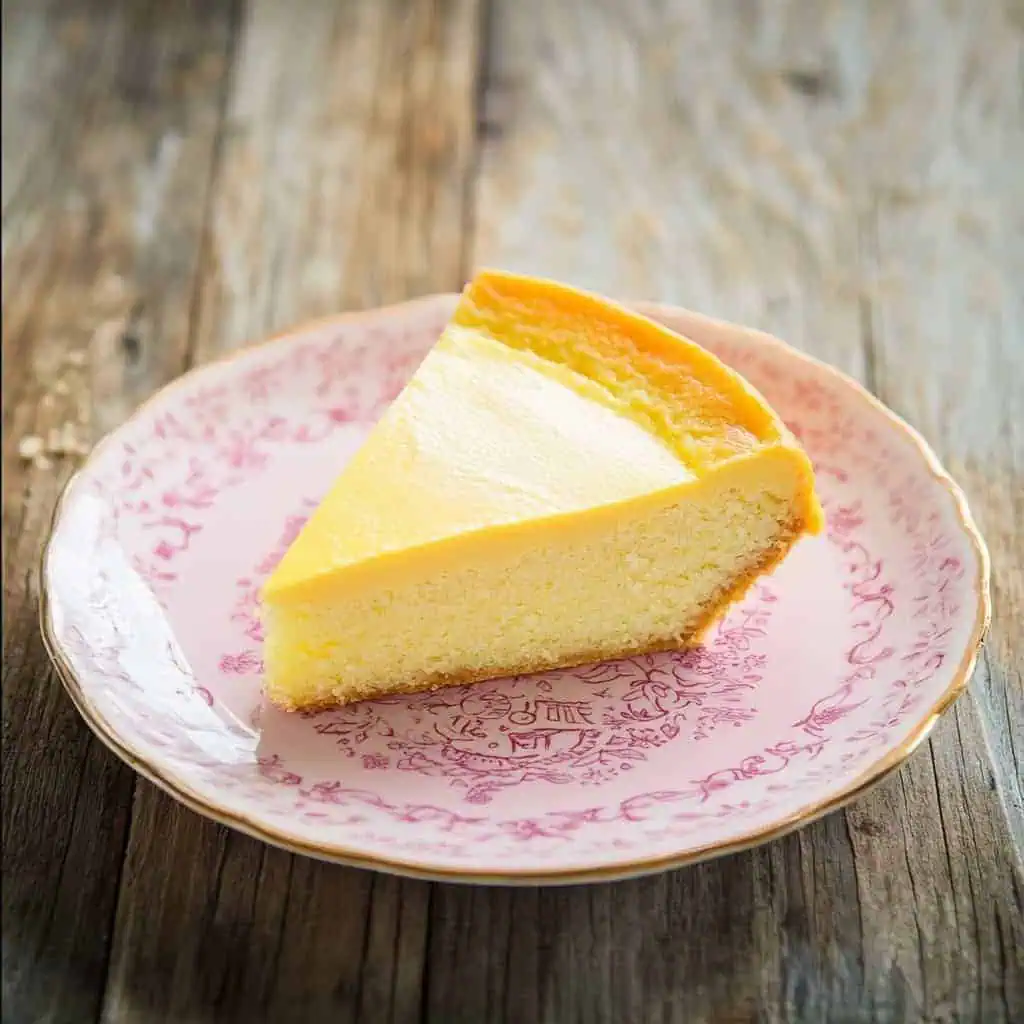
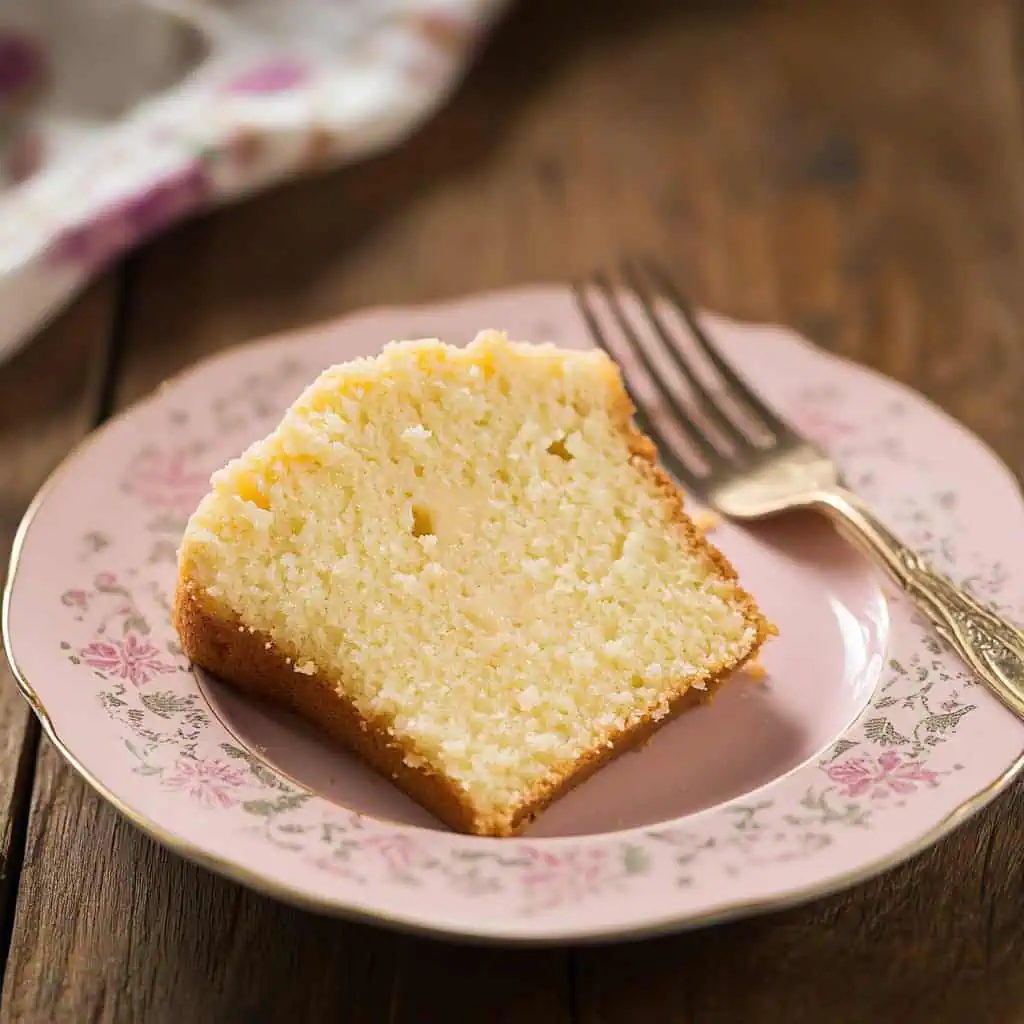
Ever since I discovered this Thai Butter Cake recipe, it has become my go-to dessert for family gatherings and merienda time. If you love the classic butter cakes from Goldilocks and local bakeries, you'll be amazed at how this homemade version tastes even better.
The secret lies in the water bath method and overnight chilling, which creates an incredibly soft, melt-in-your-mouth texture that will remind you of those expensive cakes from fancy bakeshops. I've baked this countless times for my family, and they always ask for the recipe. Even my Lola, who's quite particular about her desserts, keeps requesting this cake whenever she visits. It's that good!
Jump to:

Why You'll Love This Recipe
- Incredibly moist texture that melts in your mouth
- Perfect balance of sweetness and buttery flavor
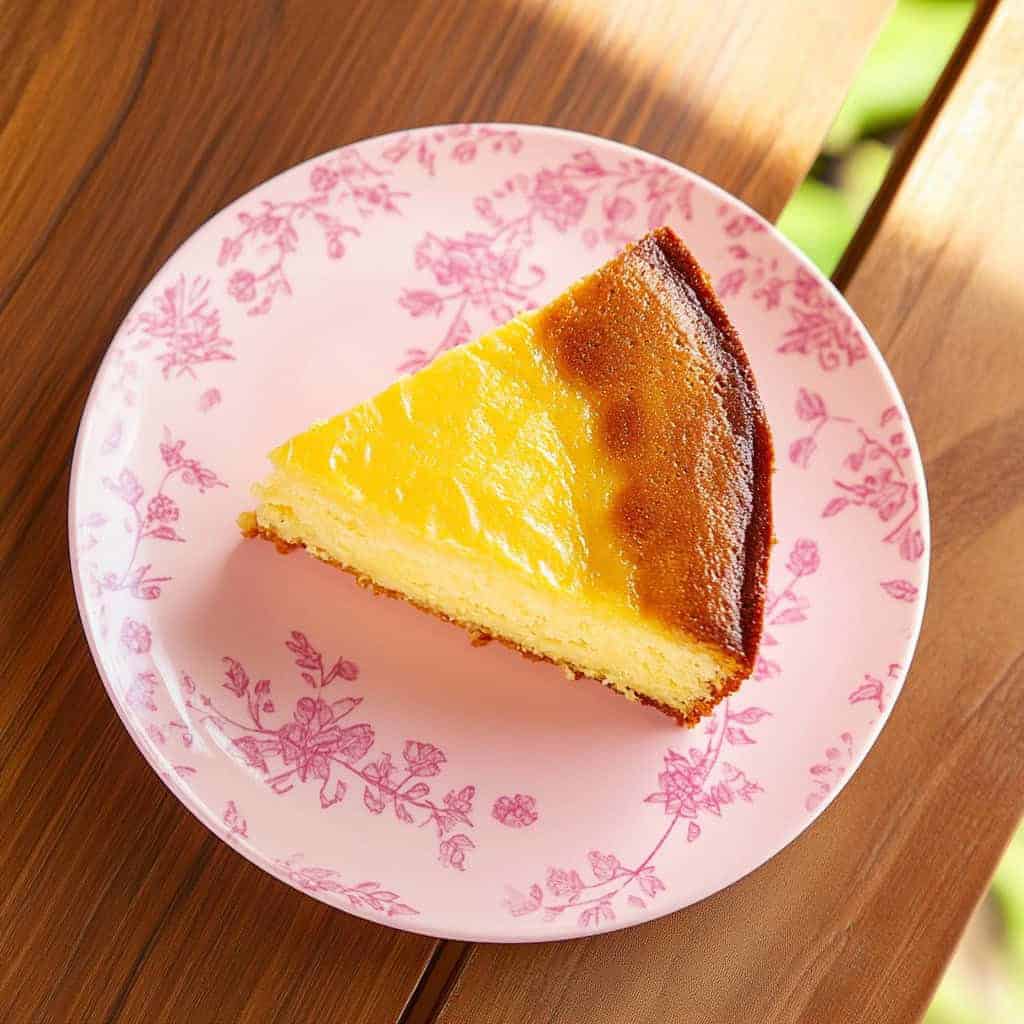
- Professional-looking results with clean, beautiful slices
- Stays fresh for days when properly stored
- Versatile recipe that can be adapted with different variations
- Time-tested recipe with proven results
Ingredients
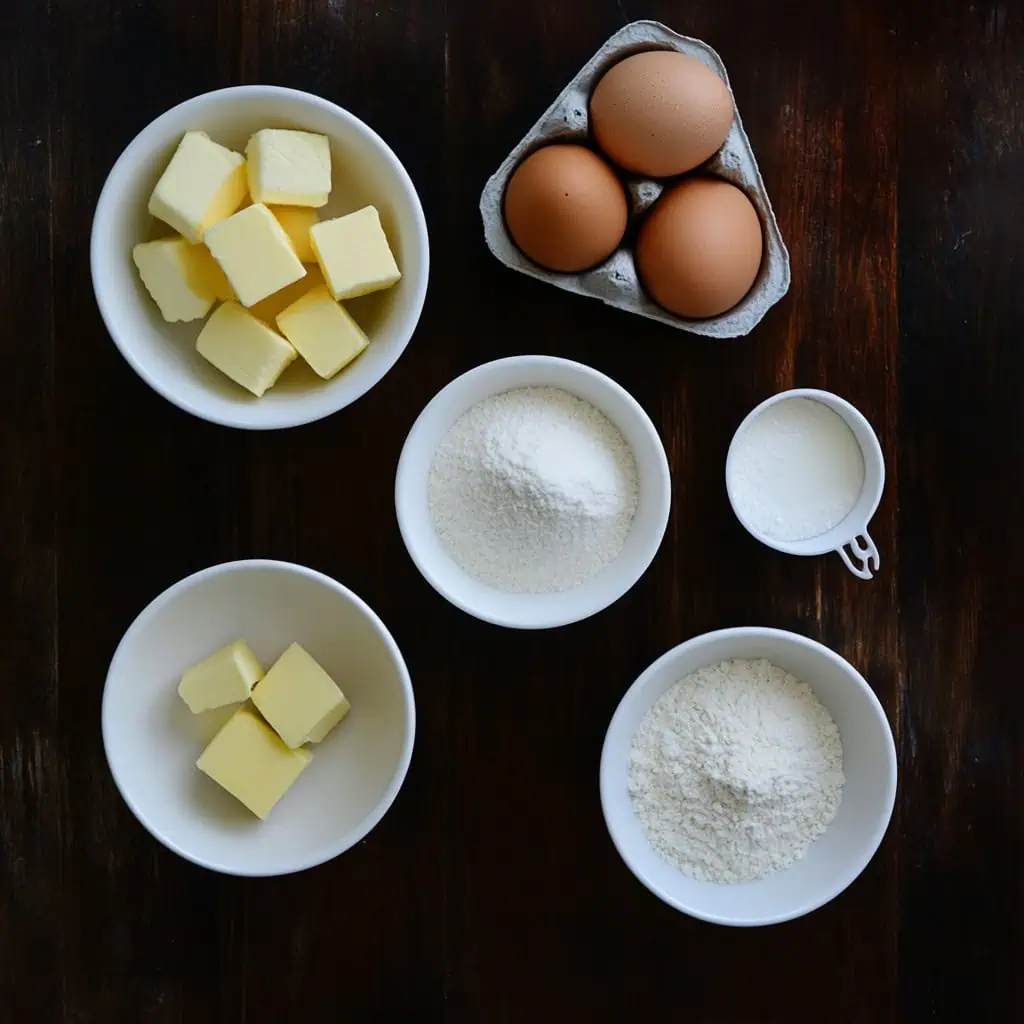
This recipe uses carefully selected ingredients that each play an important role in creating the perfect Thai Butter Cake. Premium butter forms the foundation, providing rich flavor and moist texture. Cake flour, lighter than all-purpose flour, ensures a delicate crumb structure.
The combination of castor and icing sugars creates ideal sweetness while contributing to the cake's fine texture. The star ingredient — ovalette emulsifier — is what gives this cake its signature melt-in-your-mouth quality by helping incorporate air and maintain stability during baking. Room temperature eggs and evaporated milk add richness and moisture, while the precise measurements guarantee consistent results every time.
These ingredients work harmoniously through the water bath method to create a cake that's distinctly superior to ordinary butter cakes.
- 265g Cake Flour
- 1⅓ teaspoon Baking Powder
- 200g Pure Salted Butter, softened
- 100g Castor Sugar
- 100g Icing Sugar
- 16g Ovalette/SP or Emulsifier
- 245g Eggs, room temperature (about 5 medium eggs)
- 98ml Evaporated Milk (105g), room temperature
- 1 teaspoon Vanilla Essence
Equipment
- Electric Hand Mixer or Stand Mixer: Essential for achieving the perfect creamy texture by properly incorporating air into the butter mixture
- Large Baking Tray: Must fit 2 loaf pans for the water bath method which ensures even, gentle heat distribution
- 2 Aluminum Foil Loaf Pans, 22cm: Ensures even baking and easy removal of the cake after baking
- Kitchen Scale: For precise measurements which are crucial for this recipe's success
- Mixing Bowls: Various sizes for different ingredient sets to keep your workspace organized
- Sifter: For removing lumps from dry ingredients to achieve the perfect texture
- Spatula: For scraping bowl sides to ensure all ingredients are fully incorporated
- Kitchen Towels/Tissue Paper: For water bath setup to create the ideal moisture environment
- Plastic Wrap: For proper storage after baking to maintain moisture
- Chopstick: For evening out batter surface to prevent uneven baking
How To Make
- Start by preheating your oven to 170°C (338°F). Take a large baking tray that can fit two loaf pans and line it with 10 pieces of kitchen towels or tissue paper. Pour water into the tray until the papers are just soaked, then remove any excess water.
- In a bowl, sift together 265g cake flour and 1⅓ teaspoons baking powder, then whisk to combine well. Set this aside.
- In a large mixing bowl, add 200g softened salted butter, 100g castor sugar, 100g icing sugar, and 16g ovalette (emulsifier). Beat with an electric mixer starting at low speed, then gradually increase to high speed. Beat for 6-7 minutes, scraping down the sides of the bowl occasionally to ensure even mixing.
- Gradually add 245g slightly beaten room temperature eggs (about 5 medium eggs) in small portions while mixing at medium speed. Once all eggs are incorporated, increase to high speed and beat for 3 more minutes, scraping the bowl as needed.
- Mix 1 teaspoon vanilla essence into 98ml room temperature evaporated milk. Now alternately add the flour mixture and milk mixture to your butter mixture, starting and ending with flour. Mix at medium speed between additions until smooth, then beat at medium speed for 1 minute and low speed for 3 minutes. Your batter should be creamy enough to form ribbons when slowly stirred.
- Place your aluminum foil loaf pans on the prepared water bath tray. Fill each pan halfway with batter and use a chopstick to even out the surface.
- Bake in the middle rack at 170°C for 20-30 minutes using bottom heat only, or 45 minutes if using both top and bottom heat. The exact time may vary depending on your oven, so check for doneness with a skewer.
- Let the cakes cool in their pans for 10-15 minutes before unmolding. Allow to cool completely to room temperature.
- Gently wrap each loaf tightly in plastic wrap, ensuring no air is trapped. Refrigerate overnight or for at least 12 hours - this crucial step ensures clean, beautiful slices when serving.
- The next day, remove from the refrigerator, slice, and enjoy your perfectly textured Thai Butter Cake.

Tips from Lola's Kitchen
- Proper ingredient temperature is crucial. All ingredients should be at room temperature before starting. Cold ingredients won't incorporate properly, leading to a dense cake.
- Don't rush the creaming process. The 6-7 minutes of beating butter, sugar, and emulsifier creates the foundation for the cake's texture. This step incorporates air that gives the cake its signature lightness.
- Add eggs gradually. Adding all eggs at once can cause the batter to curdle or separate. Small additions ensure proper emulsion.
- The water bath is non-negotiable. This method creates steam in the oven that prevents the cake from drying out and helps it bake evenly without cracking.
- Invest in quality butter. The butter is the star ingredient here – using a high-quality brand makes a noticeable difference in flavor and texture.
- Follow the mixing times precisely. Each mixing period and speed change serves a purpose in developing the cake's structure.
- Wrap while still warm. Wrapping the cake while it's still slightly warm (but not hot) helps trap moisture inside, enhancing the melt-in-your-mouth quality.
- Be patient with the overnight chilling. This resting period allows the moisture to distribute evenly throughout the cake, resulting in that signature clean-slicing ability.
Substitutions
- For the butter: If you only have unsalted butter, use 200g unsalted butter plus 1 teaspoon salt. The salt balances the sweetness and enhances the butter flavor.
- For the emulsifier: If you can't find Ovalette/SP, look for cake emulsifier or substitute with an additional 1 teaspoon of double-acting baking powder plus 1 tablespoon of vegetable oil, though the texture won't be exactly the same.
- For evaporated milk: Substitute with 75ml fresh milk mixed with 2 tablespoons milk powder. This provides similar fat content and milk solids.
- For cake flour: Make your own by measuring 265g all-purpose flour, removing 5 tablespoons, and replacing with 5 tablespoons cornstarch. Sift together 5 times for proper mixing.
- For castor sugar: If unavailable, pulse regular granulated sugar in a food processor until finer but not powdery.
Troubleshooting
Problem: My cake is too dense
- Cause: Butter wasn't creamed enough, ingredients were too cold, or overmixing after adding flour
- Solution: Ensure butter is very soft (but not melted) before creaming, let all ingredients reach room temperature, and mix just until ingredients are incorporated after adding flour
Problem: Cake has uneven rising or sinks in the middle
- Cause: Oven temperature inconsistent, opening the oven door too early, or uneven water bath
- Solution: Use an oven thermometer to verify temperature, avoid opening the oven for the first 30 minutes, and ensure water bath covers the entire tray evenly
Problem: Cake is crumbling when sliced
- Cause: Insufficient chilling time or cutting while too cold
- Solution: Refrigerate for the full 12 hours and allow cake to sit at room temperature for 10-15 minutes before slicing
Problem: Cake has cracks on top
- Cause: Oven temperature too high or rack position too high
- Solution: Verify oven temperature with a thermometer, use middle rack position, and consider reducing temperature by 10°C if your oven runs hot
Problem: Batter curdled after adding eggs
- Cause: Eggs too cold or added too quickly
- Solution: Ensure eggs are at room temperature and add them very gradually, beating well between additions
Storage & Reheating
Storage Options:
- Room temperature: Keep in an airtight container for 3-4 days
- Refrigerated: Wrap tightly in plastic wrap and store for up to 1 week
- Frozen: Double-wrap in plastic wrap and then aluminum foil for up to 3 months
Best Reheating Methods:
- From refrigerator: Allow to sit at room temperature for 30 minutes before serving for the best texture
- Quick serving: Microwave individual slices for 10-15 seconds on medium power
- From frozen: Thaw overnight in the refrigerator, then bring to room temperature for 30 minutes
Pro tip: Slightly warming refrigerated slices enhances the buttery flavor and returns some of that melt-in-your-mouth texture that's best experienced when the cake isn't cold.
FAQ
Can I halve the recipe?
Yes, you can halve all ingredients and use just one loaf pan. Reduce the baking time by about 10-15 minutes and use a smaller water bath tray.
Why use the water bath method?
The water bath provides gentle, even heat distribution and creates moisture in the oven, resulting in a more tender cake without cracks. This method is key to the cake's signature texture.
Is ovalette/emulsifier really necessary?
Yes, it's crucial for achieving the signature fine, tender crumb texture. It helps stabilize the batter, incorporate air, and creates that melt-in-your-mouth quality that makes Thai Butter Cake special.
Why do ingredients need to be at room temperature?
Room temperature ingredients blend more easily and create a smoother batter, resulting in a more uniform texture and better rise. Cold ingredients can cause the batter to curdle or result in a dense cake.
Can I skip the overnight refrigeration?
While you can eat the cake immediately, the overnight rest allows the texture to develop fully and ensures clean slices without crumbling. This step is what gives Thai Butter Cake its professional bakery-quality finish.
What's the purpose of using two types of sugar?
The combination of castor sugar and icing sugar creates the perfect sweetness level and contributes to the cake's fine texture. Castor sugar helps with aeration during creaming while icing sugar dissolves more readily for a smoother batter.
Can I make this cake without an electric mixer?
It's possible but extremely challenging. The extended beating times are crucial for proper aeration and structure. If attempting by hand, expect to cream the butter mixture for at least 15 minutes by hand and be prepared for a different texture.
Why is my cake not as yellow as expected?
The color depends on your butter quality and egg yolks. Using premium butter with a higher fat content and fresh eggs with deeply colored yolks will give a richer yellow color.
Can I use this recipe for a round cake pan instead of loaf pans?
Yes, you can use an 8-inch round pan instead of the two loaf pans. The baking time will be similar, but you'll need to check for doneness carefully as the thickness will be different.
What makes Thai Butter Cake different from regular butter cake?
The key differences are the use of emulsifier, the specific mixing method with precise timing, the water bath baking technique, and the overnight chilling process. These elements combine to create a uniquely tender, melt-in-your-mouth texture that's different from traditional Western butter cakes.
Related
Looking for other recipes like this? Try these:


Thai Butter Cake Recipe
Equipment
- Electric Hand Mixer or Stand Mixer Essential for achieving the perfect creamy texture
- Large Baking Tray Must fit 2 loaf pans for water bath method
- 2 Aluminum Foil Loaf Pans, 22cm Ensures even baking and easy removal
- Kitchen scale For precise measurements
- Mixing bowls Various sizes for different ingredient sets
- Sifter For removing lumps from dry ingredients
- Spatula For scraping bowl sides
- Kitchen Towels/Tissue Paper For water bath setup
- Plastic wrap For proper storage
- Chopstick For evening out batter surface
Ingredients
- 265 g Cake Flour Harina
- 1⅓ teaspoon Baking Powder Pampaalsa
- 200 g Pure Salted Butter softened (Mantikilya, pinalambot)
- 100 g Castor Sugar
- 100 g Icing Sugar
- 16 g Ovalette/SP or Emulsifier
- 245 g Eggs Itlog, room temperature - about 5 medium eggs
- 98 ml Evaporated Milk 105g, room temperature
- 1 teaspoon Vanilla Essence
Instructions
- Start by preheating your oven to 170°C (338°F). Take a large baking tray that can fit two loaf pans and line it with 10 pieces of kitchen towels or tissue paper. Pour water into the tray until the papers are just soaked, then remove any excess water.
- In a bowl, sift together 265g cake flour and 1⅓ teaspoons baking powder, then whisk to combine well. Set this aside.
- In a large mixing bowl, add 200g softened salted butter, 100g castor sugar, 100g icing sugar, and 16g ovalette (emulsifier). Beat with an electric mixer starting at low speed, then gradually increase to high speed. Beat for 6-7 minutes, scraping down the sides of the bowl occasionally to ensure even mixing.
- Gradually add 245g slightly beaten room temperature eggs (about 5 medium eggs) in small portions while mixing at medium speed. Once all eggs are incorporated, increase to high speed and beat for 3 more minutes, scraping the bowl as needed.
- Mix 1 teaspoon vanilla essence into 98ml room temperature evaporated milk. Now alternately add the flour mixture and milk mixture to your butter mixture, starting and ending with flour. Mix at medium speed between additions until smooth, then beat at medium speed for 1 minute and low speed for 3 minutes. Your batter should be creamy enough to form ribbons when slowly stirred.
- Place your aluminum foil loaf pans on the prepared water bath tray. Fill each pan halfway with batter and use a chopstick to even out the surface.
- Bake in the middle rack at 170°C for 20-30 minutes using bottom heat only, or 45 minutes if using both top and bottom heat. The exact time may vary depending on your oven, so check for doneness with a skewer.
- Let the cakes cool in their pans for 10-15 minutes before unmolding. Allow to cool completely to room temperature.
- Gently wrap each loaf tightly in plastic wrap, ensuring no air is trapped. Refrigerate overnight or for at least 12 hours - this crucial step ensures clean, beautiful slices when serving.
- The next day, remove from the refrigerator, slice, and enjoy your perfectly textured Thai Butter Cake.
- Remember to keep all ingredients at room temperature before starting, and take your time with the mixing steps - they're essential for achieving that signature melt-in-your-mouth texture.
Tips from Lola's Kitchen
- Always use room temperature ingredients
- Don't rush the creaming process - it's crucial for texture
- Wrap the cake while still slightly warm for maximum moisture retention
- Use premium butter for best results
- Let eggs reach room temperature for better incorporation
Nutrition
The Story Behind Thai Butter Cake
Thai Butter Cake, known locally in Thailand as "Keik Mantika," represents the fascinating blend of European baking techniques with Southeast Asian adaptations. While butter cakes originated from European traditions, this Thai version has evolved into something uniquely special, becoming a beloved treat in homes and bakeries across Thailand and Southeast Asia.
What sets Thai Butter Cake apart from traditional Western butter cakes is its distinctive texture - incredibly soft, moist, and melt-in-your-mouth tender. This unique texture comes from two key elements that Thai bakers perfected: the use of cake emulsifier (ovalette) and the water bath baking method. These techniques were developed as Thai bakers adapted Western recipes to suit local tastes and tropical climate conditions, where cakes needed to stay fresh longer in warm weather.
In recent years, this cake has gained popularity across Southeast Asia, especially in the Philippines, where it fits perfectly with our merienda culture. Filipino bakers have embraced this recipe because it reminds us of the premium butter cakes we love from famous bakeshops, but with an even more luxurious texture. The overnight chilling method, while requiring patience, is a game-changer that gives this cake its signature clean-slicing quality - a technique that has made it particularly popular for special occasions and family gatherings.
Today, Thai Butter Cake has become a staple in many Asian home bakeries and food businesses, with bakers adding their own twists while maintaining the core techniques that make it special. Whether served plain with afternoon tea or dressed up for special occasions, this cake represents the beautiful evolution of baking traditions across Southeast Asia, where different culinary cultures blend to create something uniquely delicious.


Comments
No Comments