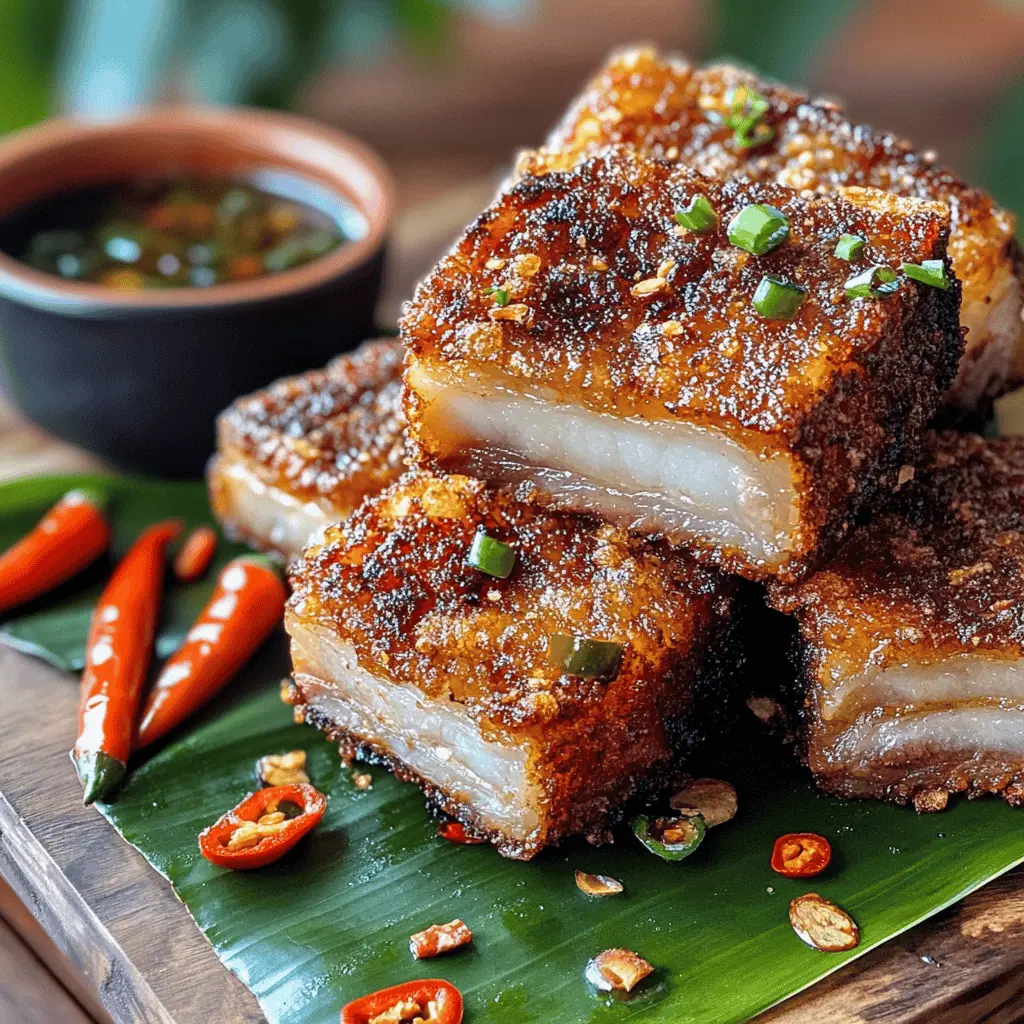
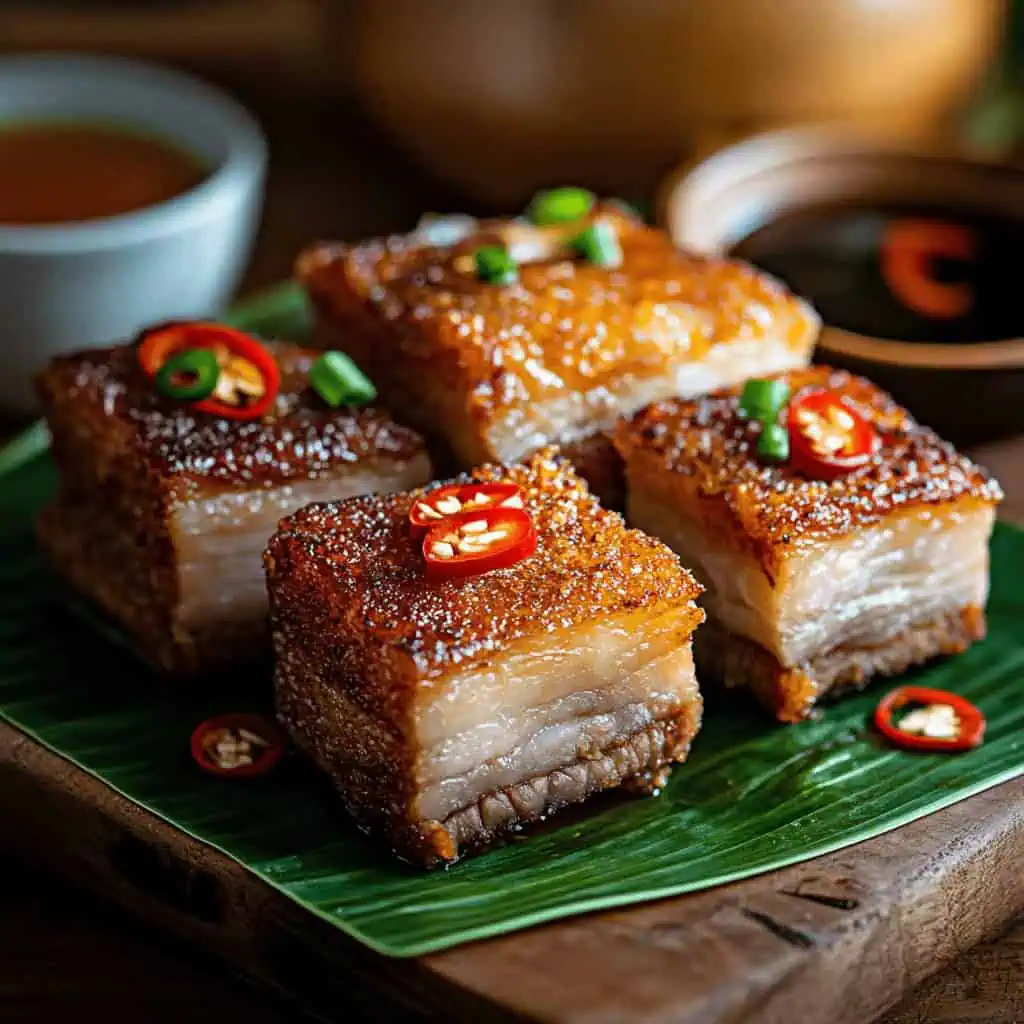
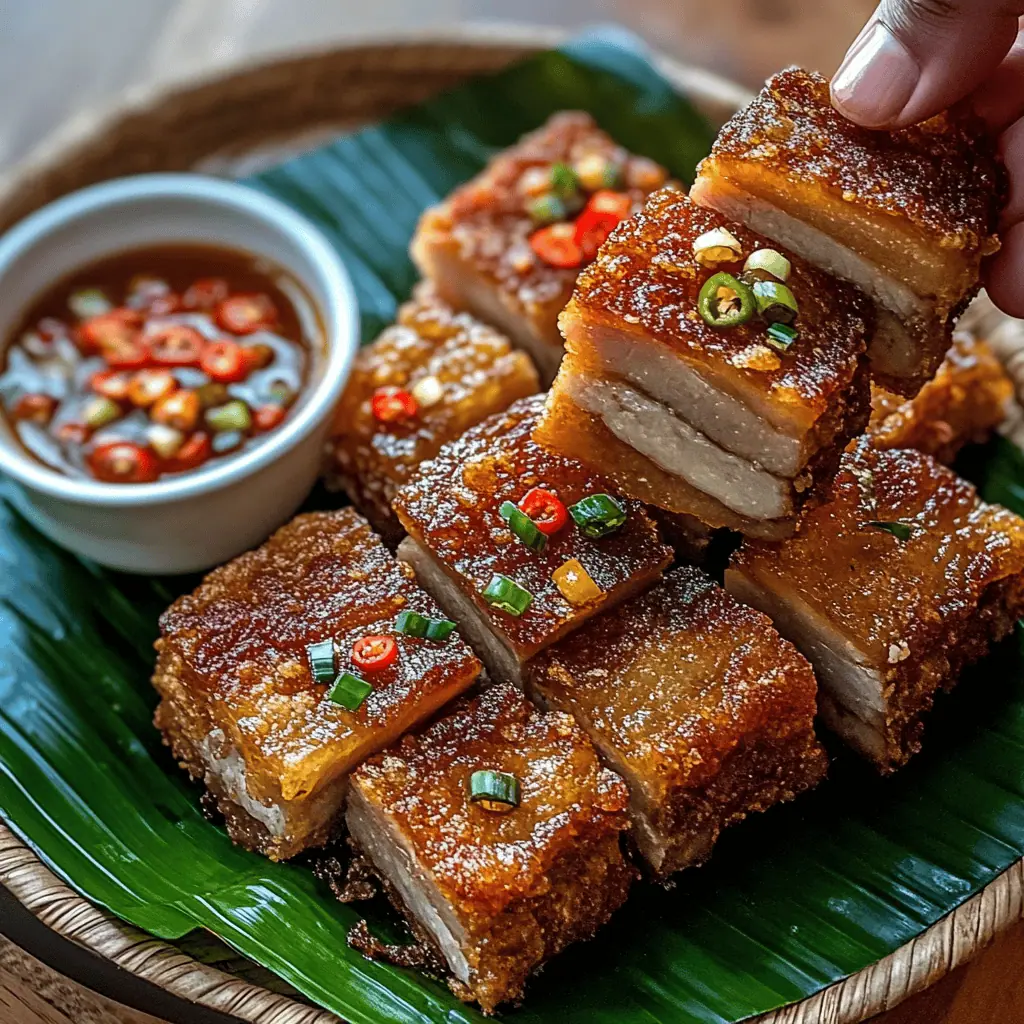
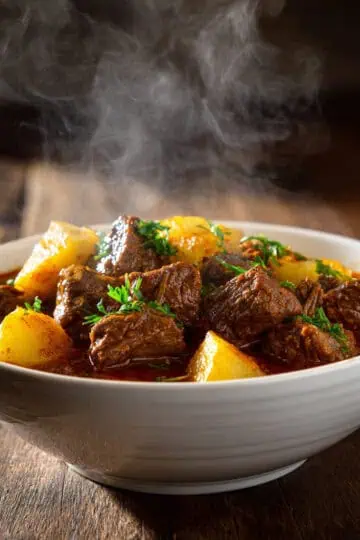
Let me tell you about my absolute favorite pulutan: Lechon Kawali. That gloriously crispy pork belly that's become my signature dish after years of ordering it at every inuman session with my barkada.
I used to spend way too much money getting this at our local eatery, watching Manong slice that crispy meat with its signature crackling sound, until my Tita Evelyn finally taught me her secret lechon kawali recipe.
Once you nail this technique (yes, including that crucial overnight drying step everyone tries to skip!), you'll never go back to takeout. This homemade Lechon Kawali recipe transforms simple liempo into that perfectly crispy, tender and juicy dish that has everyone fighting over the last piece and begging for extra rice.
Jump to:
Why You'll Love This Recipe
- Foolproof Method: Our tested three-phase cooking process guarantees success
- Restaurant-Quality Results: Achieve carinderia-level crispiness at home
- Make-Ahead Friendly: Most prep can be done a day before
- Perfect for Gatherings: Impressive centerpiece for any Filipino celebration
- Budget-Friendly: Transform affordable pork belly into a premium dish
- Versatile: Works great as ulam (main dish) or pulutan (beer match)
Ingredients
Each ingredient in this recipe plays a vital role in creating perfect Lechon Kawali. Skin-on pork belly provides the essential fat layers that keep the meat juicy while developing that signature crispy crackling.
The aromatic trio of garlic, bay leaves, and peppercorns infuses the meat with classic Filipino flavors during the boiling process, while onion and lemongrass add subtle depth. The cane vinegar and rock salt rub isn't just for flavor, the acid helps break down skin proteins while salt draws out moisture, both crucial for achieving glass-like crispiness.
High smoke point oils are specifically chosen to maintain steady temperatures without burning, ensuring even cooking and perfect golden-brown results.
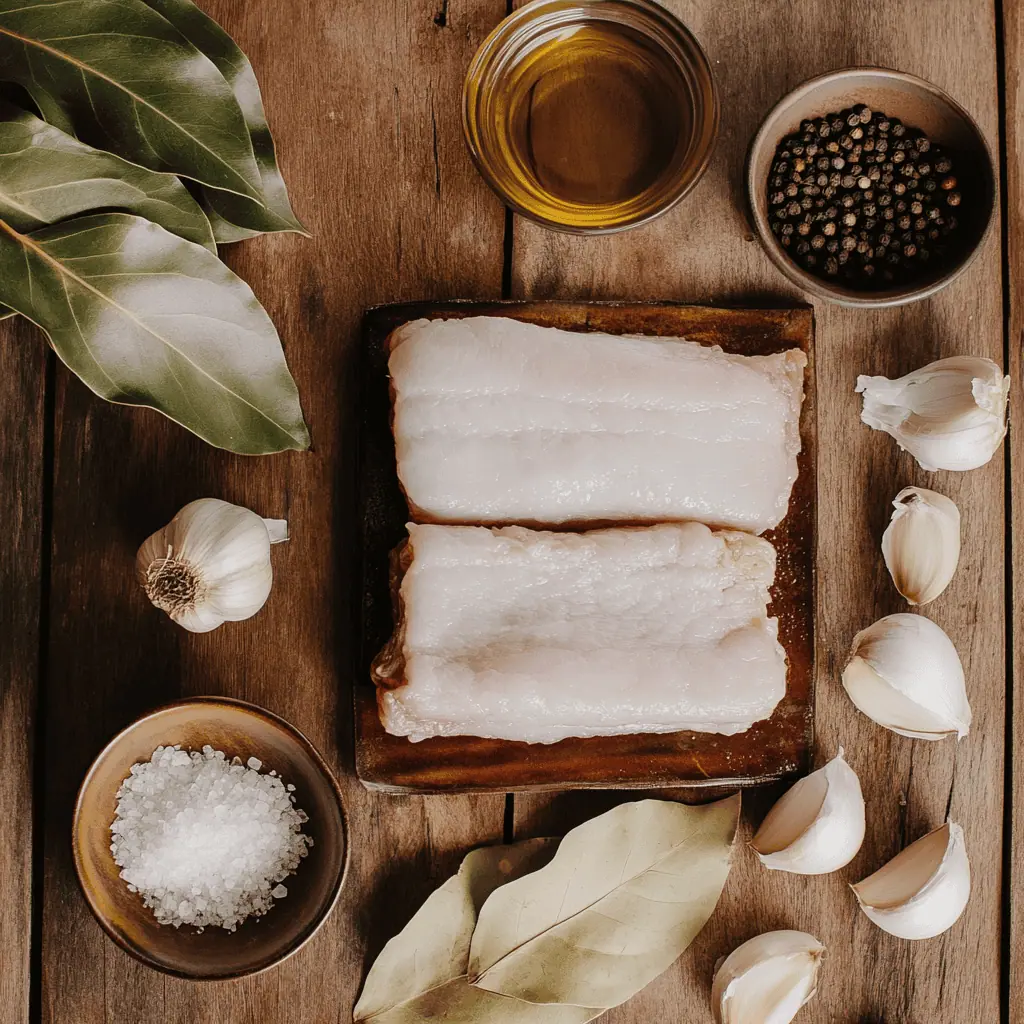
For the Pork:
- 2 kg pork belly (liempo), skin-on, whole slab
- 8 cloves garlic (bawang), crushed
- 3 bay leaves (dahon ng laurel)
- 1 tablespoon whole black peppercorns (paminta)
- 2 tablespoons sea salt (asin)
- 1 large onion, quartered
- 2 stalks lemongrass (tanglad), bruised (optional)
- Water for boiling
- Oil for deep-frying (preferably high smoke point oil like canola or peanut)
For the Salt Rub:
- 2 tablespoons cane vinegar (suka)
- 1 tablespoon rock salt (asin)
For Serving (Optional):
- Spiced vinegar dipping sauce (see recipe below)
- Atchara (pickled green papaya)
- Steamed white rice
Equipment
- Large Heavy-Bottom Pot: For the initial boiling process; the heavy bottom ensures even heat distribution and prevents scorching
- Wire Cooling Rack: Essential for the overnight drying process; allows air to circulate around the entire pork belly
- Deep Heavy-Duty Wok or Dutch Oven: For the final deep-frying; must be large enough to safely contain hot oil
- Cooking Thermometer: Critical for monitoring oil temperature (350-375°F/175-190°C) for perfect crispy skin
- Meat Thermometer: Ensures the pork reaches a safe internal temperature (145°F/63°C minimum)
- Sharp Chef's Knife: For scoring the skin and cutting the finished dish
- Long Cooking Chopsticks or Tongs: For safely handling the pork during frying
- Paper Towels: For thoroughly drying the pork before and after cooking
- Spider Strainer or Slotted Spoon: For safely removing the fried pork from hot oil
- Heat-Resistant Gloves: For added safety when handling hot cookware
- Splatter Screen: To minimize oil splatter during frying

How To Make
Day 1: Preparation and Boiling
- Prepare the pork belly: Rinse the 2 kg whole pork belly slab thoroughly with cold water. Pat completely dry with paper towels. Using a sharp knife, create shallow scores across the skin in a crosshatch pattern (about ½ inch apart). Be careful not to cut into the meat layer - the cuts should only penetrate the skin.
- Boil with aromatics: Place the pork belly in a large pot, skin side up. Add the 8 crushed garlic cloves, 3 bay leaves, 1 tablespoon whole black peppercorns, 2 tablespoons sea salt, quartered onion, and bruised lemongrass (if using). Pour enough water to fully cover the meat by about 1 inch.
- Simmer to tenderness: Bring the water to a full boil over high heat. Once boiling, reduce the heat to medium-low to maintain a gentle simmer (around 180°F/82°C). Let the pork simmer for 45-60 minutes, or until you can easily pierce it with a fork but it still holds its shape. The internal temperature should reach at least 145°F (63°C).
- Begin the drying process: Remove the pork from the water and let it cool to room temperature on a wire rack (about 30 minutes). Once cooled, thoroughly pat the entire piece dry with paper towels, paying special attention to the skin.
- Apply vinegar and salt: Brush the skin with 2 tablespoons of cane vinegar, ensuring complete coverage. This acid helps break down proteins in the skin for better crisping. Next, thoroughly rub 1 tablespoon of rock salt all over the skin. The salt draws out moisture - a critical step for achieving crispy skin.
- Overnight drying: Place the pork on a wire rack with the skin facing up. Put it in the refrigerator uncovered and let it dry overnight or for at least 8 hours. This step is non-negotiable for achieving that perfect crackling texture.
Day 2: The Final Frying
- Bring to room temperature: Remove the pork from the refrigerator 30 minutes before cooking to let it come closer to room temperature (but not fully). Pat it dry again if you see any moisture on the surface.
- Prepare for frying: You can cut the pork into 2-3 inch pieces now if desired, or fry the entire slab and cut after cooking (cutting beforehand creates more crispy edges). Heat cooking oil in a deep pot, wok, or Dutch oven. The oil should reach 350°F (175°C) - use a thermometer for accuracy. The oil should be deep enough to submerge at least half of the pork.
- The first fry: Carefully lower the pork into the hot oil, skin side down first. This initiates the crisping process. Maintain the oil temperature between 350-375°F (175-190°C) throughout cooking. Fry for about 8-10 minutes until the skin starts turning golden.
- The final fry: Turn the pork skin side up and continue frying for another 7-10 minutes until the skin turns a deep golden brown and becomes very crispy. You should see and hear the skin bubbling and crackling.
- Rest before serving: Remove the pork from the oil and let it rest on a wire rack (not paper towels, which can create steam and soften the skin) for 5 minutes. This resting period allows the internal juices to redistribute while the skin remains crispy.
- Slice and serve: Using a sharp cleaver or heavy knife, slice the lechon kawali into serving pieces and serve immediately while hot.
Spiced Vinegar Dipping Sauce
The perfect accompaniment to cut through the richness of the pork.
Ingredients:
- ½ cup cane vinegar or white vinegar
- 3 cloves garlic, minced
- 1 small red onion, finely chopped
- 2 bird's eye chilies (siling labuyo), sliced
- ½ teaspoon whole black peppercorns
- ¼ teaspoon salt
- 1 tablespoon soy sauce (optional)
Instructions:
Combine all ingredients in a small bowl. Let it sit for at least 30 minutes before serving to allow the flavors to meld. Can be made up to 3 days ahead and stored in the refrigerator.

Tips from Lola's Kitchen
For Perfect Crackling
- The Ice Bath Trick: After boiling, shock the pork in ice water for 5 minutes before drying. This contracts the skin and helps it crisp more evenly.
- The Baking Soda Secret: Before refrigerating, lightly dust the scored skin with a small amount of baking soda along with the salt. This alkaline environment further breaks down proteins for extra crispiness.
- The Dual Temperature Fry: Start frying at 325°F for 5 minutes to cook the interior, then increase to 375°F for the final 10 minutes to create that glass-like crackling.
- The Foil Shield: If parts of the skin brown too quickly, create small foil shields to protect those areas while the rest catches up.
- The Vinegar Test: Your pork is perfectly dried when a drop of vinegar sizzles immediately upon touching the skin.
For Maximum Flavor
- The Aromatic Bundle: Tie your herbs and spices in a cheesecloth bundle for easier removal after boiling.
- The Broth Treasure: Don't discard the boiling liquid—strain and use it as a rich pork broth for soups or cooking rice.
- The Flavor Injection: Before boiling, use a meat injector to insert a mixture of soy sauce, garlic, and black pepper into the meat portion.
- The Resting Position: Rest fried pork skin-side up on a wire rack at a slight angle to prevent any steam from softening the crackling.
- The Serving Temperature: Lechon Kawali tastes best when slightly cooler than piping hot, about 5-7 minutes after frying.
Substitutions
Pork Cut Options:
- Pork Shoulder: Less fatty but won't have the same layered texture of belly; cook 10-15 minutes longer during the boiling phase
- Boneless Pork Ribs: Different texture but works in a pinch; reduce boiling time by 10 minutes
- Skinless Belly: Will be less crispy but still delicious; skip the scoring step and reduce frying time by 3-5 minutes
- Pork Jowl (Mask): A fantastic alternative with similar fat content; follow the same cooking times
Aromatics:
- No Lemongrass: Substitute with 2 slices of ginger and 1 teaspoon lemon zest
- No Bay Leaves: Use 1 teaspoon dried oregano or 1 tablespoon fresh thyme
- No Whole Peppercorns: Substitute with 1 teaspoon ground black pepper
Oils:
- Canola Oil: Preferred for its neutral flavor and high smoke point
- Peanut Oil: Excellent alternative with high smoke point
- Vegetable Oil: Works well but may impart a slight flavor
- Lard: Traditional but heavy; mix with vegetable oil if using
Troubleshooting
Skin Not Crisping
- Problem: Skin remains soft or rubbery after frying
- Solutions:
- Ensure pork is completely dry before frying
- Check that oil temperature is consistently hot (350-375°F)
- Make sure the vinegar and salt drawing process was thorough
- Verify the overnight drying was uninterrupted and the pork was uncovered
- Try a longer frying time, carefully watching to prevent burning
Meat Too Dry
- Problem: Interior meat lacks juiciness
- Solutions:
- Don't overcook during boiling (45-60 minutes maximum)
- Check internal temperature doesn't exceed 165°F during boiling
- Allow proper resting time after frying (5 minutes minimum)
- Ensure pork is at room temperature before frying
- Cut pieces larger rather than smaller to retain moisture
Oil Splattering Excessively
- Problem: Dangerous oil splatter during frying
- Solutions:
- Make absolutely sure the pork is completely dry before frying
- Lower the pork into the oil very slowly using tongs
- Use a splatter screen
- Maintain proper oil temperature (too hot = more splatter)
- Consider patting the pork dry one final time right before frying
Difficult to Cut
- Problem: Skin is too hard to slice through
- Solutions:
- Use a very sharp cleaver or heavy-duty knife
- Score the skin again lightly after frying but before cutting
- Cut from the meat side up toward the skin
- Let rest slightly longer (up to 10 minutes) before cutting
Storage & Reheating
Storage
- Refrigeration: Store cooled leftovers in an airtight container for up to 3 days
- Freezing Unfried Portions: You can freeze the boiled and dried pork (before frying) for up to 3 months. Wrap tightly in plastic wrap, then foil
- Freezing Fried Portions: Not recommended, as the texture will deteriorate
- Best Practices: Store fried pieces uncovered or loosely covered in the refrigerator to prevent the skin from becoming soggy
Reheating Methods
Air Fryer (Best Method)
- Preheat air fryer to 375°F (190°C)
- Place cold lechon kawali in basket without overcrowding
- Heat for 3-4 minutes until skin re-crisps and meat is warmed through
- No need to add additional oil
Oven
- Preheat oven to 350°F (175°C)
- Place lechon kawali on a wire rack over a baking sheet
- Heat for 10-15 minutes until skin crisps up again
- For extra crispiness, finish under the broiler for 1-2 minutes (watch carefully!)
Pan-Frying
- Heat a dry non-stick pan over medium heat
- Place lechon kawali skin-side down first for 2 minutes
- Flip and heat meat side for 1-2 minutes
- Not ideal as it may make the meat greasier
Toaster Oven
- Preheat to 350°F (175°C)
- Place on foil-lined tray
- Heat for 7-10 minutes
- Good for small portions
Microwave (Last Resort)
- Place on microwave-safe plate
- Heat on 70% power for 1 minute
- Finish in a hot pan, skin-side down to regain some crispness
- Note: The skin will never be as crispy as with other methods
FAQ
Why is my Lechon Kawali not as crispy as restaurant versions?
Restaurant-level crispiness requires three critical elements: thorough drying (minimum 8 hours uncovered in the refrigerator), proper salt drawing (to pull out moisture), and consistent oil temperature (350-375°F). A kitchen thermometer is invaluable here.
Can I make Lechon Kawali without a deep fryer?
Absolutely! A deep, heavy-bottomed pot or Dutch oven works perfectly. Just ensure you have enough oil to submerge at least half of the pork and use a thermometer to maintain the correct temperature.
Why is overnight drying so important?
This step removes moisture from the skin, which is essential for achieving that glass-like crackling. Moisture is the enemy of crispiness. The refrigerator environment also helps dry the skin while keeping the meat fresh.
Can I skip the boiling step and just fry the pork?
No, this step is non-negotiable for three reasons: it tenderizes the meat, infuses flavor from the aromatics, and begins breaking down the collagen in the skin, which is essential for perfect crispiness.
How do I know when the oil is hot enough without a thermometer?
While a thermometer is strongly recommended, you can test by inserting a wooden chopstick into the oil, if small bubbles form around it immediately, the oil is ready (around 350°F). Another test: drop a tiny piece of bread in the oil, it should turn golden brown in about 60 seconds.
Can I reuse the frying oil?
Yes, strain it through a fine-mesh sieve lined with cheesecloth once it's completely cooled. Store in a clean, sealed container away from light. Use up to 2-3 times, but discard if it smells off or looks dark.
Can I prepare Lechon Kawali in an air fryer?
While you can reheat Lechon Kawali in an air fryer, the initial cooking should be done traditionally. The air fryer doesn't provide the necessary submerged frying environment needed for that perfect crackling skin.
Do I need to score the skin? What if I cut too deep?
Scoring helps the skin crisp evenly and prevents it from buckling during frying. If you cut too deep into the fat layer, it's not a disaster, but try to avoid cutting into the meat. Use a very sharp knife and work slowly.
What's the purpose of rubbing vinegar on the skin?
The acid in vinegar helps break down proteins in the skin, allowing it to crisp more effectively during frying. It also adds a subtle tanginess that balances the richness of the pork.
Can I marinate the pork before boiling?
While traditional Lechon Kawali doesn't require marination (the boiling with aromatics infuses plenty of flavor), you can marinate the meat side (not the skin) for 2-3 hours before boiling if desired. Just ensure the skin remains dry.
What if I don't have 8 hours to dry the pork in the refrigerator?
While the full drying time yields best results, you can accelerate the process: after boiling, pat very dry, rub with vinegar and salt, then place in front of a fan for 2-3 hours, followed by 45 minutes in a 200°F (93°C) oven with the door slightly ajar. Results won't be as perfect but still good.
What are traditional sides to serve with Lechon Kawali?
Classic accompaniments include steamed white rice, atchara (pickled green papaya), ensaladang talong (eggplant salad), spiced vinegar dipping sauce, or toyomansi (soy sauce with calamansi). For a complete meal, serve with chopsuey or pinakbet (vegetable stew).
How many people will a 2kg pork belly serve?
A 2kg pork belly typically serves 6-8 people as a main dish with sides, or 10-12 people as part of a larger Filipino feast with multiple dishes.
Can I make this dish ahead for a party?
Yes! Complete the boiling and drying steps a day ahead. On party day, bring the pork to room temperature for 30 minutes, then fry just before serving. Alternatively, fry up to 3 hours ahead and reheat in a 350°F (175°C) oven for 10 minutes just before serving.
What's the best way to transport Lechon Kawali to a potluck?
If possible, fry on location. Otherwise, slightly undercook during frying, let cool completely uncovered, transport in a container lined with paper towels (not airtight), and finish in a hot oven (400°F/205°C) for 5-10 minutes upon arrival.
Related
Looking for other recipes like this? Try these:


Filipino Lechon Kawali (Crispy Pork Belly)
Ingredients
For the Pork
- 2 kg pork belly liempo, skin-on, whole slab
- 8 cloves garlic bawang, crushed
- 2 bay leaves dahon ng laurel
- 1 tablespoon whole black peppercorns paminta
- 2 tablespoons salt asin
- Water for boiling
- Oil for deep-frying
For the Salt Rub
- 2 tablespoons cane vinegar suka
- 1 tablespoon rock salt asin
Instructions
- Start with a 2 kg whole pork belly slab (liempo) with skin on. Rinse the pork belly thoroughly with clean water (hugasan ng maigi ang liempo) and pat it completely dry using paper towels (patuyuin gamit ang paper towel). Using a sharp knife, create shallow cuts across the skin in a crosshatch pattern, being careful not to cut into the meat.
- Take a large pot and place the pork belly inside. Add 8 crushed garlic cloves (bawang na dinurog), 2 bay leaves (dahon ng laurel), 1 tablespoon whole black peppercorns (paminta), and 2 tablespoons salt (asin). Pour enough water to fully cover the meat.
- Set your stove to high heat and bring the water to a full boil. Once boiling, reduce the heat to medium-low to maintain a temperature of 180°F/82°C. Let the pork simmer for 45-60 minutes, or until you can easily pierce it with a fork (kutsilyo) but it still holds its shape. The internal temperature should reach 165°F (74°C).
- Remove the pork from the water (hanguin ang baboy mula sa tubig) and let it cool to room temperature. Once cooled, pat the entire piece very dry with paper towels, paying special attention to the skin. Brush the skin with cane vinegar (pahiran ng suka ang balat). Thoroughly rub rock salt all over the skin (ikuskos ang asin sa balat).
- Place the pork on a wire rack with the skin facing up. Put it in the refrigerator uncovered (huwag takpan) and let it dry overnight or for at least 8 hours. This step is crucial for achieving crispy skin (importanteng hakbang para lumutong ang balat).
- The next day, remove the pork from the refrigerator 30 minutes before cooking to let it come closer to room temperature. Pat it dry again if you see any moisture on the surface (punasan muli kung may tubig). You can cut it into smaller pieces now if desired.
- Heat cooking oil in a deep pot or kawali. The oil should reach 350°F (175°C) - use a thermometer for accuracy. The oil should be deep enough to submerge the pork (dapat nalulubog ang karne sa mantika).
- Carefully lower the pork into the hot oil (dahan-dahang ibaba ang karne sa mainit na mantika). Maintain the oil temperature between 350-375°F (175-190°C) throughout cooking. Fry for 15-20 minutes until the skin turns golden brown and very crispy.
- Remove the pork from the oil (hanguin ang baboy mula sa mantika) and let it rest on a wire rack or paper towels for 3-5 minutes. This resting period helps maintain the crispiness of the skin (nakakatulong ito para mapanatili ang pagiging lutong ng balat).
- Slice the lechon kawali into serving pieces (hiwain sa serving size) and serve immediately while hot. Traditional accompaniments include spiced vinegar (sawsawang suka), atchara (pickled papaya), or toyomansi (soy sauce with calamansi).
- Leftover lechon kawali can be stored in the refrigerator for up to 3 days (matatago sa ref hanggang 3 araw). To reheat, use an air fryer at 375°F (190°C) for 3-4 minutes or an oven at 350°F (175°C) for 10-15 minutes to maintain crispiness (para mapanatili ang pagiging malutong).
- Remember that the key to perfect lechon kawali lies in thoroughly drying the skin and maintaining the right oil temperature (ang sikreto sa perpektong lechon kawali ay ang husto na pagpapatuyo ng balat at tamang temperatura ng mantika).
Tips from Lola's Kitchen
For Perfect Crackling
- Thoroughly dry the skin before refrigerating
- Don't skip the vinegar step - it's crucial for crackling
- Keep pork cold until ready to fry
- Ensure oil temperature stays consistent
For Juicy Meat
- Don't overcook during boiling phase
- Let meat rest after frying
- Cut pieces larger rather than smaller
- Keep meat portion submerged during initial boiling
Nutrition
The Story Behind Lechon Kawali (Crispy Pork Belly)
Long before air fryers and modern kitchens, Lechon Kawali emerged as the brilliant solution for Filipino families craving the celebrated taste of traditional lechon without roasting an entire pig. This beloved crispy pork belly dish tells the story of Filipino culinary ingenuity, where home cooks transformed the Spanish colonizers' whole-roasted pig tradition into an achievable everyday luxury using nothing more than a deep pot (kawali) and generations-worth of cooking wisdom.
The name itself captures this beautiful adaptation – "lechon" from the Spanish word for roasted pig, and "kawali," the Filipino word for wok, creating a perfectly crispy pork dish that rivals its whole-roasted ancestor. While the traditional lechon required festive occasions and community gatherings, Lechon Kawali democratized this coveted crispy pork experience, making it accessible for ordinary days and modest celebrations alike.
What makes Lechon Kawali truly special isn't just its crackling skin or tender meat – it's how the dish reflects the Filipino value of "diskarte" (resourcefulness). The three-stage cooking process showcases our ancestors' understanding of food science before food science was even a term. The initial boiling with aromatics infuses the meat with flavor while tenderizing it. The crucial overnight drying (a step your Lola would never let you skip) ensures that glass-like crackle. Finally, the deep-frying transforms humble pork belly into golden-brown perfection that makes any meal feel like a fiesta.
Today, whether you're in a Manila carinderia, a family Sunday lunch, or a barkada gathering, Lechon Kawali stands as a testament to Filipino cooking excellence. It's become more than just food – it's the centerpiece that brings people together, the ulam that makes extra rice inevitable, and the pulutan that turns simple drinking sessions into memorable celebrations. From its origins as a practical alternative to whole lechon, it's evolved into its own culinary star, beloved not just in Filipino homes but in restaurants worldwide.
Remember: Perfect lechon kawali isn't about fancy ingredients—it's about the patience to dry the skin completely, the courage to let it fry until golden brown, and that satisfying crack when you bite into perfectly crispy skin.


Comments
No Comments