Hopiang Baboy wasn't just another snack, it was part of my love story. My ex-boyfriend Christopher would always surprise me with a box of warm hopia from Baker's Fair after his classes at UST. And I can still remember how that flaky, golden-brown pastry would melt in my mouth with each bite.
While Christopher and I went our separate ways, my love affair with hopia never ended. After countless attempts in my own kitchen, I've finally perfected this recipe that takes me right back to those sweet moments at Lover's Lane, sharing hopia and milk tea.
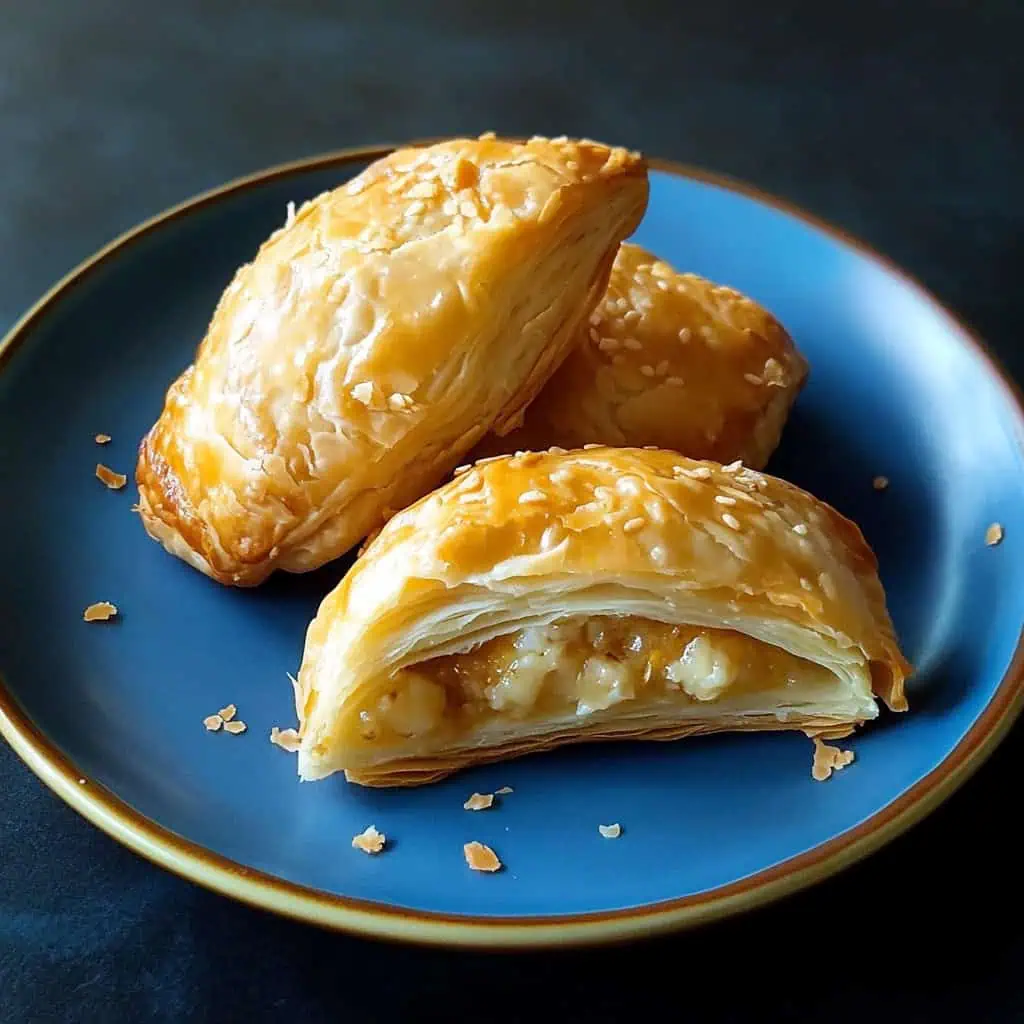
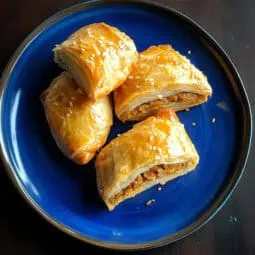
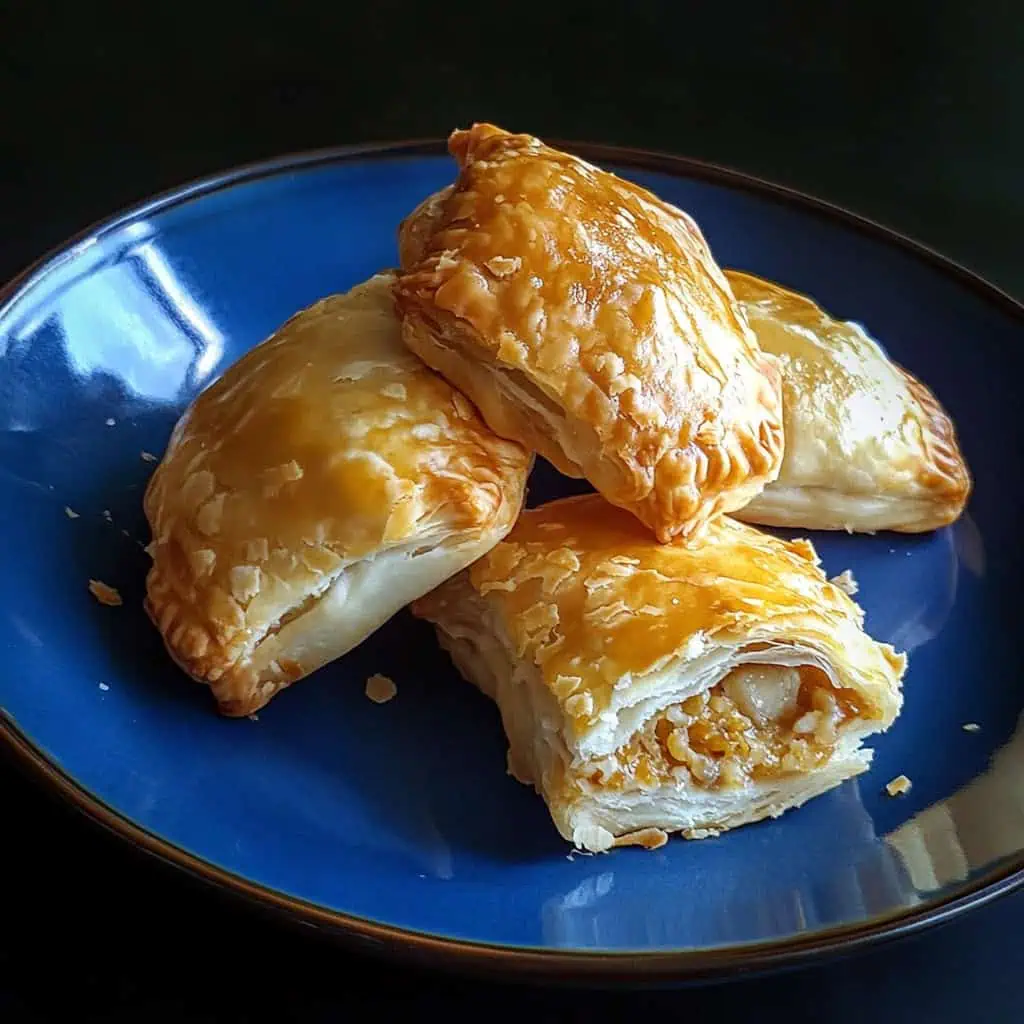
With this detailed hopiang baboy recipe, you'll create that same irresistible combination of buttery layers and rich pork-flavored filling that makes Filipino hopia so special.
You'll never need to line up at your favorite hopia store again, though I still occasionally grab a box from Baker's Fair, just for old time's sake.
Jump to:
Why You'll Love This Recipe
- Authentic taste that rivals popular brands like Tipas Hopia
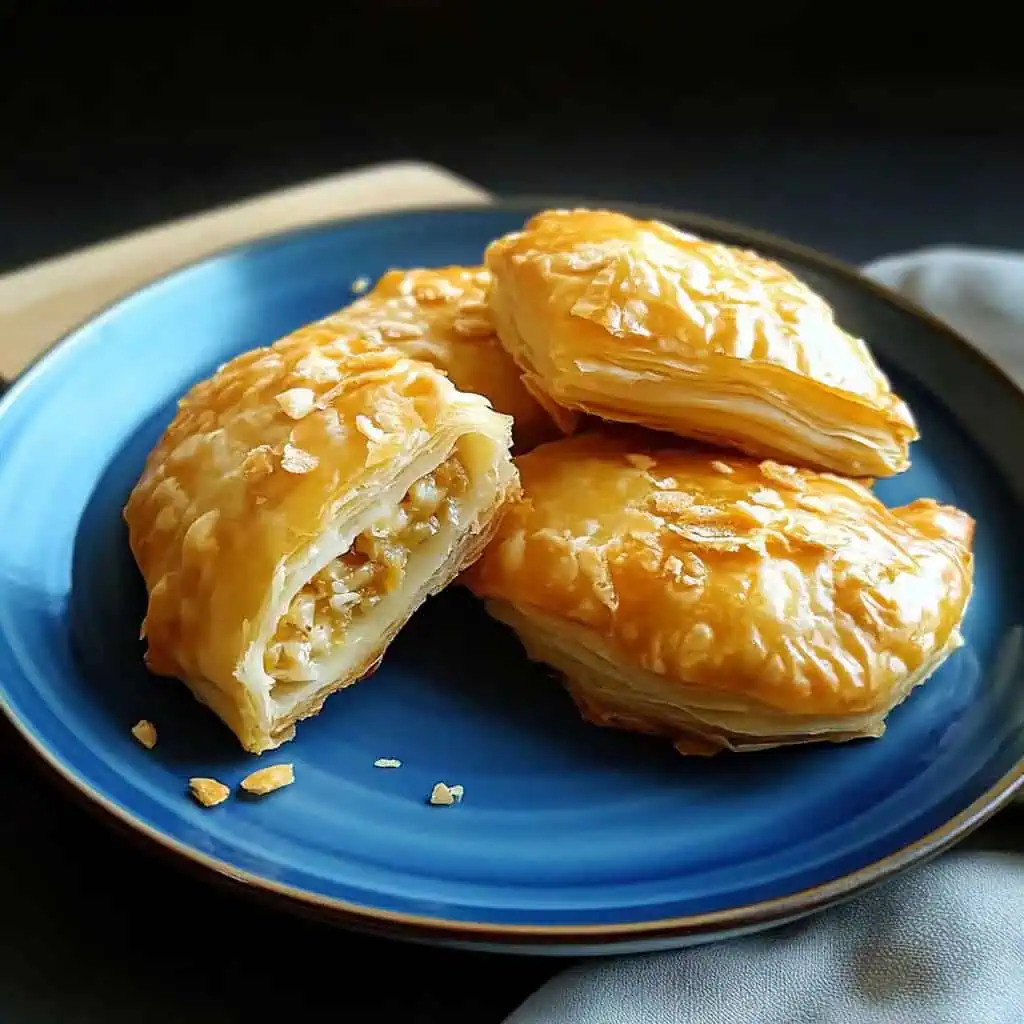
- Flaky, buttery layers that melt in your mouth
- Perfect balance of sweet and savory flavors
- Make restaurant-quality hopia at home for a fraction of the cost
- Great make-ahead snack or pasalubong (gift)
- Detailed steps ensure success even for beginners
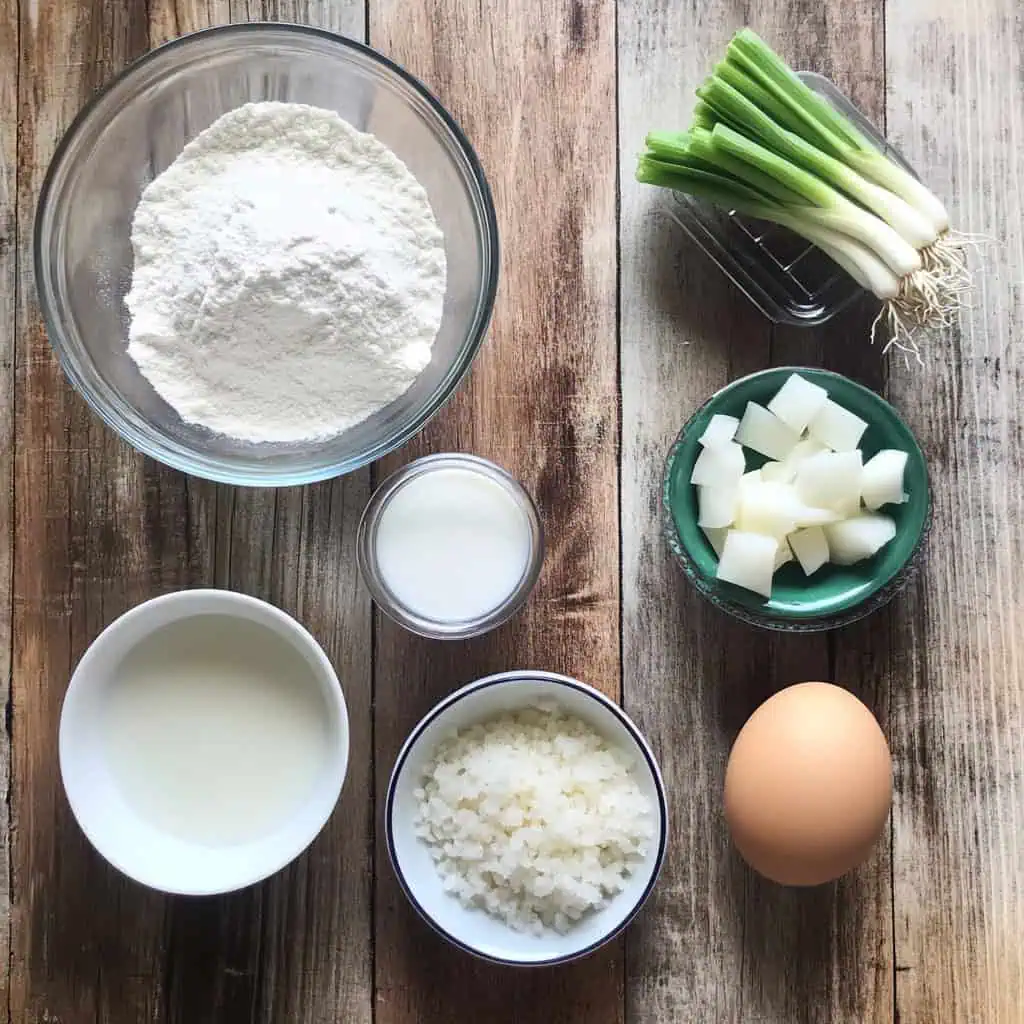
Ingredients
The combination of all-purpose flour, lard, and layering technique creates the signature flaky texture that makes hopia irresistible. The pork-flavored filling balances sweet and savory notes perfectly, while the egg wash gives these pastries their beautiful golden finish.
Each ingredient plays a crucial role in achieving that authentic taste and texture that rivals even the most popular hopia brands.
For the Flaky Dough (Outer Layer):
- 4 cups (500g) all-purpose flour
- 1 teaspoon (5g) salt
- 1 cup (240ml) vegetable oil
- 1 cup (240ml) water, room temperature
For the Roll-in Fat Layer (Inner Paste):
- 3 cups (375g) all-purpose flour
- 1 cup (240g) lard or butter
- 1 cup (200g) sugar
For the Pork Filling:
- 200g pork skin
- ½ cup onion, finely chopped
- 1 tablespoon garlic, minced
- ¾ cup (95g) all-purpose flour
- 1 teaspoon (5g) salt
- ¾ cup (150g) white sugar
- ¼ cup (60ml) pork oil or cooking oil
- ½ cup (120ml) evaporated milk
- 1 cup (240ml) water
For the Finish:
- 1 egg yolk, beaten
- 2 tablespoons sesame seeds
Equipment
- Stand mixer or large mixing bowl: For properly combining the dough ingredients
- Rolling pin: Essential for creating thin, even layers of dough
- Pastry cutter or sharp knife: For precisely cutting dough portions
- Baking sheets: To hold the hopia while baking
- Pastry brush: For applying the egg wash evenly
- Fork: To create decorative holes that allow steam to escape
- Measuring cups and spoons: For accurate ingredient measurements
- Strainer: To sift flour for a smoother dough
- Spatula: For mixing ingredients without overworking them
- Heavy-bottom pan: Creates even heat distribution when cooking the filling
- Oven thermometer: Ensures accurate baking temperature for perfect results
How To Make
- Take all ingredients out of the refrigerator 30 minutes before starting to reach room temperature.
- Sift 4 cups flour through a strainer into a large mixing bowl. Create a well in the center and add 1 cup water, 1 teaspoon salt, and 1 cup vegetable oil. Mix gently with a spatula until just combined. Knead to form a ball, place in a greased bowl, cover with a clean cloth, and let rest for 30 minutes.
- Mix 3 cups flour, 1 cup sugar, and 1 cup lard in a separate bowl until it becomes a smooth paste. Set aside.
- Roll the rested dough on a lightly floured surface into a 1-inch thick rectangle. Trim edges to make clean lines. Spread the paste mixture over ⅔ of the dough, leaving one-third uncovered. Fold the uncovered part over the center, then fold the remaining third on top, like folding a letter. Roll back to original size and repeat this folding two more times. Let rest for 5 minutes.
- For the filling, heat ¼ cup pork oil in a pan. Add ½ cup chopped onions and 1 tablespoon minced garlic, cook until fragrant. Add ¾ cup sugar and ¾ cup flour, mix well. Pour in ½ cup evaporated milk and 1 cup water. Keep stirring until mixture becomes dry and well-combined. Let cool completely.
- Heat oven to 200°C (392°F). Cut the rested dough into two long pieces. Cut each piece into 6 equal parts. Roll each piece into a circle. Put one tablespoon of filling in the center, gather edges to make a ball, then flatten slightly.
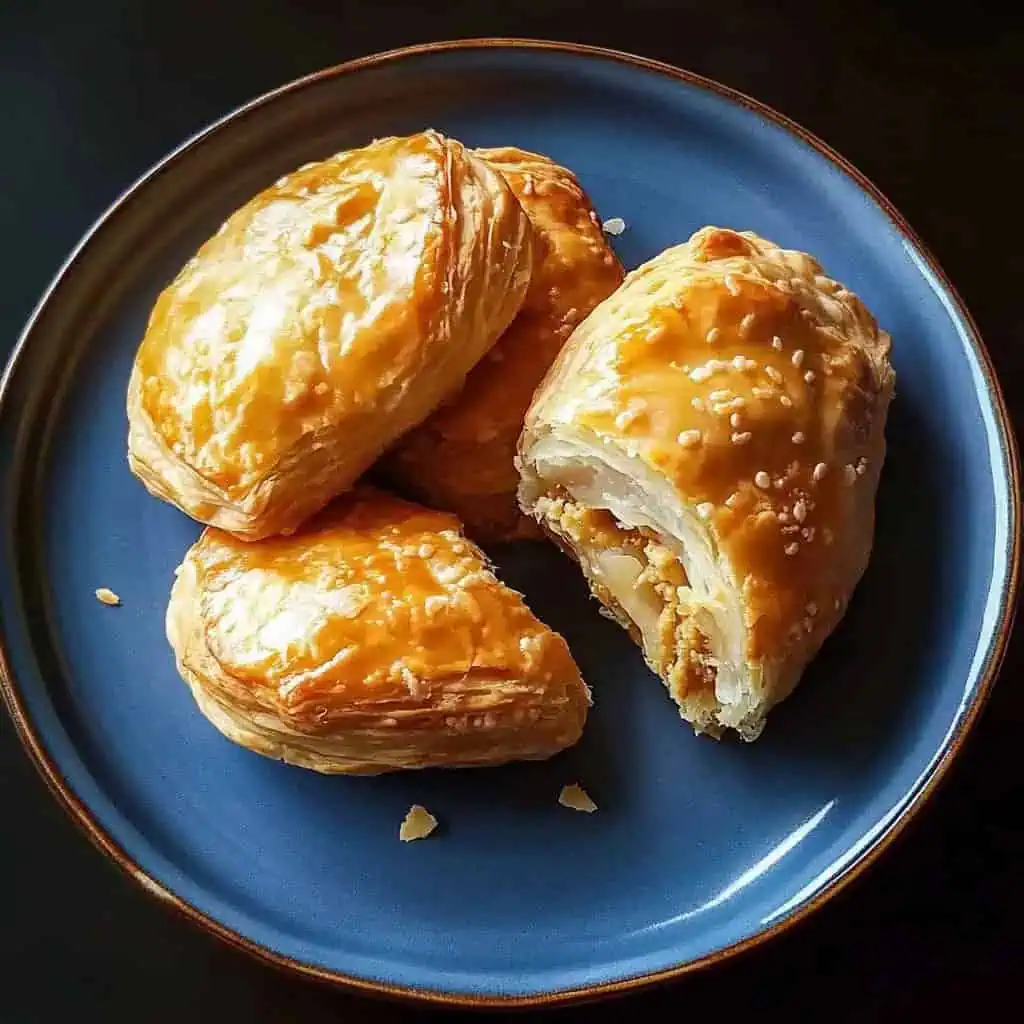
- Place on a greased baking sheet. Brush tops with beaten egg yolk and sprinkle with sesame seeds. Poke holes on top with a fork. Bake for 25-30 minutes or until golden brown.
- Let cool for 5-10 minutes before eating. Best served warm with coffee or tea.

Tips from Lola's Kitchen
- Temperature matters: Keep ingredients at room temperature for best results when working with the dough.
- Handle with care: Don't overwork the dough to ensure maximum flakiness in the final product.
- Patience pays off: The resting periods are crucial for developing proper texture, so don't skip them.
- Authentic flavor boost: Use real lard for the most authentic flavor profile, though butter works well too.
- Filling control: Chill the filling slightly before assembling for easier handling and less leakage.
- Plan ahead: Make extra filling to freeze for future use - it keeps well for up to 3 months.
- Even browning: For perfectly golden hopia, rotate your baking sheet halfway through baking time.
- Cool slightly: Allow your hopia to cool for 5-10 minutes before serving - the filling will be very hot!
Substitutions
- No lard? Butter can replace lard in the roll-in layer, though the texture will be slightly different.
- Vegetarian option: Use vegetable shortening instead of lard and vegetable oil instead of pork oil.
- Milk alternatives: Fresh milk can replace evaporated milk in equal amounts.
- Sugar swap: Brown sugar can substitute white sugar for a deeper, more caramel-like flavor.
- Oil options: Any neutral-flavored oil can replace vegetable oil in the dough.
- Filling variations: Try mung bean (monggo), ube (purple yam), or winter melon for different traditional flavors.
Troubleshooting
- Sticky dough? If your dough feels too sticky, gradually add more flour while kneading until it reaches a workable consistency.
- Filling leaking out? Make sure to seal the edges properly and avoid overfilling each piece.
- Uneven browning? Your oven may have hot spots - rotate the pan halfway through baking for more even results.
- Pastry too dry? You may have overbaked - reduce the baking time by 3-5 minutes next time or lower your oven temperature slightly.
- Not flaky enough? The layering technique might need improvement - make sure you're folding properly and not skipping rest periods.
- Filling too runny? Cook it a bit longer until it thickens to a paste-like consistency.
Storage & Reheating
- Counter storage: Store in an airtight container at room temperature for up to 3-4 days.
- Refrigeration: Refrigerate in an airtight container for up to 1 week.
- Freezer-friendly: Freeze unbaked hopia for up to 3 months. Thaw in refrigerator overnight before baking.
- Oven reheating: For the best texture, reheat in a preheated oven at 150°C for 5-7 minutes.
- Quick reheat: Microwave for 15-20 seconds if you're in a hurry, but note that the texture won't be as crisp.
- Refreshing stale hopia: Sprinkle with a few drops of water before reheating in the oven to restore moisture.
FAQ
Why is it called Hopiang Baboy if there's no pork meat?
The name comes from the use of pork lard which gives it its distinctive flavor, not from containing actual pork meat.
Can I make this vegetarian?
Yes, substitute vegetable shortening for lard and vegetable oil for pork oil for a vegetarian version.
How do I know when my hopia is done baking?
The pastry should be golden brown all over and firm to the touch. The bottom should also be browned.
Can I make the dough ahead of time?
Yes, you can refrigerate the prepared dough for up to 24 hours, but bring it back to room temperature before continuing with the recipe.
Why is my hopia not as flaky as store-bought ones?
The flakiness comes from proper layering technique and resting periods. Make sure you're following the folding instructions carefully and not rushing the process.
Can I use a food processor to make the dough?
While possible, hand mixing is preferred for this recipe as it gives you better control over the dough development and prevents overworking.
Is there a way to make mini versions for parties?
Yes! Simply divide the dough into smaller portions and reduce the baking time by about 5-7 minutes, checking frequently to prevent overbaking.
How much filling should I put in each hopia?
About 1 tablespoon is ideal - too much will cause leakage, while too little will result in dry hopia.
Related
Looking for other recipes like this? Try these:


Authentic Hopiang Baboy Recipe (Hopia with Pork-Flavored Filling)
Equipment
- Stand mixer or large mixing bowl (Para sa pagmasa ng dough)
- Rolling pin (Pambaklas ng masa)
- Pastry cutter or sharp knife (Pamputol ng dough)
- Baking sheets (Panghorno)
- Pastry brush (Para sa egg wash)
- Fork (Panbutas sa ibabaw ng hopia)
- Measuring cups and spoons (Panukat)
- Strainer [Salaan]
- Spatula (Panghalo)
- Heavy-bottom pan (for filling)
- Oven thermometer (for accurate temperature)
Ingredients
For the Flaky Dough (Panlabas na Masa)
- 4 cups all-purpose flour 500g
- 1 teaspoon salt 5g
- 1 cup vegetable oil 240ml
- 1 cup water 240ml, room temperature
For the Roll-in Fat Layer (Panloob na Pasta)
- 3 cups all-purpose flour 375g
- 1 cup lard or butter 240g
- 1 cup sugar 200g
For the Pork Filling (Palaman)
- 200 g pork skin Balat ng baboy
- ½ cup onion finely chopped (Sibuyas)
- 1 tablespoon garlic minced (Bawang)
- ¾ cup all-purpose flour 95g
- 1 teaspoon salt 5g
- ¾ cup white sugar 150g
- ¼ cup pork oil or cooking oil 60ml
- ½ cup evaporated milk 120ml
- 1 cup water 240ml
For the Finish
- 1 egg yolk beaten (Untuk pamahid)
- 2 tablespoons sesame seeds Binhing sesame
Instructions
- Take all ingredients out of the refrigerator 30 minutes before starting to reach room temperature.
- Sift 4 cups flour through a strainer into a large mixing bowl. Create a well in the center and add 1 cup water, 1 teaspoon salt, and 1 cup vegetable oil. Mix gently with a spatula until just combined. Knead to form a ball, place in a greased bowl, cover with a clean cloth, and let rest for 30 minutes.
- Mix 3 cups flour, 1 cup sugar, and 1 cup lard in a separate bowl until it becomes a smooth paste. Set aside.
- Roll the rested dough on a lightly floured table into a 1-inch thick rectangle. Trim edges to make clean lines. Spread the paste mixture over ⅔ of the dough, leaving one-third uncovered. Fold the uncovered part over the center, then fold the remaining third on top, like folding a letter. Roll back to original size and repeat this folding two more times. Let rest for 5 minutes.
- For the filling, heat ¼ cup pork oil in a pan. Add ½ cup chopped onions and 1 tablespoon minced garlic, cook until fragrant. Add ¾ cup sugar and ¾ cup flour, mix well. Pour in ½ cup evaporated milk and 1 cup water. Keep stirring until mixture becomes dry and well-combined. Let cool completely.
- Heat oven to 200°C (392°F). Cut the rested dough into two long pieces. Cut each piece into 6 equal parts. Roll each piece into a circle. Put one tablespoon of filling in the center, gather edges to make a ball, then flatten slightly and fold in half.
- Place on a greased baking sheet. Brush tops with beaten egg yolk and sprinkle with sesame seeds. Poke holes on top with a fork. Bake for 25-30 minutes or until golden brown.
- Let cool for 5-10 minutes before eating. Best served warm with coffee or tea. Store in an airtight container and eat within 4 days.
- If you want to make crispy pork skin for extra flavor: Boil pork skin until soft, refrigerate overnight, cut into small pieces, fry until crispy, save the oil, and add the crispy bits to your filling mixture.
Tips from Lola's Kitchen
- Keep ingredients at room temperature for best results
- Don't overwork the dough to ensure flakiness
- Rest periods are crucial for proper texture
- Use real lard for authentic flavor
- Chill the filling slightly for easier handling
- Make extra filling to freeze for future use
Nutrition
The Story Behind Hopiang Baboy
Long before food delivery apps and corner bakeries dotted Metro Manila's streets, Hopiang Baboy made its way into Filipino hearts through the skilled hands of Fujianese immigrants in the early 20th century. This beloved pastry, known in Chinese as "豬肉餅" (zhu rou bing), translates to "good pastry" and represents a delicious chapter in our country's rich culinary fusion history.
In the bustling streets of Binondo, Manila's historic Chinatown, Chinese bakeries began crafting these flaky, pork-flavored treats that would soon become a Filipino merienda staple. Despite its name suggesting a meat-filled pastry, Hopiang Baboy's unique character comes from the use of pork lard rather than actual pork meat – a clever culinary technique that delivers rich flavor while keeping the pastry affordable and accessible to everyone.
The same pastry found its way to Indonesia, where it's called Bakpia, showcasing how Chinese culinary traditions spread throughout Southeast Asia. In the Philippines, legendary establishments like Eng Bee Tin and Tipas Hopia transformed this humble pastry into a cultural icon. Today, you'll find Hopiang Baboy everywhere from high-end bakeries in Greenhills to small neighborhood panaderias in the provinces, each bite telling a story of cultural adaptation and Filipino ingenuity.
What makes Filipino Hopiang Baboy truly special is its evolution from its Chinese roots. While maintaining the traditional flaky layers and technique, Filipino bakers adapted the recipe to local tastes, creating a perfect balance of sweet and savory that pairs beautifully with afternoon coffee or morning tsokolate. Modern variations now include ube, munggo, and even cheese fillings, but the classic pork-flavored version remains a testament to our enduring love for this Filipino-Chinese pastry tradition.
Whether enjoyed fresh from the oven or as pasalubong from Manila, Hopiang Baboy continues to bring families together, one flaky bite at a time. Its journey from Chinese teahouses to Filipino homes mirrors our own story of cultural integration, showing how food bridges traditions and creates new memories with each generation.

Comments
No Comments