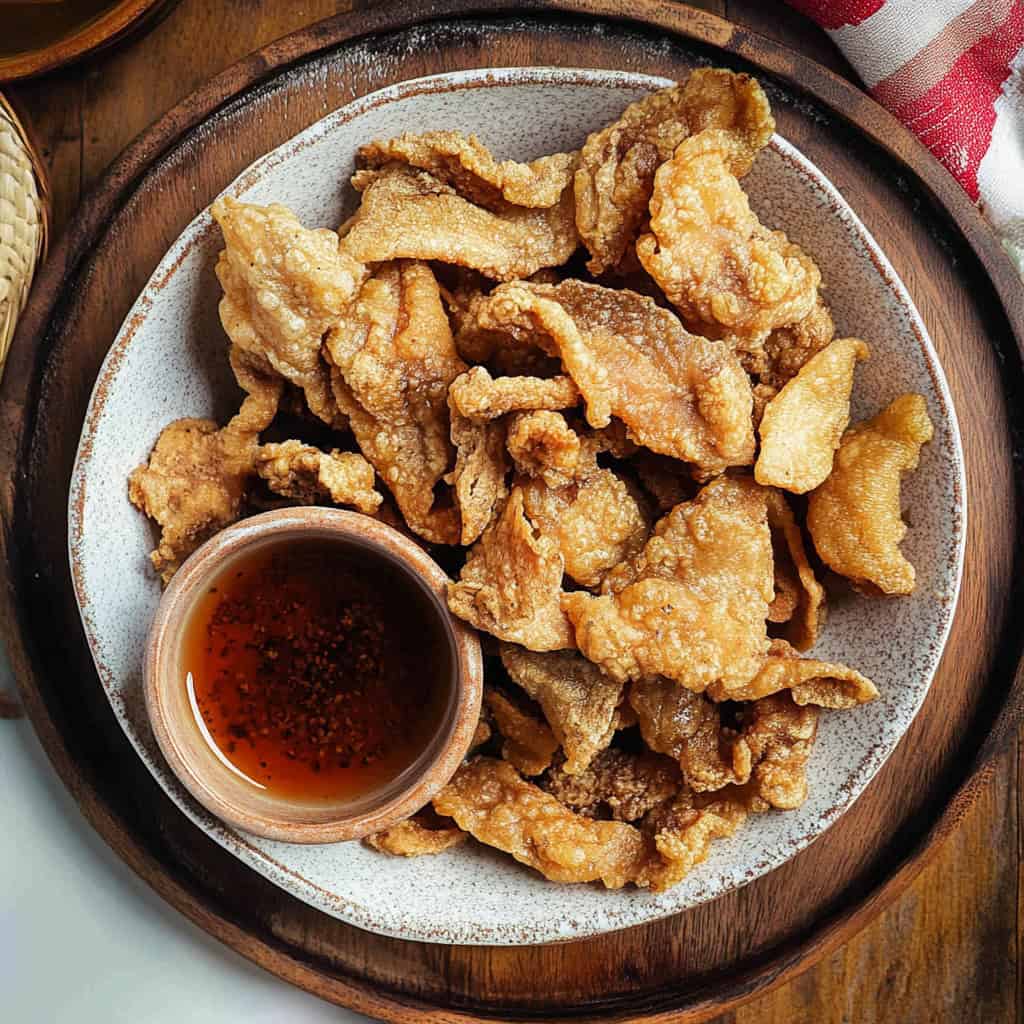
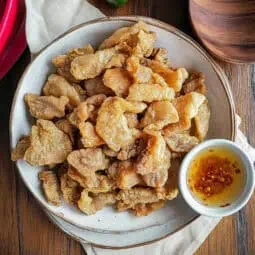
As a home cook who's perfected this Crispy Chicken Skin Chicharon recipe after countless experiments, I can confidently say this Filipino favorite is worth every minute of preparation.
Despite my doctor's gentle reminders about my blood pressure, this golden-brown delicacy continues to be my guilty pleasure, and for good reason. The satisfying glass-like crackle, the perfectly seasoned bite, and that irresistible aroma that fills your kitchen are simply unmatched.
After years of buying overpriced chicken skin chicharon from local restaurants, I've finally mastered creating this beloved pulutan at home, transforming humble chicken skins into a crowd-pleasing snack that rivals any commercial version.
This Filipino crispy chicken skin recipe delivers restaurant-quality results at a fraction of the cost.
Jump to:
Why You'll Love This Recipe
- Incredibly Crunchy: Master the three-stage cooking process for that signature glass-like crunch
- Budget-Friendly: Turn kitchen scraps into a gourmet snack
- Versatile: Perfect as pulutan, garnish, or cooking ingredient
- Keto-Friendly: Zero net carbs make it ideal for low-carb diets
- Restaurant Quality: Achieve the same crunch and flavor as famous Filipino restaurants
- Make-Ahead Friendly: Can be prepared in stages
- Customizable: Multiple seasoning variations to suit your taste
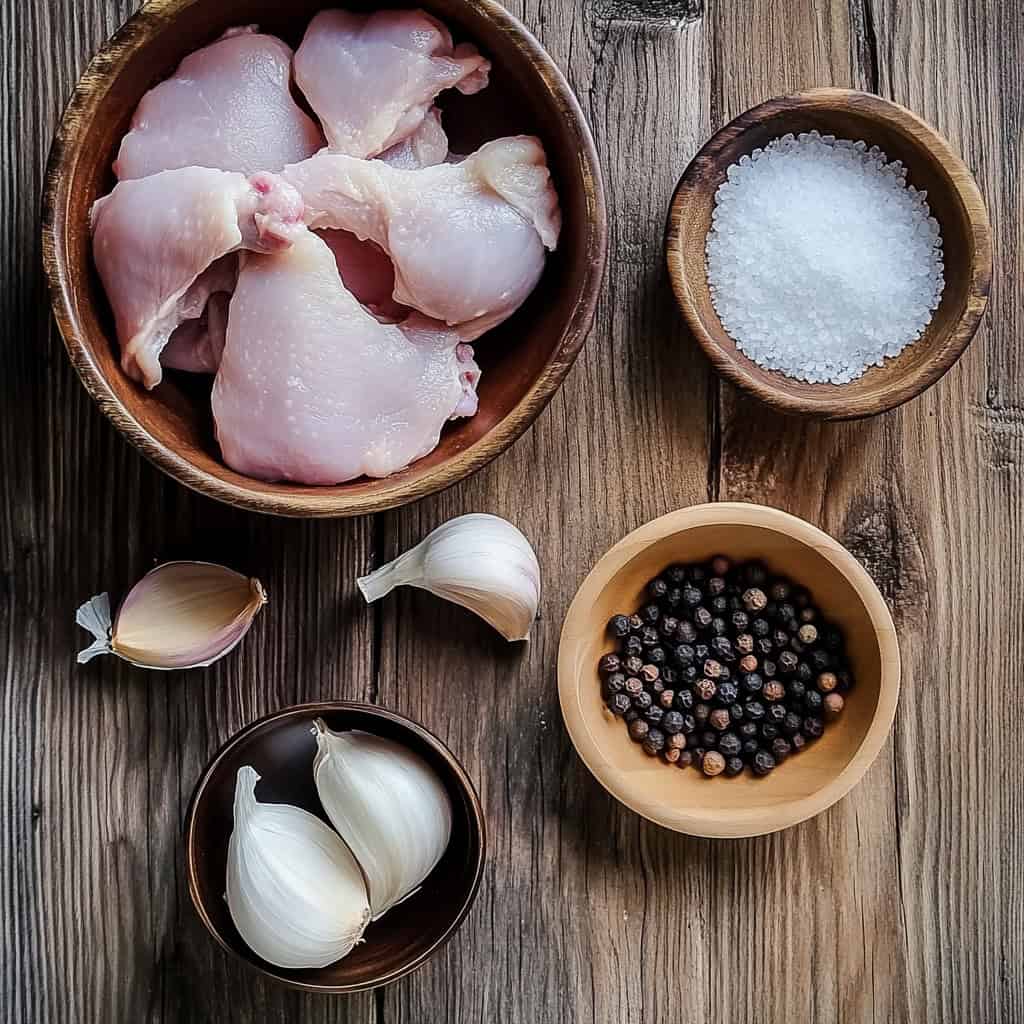
Ingredients
This recipe uses simple yet powerful ingredients that work together to create the perfect chicken skin chicharon. The vinegar in the boiling liquid helps tenderize the skins while adding subtle tanginess.
Garlic and peppercorns infuse depth of flavor during the initial cooking phase without overpowering the natural chicken taste. Salt enhances all flavors while helping to draw out moisture, crucial for achieving that glass-like crispiness. The choice of lard or canola oil for frying provides the high smoke point needed for the perfect puff and golden color.
For the dipping sauce, raw garlic and chile pepper create a bright, punchy contrast that cuts through the richness of the fried skins, making each bite perfectly balanced.
Main Ingredients:
- 3 pounds chicken skin
- 2 cups water
- ¼ cup vinegar
- 4 cloves garlic, peeled and crushed
- ½ teaspoon whole peppercorns
- 1 teaspoon salt
- Lard or canola oil for frying
For Spiced Vinegar (Sawsawan):
- ½ cup vinegar
- 2 cloves garlic, minced
- 1 small chili pepper, chopped
- ¼ teaspoon ground black pepper
Equipment Needed
- Large pot: Used for the initial boiling process to tenderize the chicken skins with aromatics and vinegar
- Baking sheet: Provides a flat surface for arranging the skins during the crucial drying phase
- Wire rack: Elevates the skins for proper air circulation during drying and cooling
- Deep-frying thermometer: Ensures precise oil temperature for perfect crispiness (optional but recommended)
- Slotted spoon: Helps remove the skins from liquids while leaving aromatics behind
- Paper towels: Used for initial drying and absorbing excess oil
How To Make
- Begin by thoroughly cleaning the chicken skins, removing any excess fat or meat particles. Pat them dry with paper towels and cut into 4-inch pieces. This careful preparation ensures even cooking and maximum crispiness.
- For Phase 1 (Tenderizing), combine water, vinegar, crushed garlic, whole peppercorns, and salt in a large pot. Add the cleaned chicken skins and bring to a boil. Reduce heat and simmer for 15-20 minutes until the skins are tender but still hold their shape. Remove the skins with a slotted spoon and discard the aromatics.
- Phase 2 (Drying) focuses on removing moisture from the skins. Choose either the oven-drying method: arrange skins on a wire rack set over a baking sheet and dry in oven at 180°F (82°C) for 2-3 hours until leathery but still flexible. Alternatively, use the refrigerator method by arranging skins on a baking sheet and refrigerating uncovered for 8-12 hours.
- For Phase 3 (Frying), heat lard or canola oil to 350-375°F (175-190°C). Fry the dried skins in small batches until they puff up and turn golden brown. You'll know they're ready when the sizzling sound decreases. Remove with a slotted spoon and drain on a wire rack, not paper towels, to maintain crispiness.
- While the chicharon cools, prepare the spiced vinegar by combining vinegar, minced garlic, chopped chili pepper, and ground black pepper. Let the chicharon cool completely to achieve maximum crunchiness before serving with the prepared dipping sauce.

Tips from Lola's Kitchen
- Save as you go: Collect and freeze chicken skins when preparing other dishes for future batches
- Fat removal is key: After boiling, scrape excess fat from the skins for crispier results
- Patience during drying: Never skip or rush the drying process – it's absolutely crucial for achieving maximum crunchiness
- Listen for doneness: The sizzling sound will noticeably decrease when the skins are properly fried
- Temperature matters: If your oil isn't hot enough (350-375°F), the skins won't puff properly
- Small batches win: Avoid overcrowding the pot when frying to maintain oil temperature
- Rack, not towels: Cool on a wire rack instead of paper towels to preserve crispiness
- Seasoning timing: If adding dry seasonings, sprinkle immediately after frying while still hot
Substitutions
- Oil alternatives: Vegetable oil, peanut oil, or beef tallow can replace lard or canola oil
- Vinegar options: Apple cider vinegar or coconut vinegar work well in place of white vinegar
- Aromatics: Add bay leaves, lemongrass, or whole star anise to the boiling liquid for different flavor profiles
- Low-sodium version: Reduce salt by half and compensate with dried herbs or garlic powder
- Spice variations: Substitute chile peppers with chile flakes or hot sauce in the dipping vinegar
Troubleshooting
Problem: Not crispy enough
- Cause: Insufficient drying time
- Solution: Return to oven for additional drying at 180°F until leathery
Problem: Too oily or greasy
- Cause: Oil temperature too low during frying
- Solution: Maintain steady 350-375°F oil temperature with a thermometer
Problem: Skins not puffing up
- Cause: Either excess fat remaining or oil not hot enough
- Solution: Scrape fat more thoroughly after boiling and verify oil temperature
Problem: Burning too quickly
- Cause: Oil temperature too high
- Solution: Lower heat and maintain 350-375°F with a thermometer
Problem: Chewy texture instead of crispy
- Cause: Overboiled skins or insufficient drying
- Solution: Reduce boiling time in future batches and ensure complete drying
Storage & Reheating
- Room temperature: Stays crispy for 2-3 hours in an airtight container
- Refrigerator: Store in a sealed container with moisture absorbers for up to 5 days
- Freezer (unfried skins): Store dried, unfried skins for up to 3 months
- Reheating: Place in a 350°F oven for 3-5 minutes to restore crispiness (avoid microwave)
- Make ahead: Complete through drying stage and store dried skins until ready to fry
FAQ
Can I air-fry chicken skin chicharon?
Yes, but traditional deep-frying gives better results. If using an air fryer, preheat to 400°F and cook for 5-7 minutes, shaking the basket halfway through.
Why isn't my chicharon puffing up?
Ensure skins are completely dry and the oil is hot enough (350-375°F). Also check that you've removed enough fat from the skin during preparation.
How do I store chicken skins before cooking?
Collect and freeze raw skins in airtight containers or freezer bags for up to 3 months. Thaw completely before beginning the recipe.
Is this keto-friendly?
Yes, it's perfect for keto diets with zero net carbs. Just be sure to use a keto-friendly dipping sauce if desired.
Can I use chicken skins from any part of the chicken?
Yes, though back and thigh skins usually give the best results due to their size and fat content. Breast skins tend to be thinner and may cook faster.
How do I know when the oil is at the right temperature without a thermometer?
Drop a small piece of dried skin into the oil. If it sizzles immediately and floats to the top, the oil is ready. If it sinks and barely bubbles, the oil is too cool.
Can I add flavors directly to the chicharon?
Yes! Sprinkle your favorite seasonings (garlic powder, paprika, BBQ seasoning) immediately after frying while still hot so they adhere better.
Why did my chicharon lose its crispiness so quickly?
Exposure to humidity is the enemy of crispy chicharon. Store in airtight containers with moisture absorbers and avoid refrigerating fried chicharon when possible.
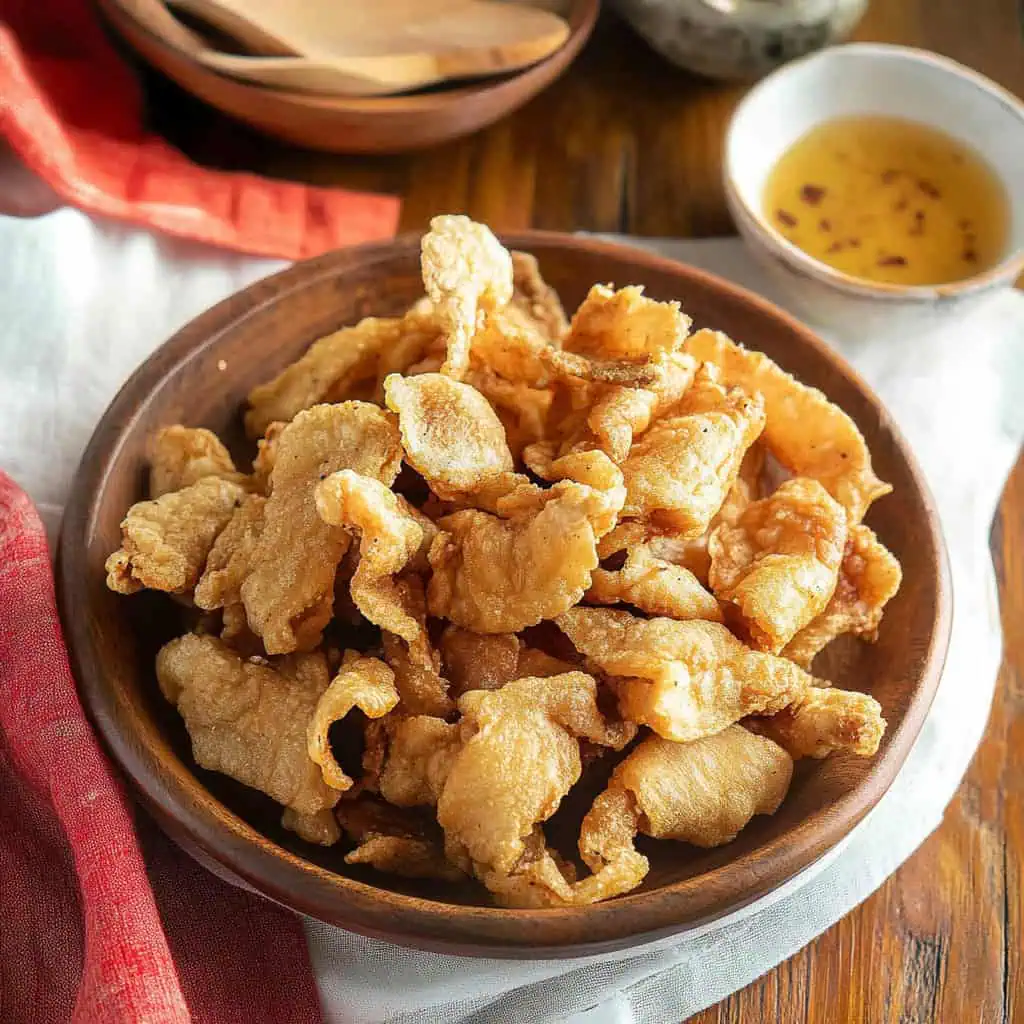
Crispy Chicken Skin Chicharon
Equipment
- Large pot [Malaking kaldero]
- Baking sheet (bandehang pampahangin)
- Wire rack (rakang pampatuyo)
- Deep-frying thermometer (optional but recommended)
- Slotted spoon (sandok na may butas)
- Paper towels
Ingredients
Main Ingredients (Mga Sangkap)
- 3 pounds chicken skin balat ng manok
- 2 cup water tubig
- ¼ cup vinegar suka
- 4 cloves garlic peeled and crushed (butil ng bawang, dikdik)
- ½ teaspoon whole peppercorns paminta
- 1 teaspoon salt asin
- Lard or canola oil for frying mantika
For Spiced Vinegar (Sawsawang Suka)
- ½ cup vinegar
- 2 cloves garlic minced
- 1 small chili pepper chopped (siling labuyo)
- ¼ teaspoon ground black pepper
Instructions
- Begin by thoroughly cleaning the chicken skins (balat ng manok), removing any excess fat or meat particles. Pat them dry with paper towels and cut into 4-inch pieces. This careful preparation ensures even cooking and maximum crispiness.
- For Phase 1 (Pagpapalambot), combine water (tubig), vinegar (suka), crushed garlic (butil ng bawang, dikdik), whole peppercorns (paminta), and salt (asin) in a large pot. Add the cleaned chicken skins and bring to a boil. Reduce heat and simmer for 15-20 minutes until the skins are tender but still hold their shape. Remove the skins with a slotted spoon (sandok na may butas) and discard the aromatics.
- Phase 2 (Pagpapatuyo) focuses on drying the skins. Choose either oven-drying method: arrange skins on a wire rack (rakang pampatuyo) set over a baking sheet and dry in oven at 180°F (82°C) for 2-3 hours until leathery but still flexible. Alternatively, use the refrigerator method by arranging skins on a baking sheet and refrigerating uncovered for 8-12 hours.
- For Phase 3 (Pagpiprito), heat lard or canola oil (mantika) to 350-375°F (175-190°C). Fry the dried skins in small batches until they puff up and turn golden brown. You'll know they're ready when the sizzling sound decreases. Remove with a slotted spoon and drain on a wire rack, not paper towels, to maintain crispiness.
- While the chicharon cools, prepare the spiced vinegar (sawsawang suka) by combining vinegar, minced garlic, chopped chili pepper (siling labuyo), and ground black pepper. Let the chicharon cool completely to achieve maximum crunchiness before serving with the prepared sawsawan.
Tips from Lola's Kitchen
- Save chicken skins when preparing other dishes by storing them in the freezer
- Scrape excess fat after boiling for crispier results
- Never skip the drying process – it's crucial for crunchiness
- If skins aren't puffing, your oil isn't hot enough
- Listen for the sizzling sound to decrease – it indicates the skins are nearly done
Nutrition
The Story Behind Chicken Skin Chicharon
In the heart of Filipino households, where resourcefulness meets culinary genius, Chicken Skin Chicharon (Tsitsarong Manok) emerged as a brilliant testament to our ancestors' "zero-waste" cooking philosophy. Long before sustainability became trendy, Filipino home cooks were already transforming humble chicken skin – often discarded in modern kitchens – into a sought-after delicacy that would rival even the classic pork chicharon.
The art of making chicharon arrived in the Philippines through Spanish colonizers, who brought their pork-based chicharrón in the 16th century. However, Filipino ingenuity soon adapted this technique to various proteins, with chicken skin becoming a popular alternative that was both more affordable and widely available. In traditional Filipino carinderia and local watering holes, Tsitsarong Manok quickly earned its place as a beloved pulutan (bar food) alongside cold San Miguel beer.
What makes Chicken Skin Chicharon truly remarkable is its three-stage cooking process – a method perfected through generations. The initial boiling with native vinegar (suka) and aromatics isn't just about cooking; it's a crucial step that infuses flavor while preparing the skin for its transformation. The subsequent drying phase, traditionally done under the sun but now adapted to modern kitchen methods, creates the foundation for that distinctive glass-like crunch. The final deep-frying stage is where magic happens – watching chicken skin balloon into airy, crispy morsels is a sight that still captivates both veteran cooks and kitchen novices.
Today, Chicken Skin Chicharon has transcended its humble beginnings to become a versatile ingredient in modern Filipino cuisine. You'll find it crowning bowls of arroz caldo, adding crunch to pancit palabok, or crumbled over monggo soup. Its recent popularity among keto diet enthusiasts has introduced this traditional snack to a whole new audience, proving that sometimes the most sustainable foods are the ones our grandmothers have been making all along.
In an era where nose-to-tail cooking is gaining global recognition, this Filipino kitchen staple stands as a delicious reminder that sustainability and incredible flavor have always been at the heart of Philippine culinary heritage. Whether enjoyed with spiced vinegar as pulutan or used to elevate everyday dishes, Chicken Skin Chicharon represents the beautiful intersection of waste-free cooking, cultural tradition, and pure, crispy satisfaction.
Comments
No Comments