You know those nights when you're craving something special, but the usual adobo or menudo feels bitin? This Hawaiian Chicken recipe has become my family's go-to "lutong sosyal" that doesn't break the bank. Perfect for when you want to impress your bisita without spending hours in the kitchen, or when the kids are saying "nagsasawa na kami sa usual."
Growing up, this was our family's Sunday lunch star, the kind that makes everyone rush to the dining table when they smell that sweet-savory sauce hitting the pan. The best part? You can get all the ingredients from your local palengke or grocery, and yes, kahit Dole canned pineapple works perfectly!
Whether you're a busy mama looking for baon ideas that will make your kids actually finish their lunch, or simply wanting to level up your usual ulam rotation, this recipe hits that sweet spot between fancy restaurant taste and lutong bahay comfort. Para kang nag-order sa food court ng mall, pero mas masarap at mas tipid!
Jump to:
Why You'll Love This Recipe
- Perfect Balance: Sweet, savory, and tangy flavors in every bite
- Beginner-Friendly: Clear instructions with three foolproof cooking methods
- Budget-Friendly: Uses accessible ingredients from your local palengke
- Make-Ahead Friendly: Tastes even better the next day
- Versatile: Can be served for any occasion, from simple family meals to special celebrations
- Kid-Approved: The sweet-savory flavor profile is a hit with children
Ingredients
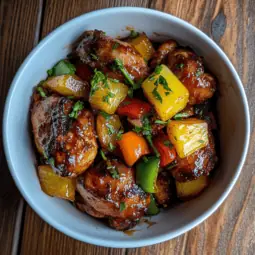
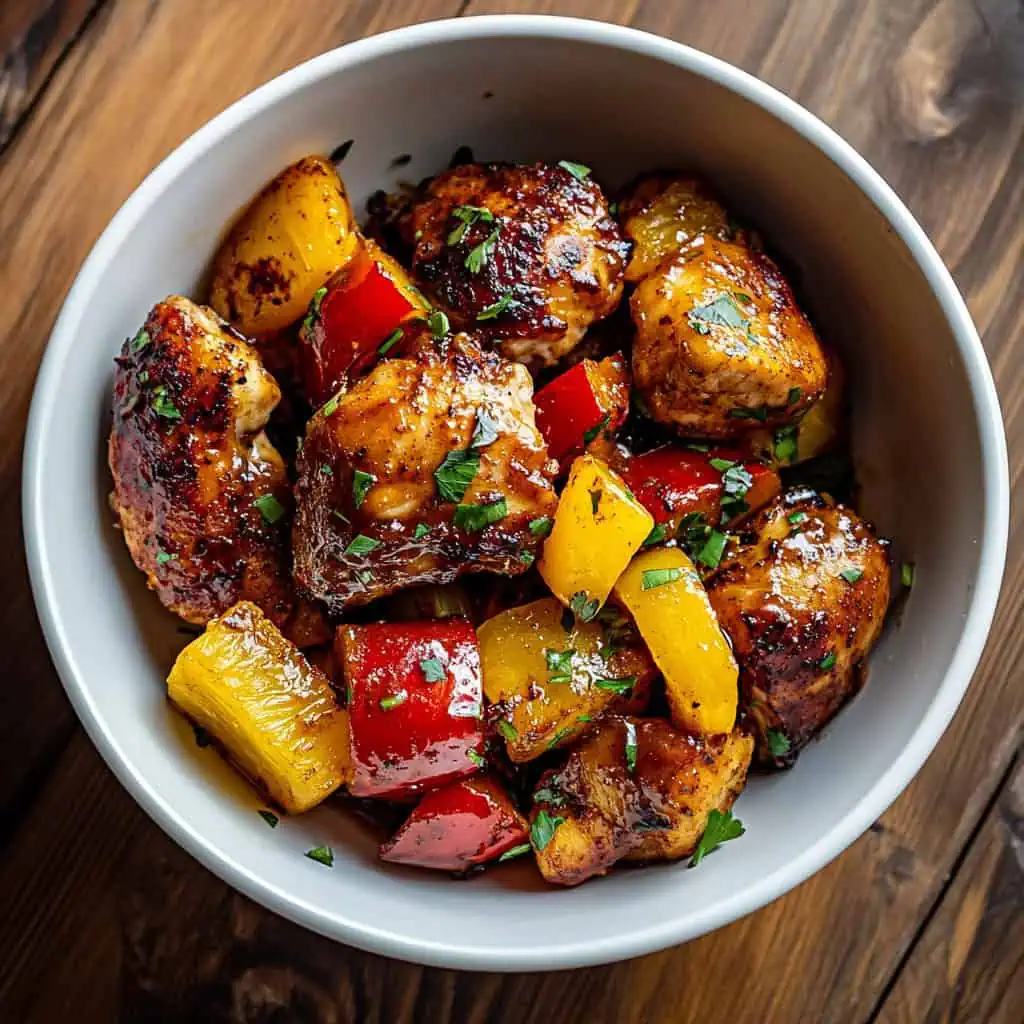
Each ingredient in this recipe serves a purpose in creating the perfect Hawaiian Chicken. Bone-in chicken thighs provide richness and stay juicy during cooking, while the colorful bell peppers add crunch and visual appeal.
Fresh ginger and garlic create an aromatic base, and the pineapple delivers that signature tropical sweetness. The sauce combines soy sauce for savory depth, pineapple juice for tanginess, and brown sugar for caramelization. Cornstarch thickens everything into a glossy sauce that clings beautifully to each piece of chicken.
- 3 pounds bone-in chicken thighs
- 1 green bell pepper
- 1 red bell pepper
- 1 medium onion
- 2-inch ginger
- 4 cloves garlic
- 1 can (20 oz) pineapple chunks with juice
For the Sauce:
- 1 cup pineapple juice
- ¼ cup light soy sauce
- ¼ cup chicken broth
- 2 tablespoons brown sugar
- 1 tablespoon cornstarch
- ¼ cup water
- Salt and pepper to taste
Equipment
- Large skillet or wok - A 12-inch skillet with high sides works best to accommodate all ingredients and allow for proper sauce reduction
- Sharp chef's knife - For cutting vegetables and trimming chicken
- Cutting board - Separate boards for meat and vegetables are ideal for food safety
- Measuring cups and spoons - For precise sauce ingredients
- Mixing bowls - Two bowls, one for the sauce mixture and one for the cornstarch slurry
- Tongs - For flipping and handling the chicken pieces
- Meat thermometer - To ensure chicken reaches the safe internal temperature of 165°F
- Wooden spoon or silicone spatula - For stirring without scratching your cookware
- Paper towels - For patting chicken dry before cooking
How To Make
- Let chicken thighs stand at room temperature for 15 minutes before cooking. While waiting, start preparing your ingredients. Cut your bell peppers into one-inch squares and slice the onions into wedges. Mince your garlic and ginger. Set all vegetables aside.
- Pat the chicken dry using paper towels and season generously with salt and black pepper. Prepare your sauce by combining pineapple juice, soy sauce, chicken broth, and brown sugar in a bowl. In a separate small bowl, mix cornstarch with water to make a slurry. Set both mixtures aside.
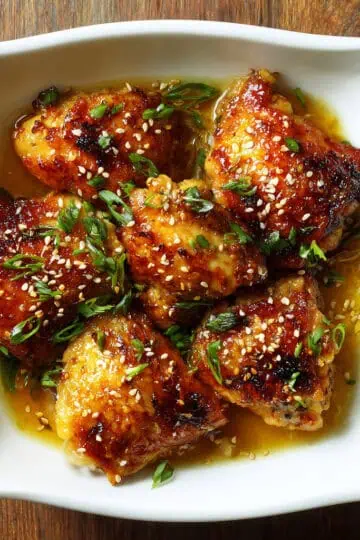
- Heat your pan over medium-high heat (350°F/175°C). Add cooking oil and wait until it shimmers but is not smoking. Place the chicken skin-side down first and cook for 4-5 minutes until golden brown. Turn the chicken over and cook the other side for another 3-4 minutes.
- Remove the browned chicken from the pan and set aside. Using the same pan with the chicken drippings, sauté minced garlic and ginger until fragrant, about 1 minute. Add onion wedges and cook until they become slightly translucent, about 2-3 minutes.
- Add your sliced bell peppers to the pan and cook for 1-2 minutes until they are crisp-tender. Be careful not to overcook them as they should maintain their bright color and slight crunch. Remove the vegetables and set aside.
- Return the chicken to the pan and pour in your prepared sauce mixture. Add the pineapple chunks with their juice. Bring to a gentle boil then reduce heat to medium-low (300°F/150°C). Cover and let simmer for 25-30 minutes, occasionally basting the chicken with the sauce.
- Check that the chicken is fully cooked by inserting a meat thermometer into the thickest part - it should read 165°F (74°C). You can also cut into the thickest piece; the meat should be white throughout with clear juices.
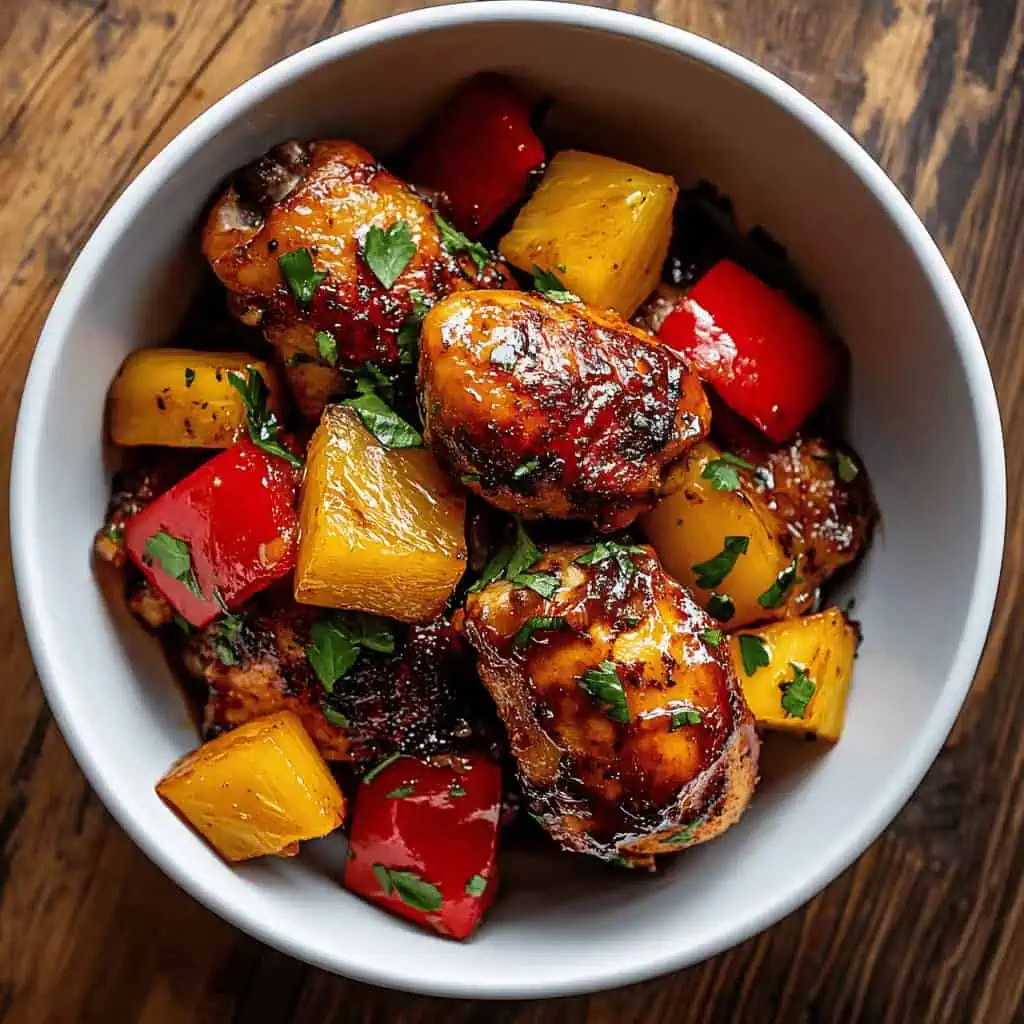
- Return the bell peppers and onions to the pan. Give your cornstarch slurry a quick stir (since it may have settled) and pour it into the pan while stirring constantly. Cook for another 3-5 minutes until the sauce thickens enough to coat the back of a spoon.
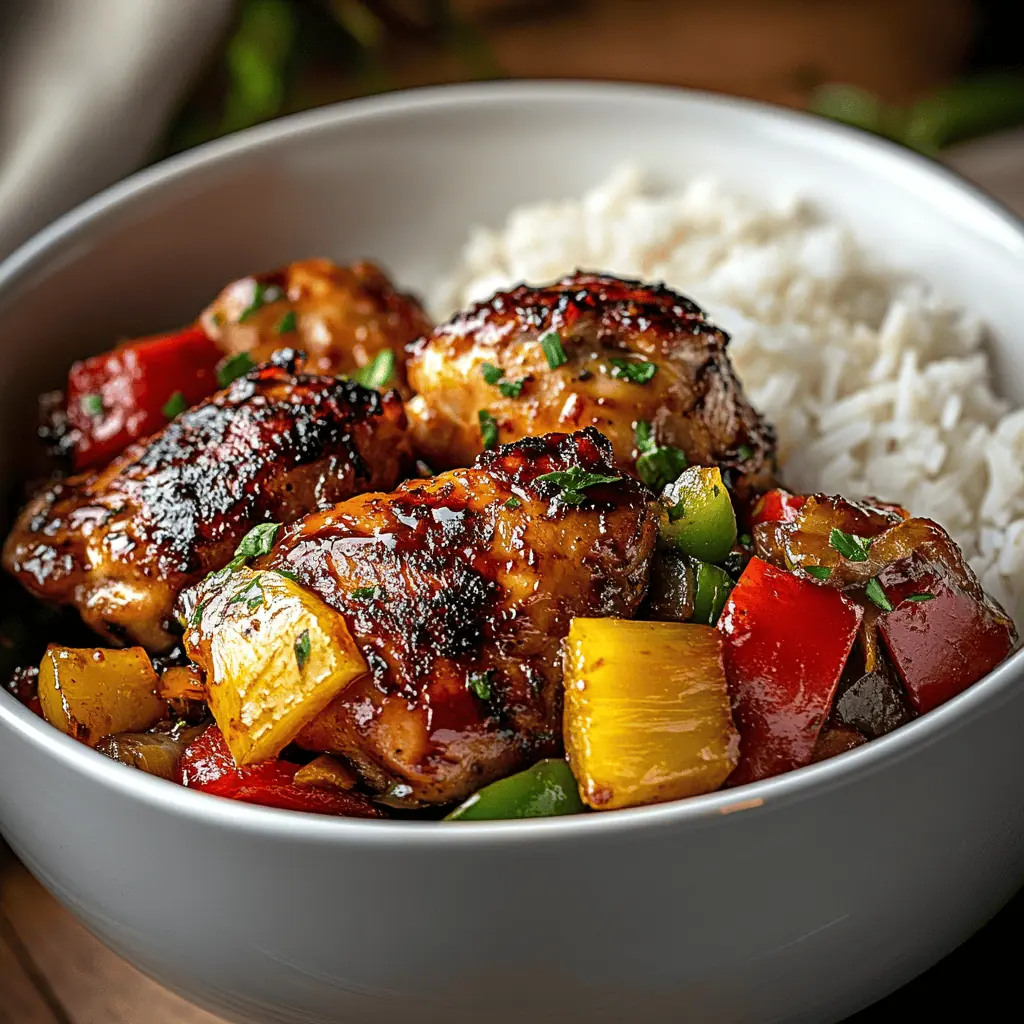
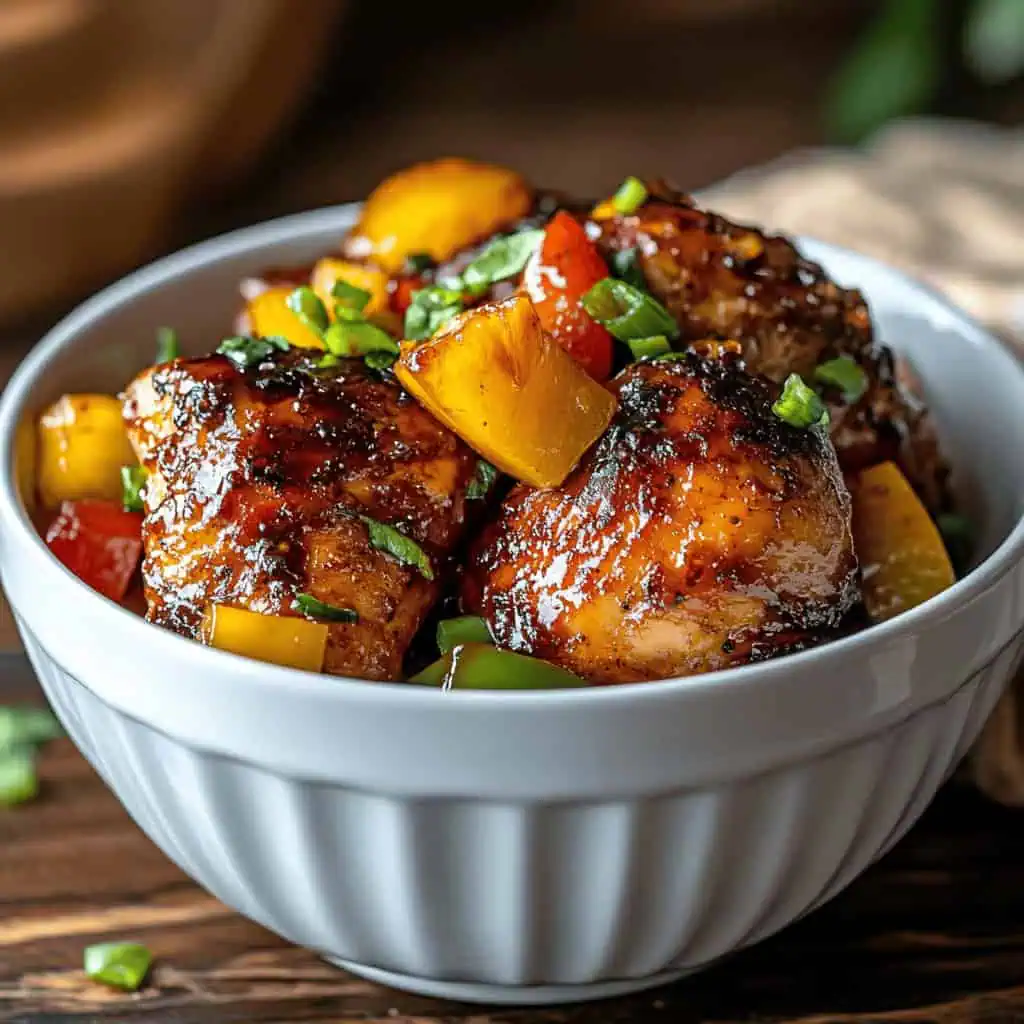
- Turn off the heat and let the dish rest for 5 minutes before serving. This allows the sauce to thicken further and the flavors to settle. Serve hot over steamed rice.

Tips from Lola's Kitchen
- Choose the right chicken: Bone-in thighs provide the most flavor, but trim excess fat before cooking for a cleaner sauce.
- Achieve perfect browning: Make sure to pat the chicken completely dry before seasoning and searing. This creates that beautiful golden crust.
- Protect your vegetables: Add bell peppers toward the end of cooking to maintain their vibrant color and slight crunch.
- Sauce consistency matters: The sauce should coat the back of a spoon but still flow smoothly—not too runny, not too thick.
- Rest before serving: Let the dish sit for 5 minutes after cooking. This allows the chicken to reabsorb juices and the sauce to reach the perfect consistency.
- Balance is key: If your sauce tastes too sweet, add a few drops of calamansi or lemon juice. If too tangy, balance with a pinch more brown sugar.
- Use the right heat: Medium-low heat during simmering prevents the sauce from reducing too quickly and keeps the chicken tender.
- Fresh is best: While convenient, pre-minced garlic and ginger don't provide the same aromatic punch as freshly minced.
Substitutions
- Chicken: Boneless thighs or breast can be used, but reduce cooking time by about 10 minutes. Cooking temperature remains the same.
- Pineapple: Fresh pineapple works beautifully (2 cups chunks plus 1 cup juice). If using fresh, add 1 tablespoon more brown sugar as canned is typically sweeter.
- Soy sauce: Coconut aminos or tamari make excellent gluten-free alternatives. Reduce salt elsewhere as tamari is saltier than regular soy sauce.
- Sweetener: Honey or maple syrup can replace brown sugar (use same amount). Each adds a subtle different flavor profile.
- Bell peppers: Any color combination works, or substitute with snow peas or sliced carrots for a different texture.
- Chicken broth: Vegetable broth or even water with a bouillon cube works in a pinch.
- Cornstarch: Arrowroot powder or potato starch can be substituted in equal amounts.
Troubleshooting
Sauce Too Thin?
- Add another 1-2 teaspoons cornstarch mixed with equal parts cold water
- Continue simmering uncovered for 5-10 minutes to reduce
- Next time, reduce liquid ingredients by 25%
Sauce Too Thick?
- Add 2-3 tablespoons chicken broth or pineapple juice
- Mix thoroughly and simmer for 2 minutes to incorporate
Chicken Not Tender?
- Extend cooking time by 10-15 minutes with lid on
- Ensure proper simmering temperature (300°F/150°C)
- Use smaller chicken pieces for more even cooking
- Add 2 tablespoons of water and continue cooking covered
Vegetables Too Soft?
- Next time, add them during the final 5 minutes of cooking
- Blanch them in ice water before adding to stop the cooking process
- Cut vegetables slightly larger to prevent overcooking
Too Sweet?
- Add 1-2 teaspoons of rice vinegar or lemon juice
- Increase soy sauce by 1 tablespoon
- Add a pinch of salt to balance sweetness
Too Salty?
- Add 1 teaspoon of brown sugar to balance
- Dilute with 2-3 tablespoons additional pineapple juice
- Add a small amount of unsalted chicken broth
Storage & Reheating
Storage:
- Refrigerator: Store in an airtight container for 3-4 days. The flavor actually improves overnight as the sauce ingredients meld.
- Freezer: Freeze for up to 3 months in a freezer-safe container. The sauce may separate slightly but will reconstitute when reheated.
Reheating:
- Stovetop: The best method. Place in a pan over medium heat with a splash of water or chicken broth. Cover and heat for 7-10 minutes, stirring occasionally.
- Microwave: Place in a microwave-safe container, cover loosely, and heat on 70% power for 2-3 minutes, stirring halfway through.
- Oven: Preheat to 350°F, place in an oven-safe dish, add 2 tablespoons of water, cover with foil, and heat for 15-20 minutes until hot throughout.
FAQ
Can I use fresh pineapple instead of canned?
Yes! Use 2 cups of fresh pineapple chunks and purchase pineapple juice separately for the sauce (about 1 cup needed). Fresh pineapple is less sweet than canned, so you might want to add an extra tablespoon of brown sugar.
How do I know when the chicken is done?
The most reliable way is using a meat thermometer - it should read 165°F (74°C) when inserted into the thickest part without touching bone. Alternatively, cut into the thickest piece; the meat should be white throughout with clear juices.
Can I make this dish ahead of time?
Absolutely! In fact, many people find it tastes better the next day as the flavors have more time to meld. Store in the refrigerator and reheat according to the instructions above.
Is this recipe gluten-free?
Not as written, but it's easy to adapt. Just substitute the soy sauce with gluten-free tamari and verify your chicken broth is gluten-free.
Can I double the recipe for a larger crowd?
Yes! Use a larger pan or dutch oven. The cooking process remains the same, but you may need to increase the initial browning time by working in batches to avoid overcrowding the pan.
What's the best way to serve this dish?
Traditional steamed jasmine rice is perfect, but it's also delicious with coconut rice, cauliflower rice (for low-carb), or even alongside a simple noodle dish.
Can I cook this in a slow cooker or Instant Pot?
For slow cooker: Brown the chicken first, then cook on low for 6 hours or high for 3-4 hours. Add vegetables during the last 30 minutes.
For Instant Pot: Use the sauté function to brown the chicken, then pressure cook for 10 minutes with a 10-minute natural release. Add vegetables and thicken the sauce using the sauté function after pressure cooking.
How spicy is this dish?
As written, it's not spicy at all, making it perfect for families with children. For heat lovers, add 1-2 teaspoons of sriracha or a sliced fresh chili when sautéing the garlic and ginger.
Related
Looking for other recipes like this? Try these:


Hawaiian Chicken (Manok na Hawaiian)
Ingredients
Main Ingredients (Mga Pangunahing Sangkap):
- 3 pounds bone-in chicken thighs hita ng manok
- 1 green bell pepper berdeng bell pepper
- 1 red bell pepper pulang bell pepper
- 1 medium onion sibuyas
- 2- inch ginger luya
- 4 cloves garlic bawang
- 1 can 20 oz pineapple chunks with juice (pinya)
For the Sauce (Para sa Sarsa):
- 1 cup pineapple juice katas ng pinya
- ¼ cup light soy sauce toyo
- ¼ cup chicken broth sabaw ng manok
- 2 tablespoons brown sugar maskobado
- 1 tablespoon cornstarch cornstarch
- ¼ cup water tubig
- Salt and pepper to taste asin at paminta
Instructions
- Let stand chicken thighs (hita ng manok) at room temperature for 15 minutes before cooking. While waiting, start preparing your ingredients. Cut your bell peppers (paminta) into one-inch squares and slice the onions (sibuyas) into wedges. Mince your garlic (bawang) and ginger (luya). Set all vegetables aside.
- Pat the chicken dry using paper towels and season generously with salt (asin) and black pepper (paminta). Prepare your sauce by combining pineapple juice (katas ng pinya), soy sauce (toyo), chicken broth (sabaw ng manok), and brown sugar (asukal na pula) in a bowl. In a separate small bowl, mix cornstarch (gawgaw) with water (tubig) to make a slurry. Set both mixtures aside.
- Heat your pan or kawali over medium-high heat (350°F/175°C). Add cooking oil and wait until it shimmers but is not smoking. Place the chicken skin-side down first and cook for 4-5 minutes until golden brown (hanggang maging golden brown). Turn the chicken over and cook the other side for another 3-4 minutes.
- Remove the browned chicken from the pan and set aside. Using the same pan with the chicken drippings (mantika), sauté minced garlic and ginger until fragrant (hanggang mabango), about 1 minute. Add onion wedges and cook until they become slightly translucent, about 2-3 minutes.
- Add your sliced bell peppers to the pan and cook for 1-2 minutes until they are crisp-tender. Be careful not to overcook them as they should maintain their bright color and slight crunch. Remove the vegetables and set aside.
- Return the chicken to the pan and pour in your prepared sauce mixture. Add the pineapple chunks (pinya) with their juice. Bring to a gentle boil then reduce heat to medium-low (300°F/150°C). Cover and let simmer for 25-30 minutes, occasionally basting the chicken with the sauce (diligan paminsan-minsan ng sarsa).
- Check that the chicken is fully cooked by inserting a meat thermometer into the thickest part - it should read 165°F (74°C). You can also cut into the thickest piece; the meat should be white throughout with clear juices (walang pamumula sa loob).
- Return the bell peppers and onions to the pan. Give your cornstarch slurry a quick stir (since it may have settled) and pour it into the pan while stirring constantly. Cook for another 3-5 minutes until the sauce thickens enough to coat the back of a spoon (hanggang lumapot ang sarsa).
- Turn off the heat and let the dish rest for 5 minutes before serving. This allows the sauce to thicken further and the flavors to settle (para lalong sumarap). Serve hot over steamed rice (mainit na kanin).
- For storing, let the dish cool completely before transferring to an airtight container. It will keep in the refrigerator for up to 4 days. When reheating, warm in a pan over medium heat (350°F/175°C) with a splash of water, or microwave in 1-minute intervals, stirring between each interval until heated through.
Tips from Lola's Kitchen
- Choose bone-in thighs for more flavor, but trim excess fat
- Use pineapple in natural juice, not syrup
- Don't overcook the bell peppers - they should remain crisp
- Let chicken rest at room temperature 15 minutes before cooking
- Pat chicken dry before seasoning for better browning
- Use fresh ginger whenever possible
- Add a pinch of red pepper flakes for heat
Nutrition
The Story Behind Hawaiian Chicken
Hawaiian Chicken has an interesting journey that spans the Pacific, blending American mid-century convenience cooking with tropical island flavors. While many assume this dish originated in Hawaii, it actually emerged during the 1950s pineapple boom, when companies like Dole and Del Monte popularized pineapple-focused recipes across America and eventually reached Philippine shores.
This beloved dish found its way into Filipino kitchens during the 1970s, when American-style cooking became increasingly popular in urban areas. Local cooks quickly adapted it to match Filipino taste preferences, creating what we now know as "Manok na Hawaiian Style" – a perfect example of how our cuisine expertly absorbs and transforms international dishes.
What makes our Filipino version special is how we've localized it. While the American version often uses barbecue sauce, our adaptation relies on a careful balance of toyo (soy sauce) and pineapple juice, creating that distinctive "asim-tamis" flavor that Filipinos love. Some families even add a splash of calamansi or a hint of siling labuyo for that distinctly Filipino touch.
In today's busy Filipino households, Hawaiian Chicken has become a go-to "pangluto pag may bisita" (special occasion dish) that's actually simple enough for everyday cooking. It's particularly popular during birthday celebrations and Sunday family lunches, where it often shares the table with classic Filipino dishes like pancit and lumpia.
The dish has also evolved with modern Filipino cooking trends. Health-conscious families opt for chicken breast instead of thighs, while busy parents appreciate that it can be prepped ahead and tastes even better the next day – perfect for baon. Some creative home cooks even use the sauce as a marinade for grilled liempo or glaze for crispy chicken wings.
What truly sets this recipe apart is its versatility in Filipino kitchens. Whether you're cooking it in a small apartment kawali or preparing a large batch for a barangay fiesta, the recipe adapts beautifully to different cooking methods and serving sizes. It's this adaptability, combined with its familiar yet special flavor profile, that has secured Hawaiian Chicken's place in modern Filipino comfort food.
Tips from Experienced Filipino Cooks:
- The best results come from letting the chicken marinate overnight in the refrigerator
- Using pineapple juice from native Philippine pineapples adds extra sweetness
- The sauce should be thick enough to coat the back of a spoon but not too sticky
- Adding bell peppers at the end keeps them crisp and colorful
From potluck parties to intimate family dinners, Hawaiian Chicken continues to evolve while maintaining its status as a beloved "lutong-bahay" favorite. It's a testament to Filipino cuisine's ability to embrace international flavors while making them uniquely our own.
Remember: Perfect Hawaiian Chicken isn't just about the pineapple—it's about achieving that ideal balance of sweet and savory, where the marinade caramelizes perfectly on the chicken while keeping the meat juicy and flavorful inside.
Comments
No Comments