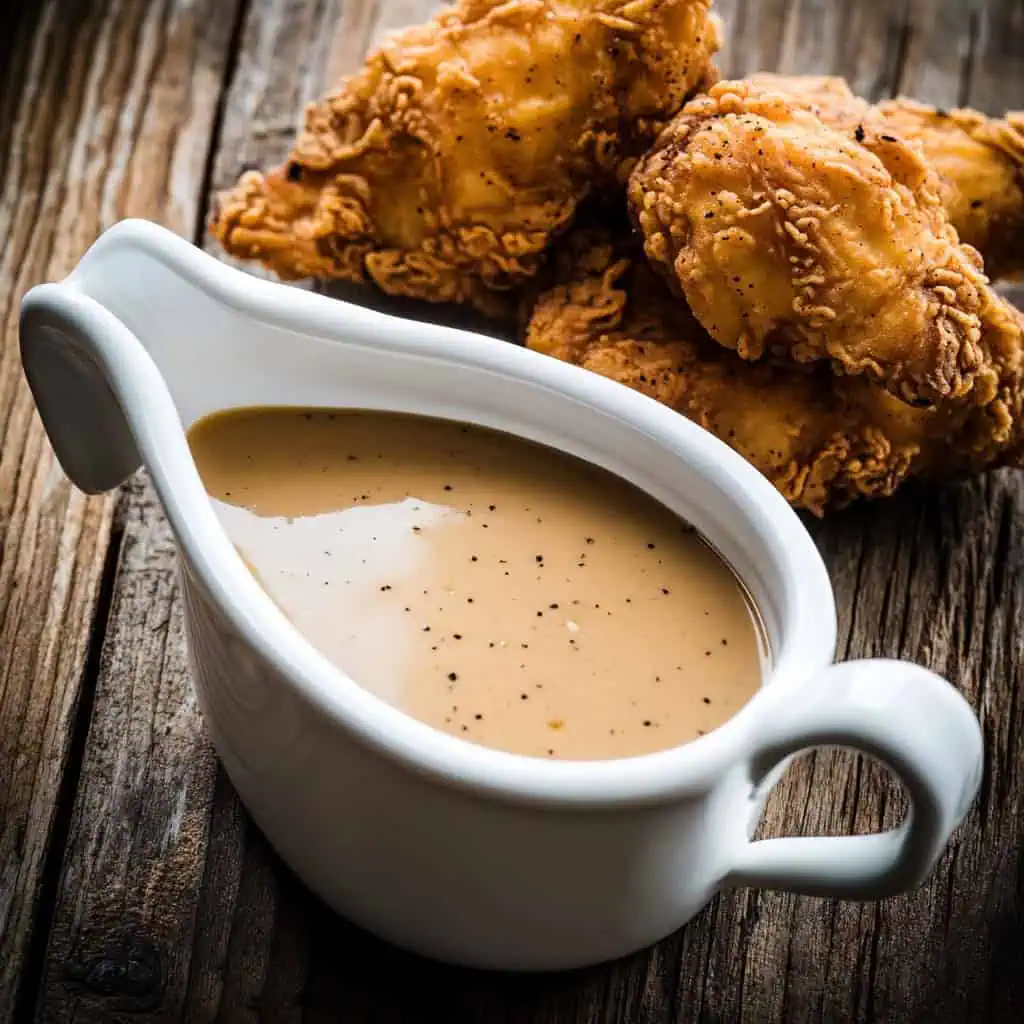
Jollibee Chickenjoy has always been my family's go-to comfort food. But like many Pinoys, I always found myself wishing they'd give us more of that iconic gravy. After countless visits where I'd guiltily ask for extra sauce cups (and sometimes still find it bitin), I decided to recreate that beloved Chickenjoy gravy at home.
As someone who's been cooking this recipe for years now, this homemade version tastes incredibly close to the original. Sometimes I think it's even better because I can make a big batch that lasts for days.
It's become such a hit that my kids now prefer my homemade Jollibee gravy, and friends keep asking for the recipe whenever they come over for dinner. This Jollibee gravy recipe is super simple to make with ingredients you probably already have in your pantry.
Whether you're craving Chickenjoy gravy for your homemade fried chicken, want to drizzle it over hot rice (guilty!), or just need that familiar taste of home, this recipe has got you covered. No more holding back on the gravy or feeling shy about asking for extra, you can now make this classic Pinoy fast-food favorite whenever the craving hits.
What Is Jollibee?
Jollibee is the largest fast-food chain brand in the Philippines and one of Asia's most successful restaurant companies, often called "The McDonald's of the Philippines." Founded in 1978 by Tony Tan Caktiong, it began as an ice cream parlor before evolving into a fast-food restaurant chain.
Jump to:

Why You'll Love This Recipe
- Tastes remarkably similar to Jollibee's iconic gravy
- Made with simple pantry ingredients
- No MSG or artificial ingredients
- Ready in just 15 minutes
- Perfect consistency for both pouring and dipping
- Versatile - great with chicken, rice, mashed potatoes, and more!
Ingredients
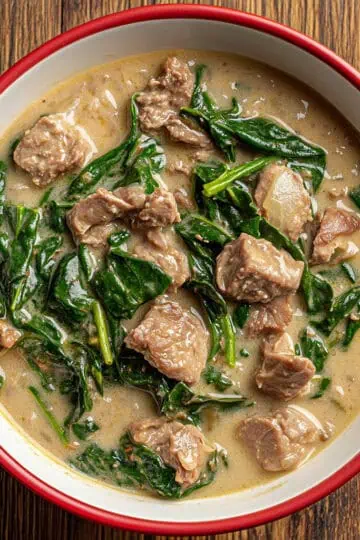
Each ingredient in this recipe plays an essential role in recreating Jollibee's iconic gravy. The butter and flour create the roux base that gives the gravy its perfect thickness, while the chicken broth provides that unmistakable savory foundation.
Soy sauce adds the signature dark color and umami depth, garlic powder contributes the aromatic flavor Jollibee is known for, and the all-purpose cream creates the silky-smooth texture that makes this gravy so craveable.
The touch of sugar balances the saltiness, creating that perfect flavor harmony that keeps you coming back for more.
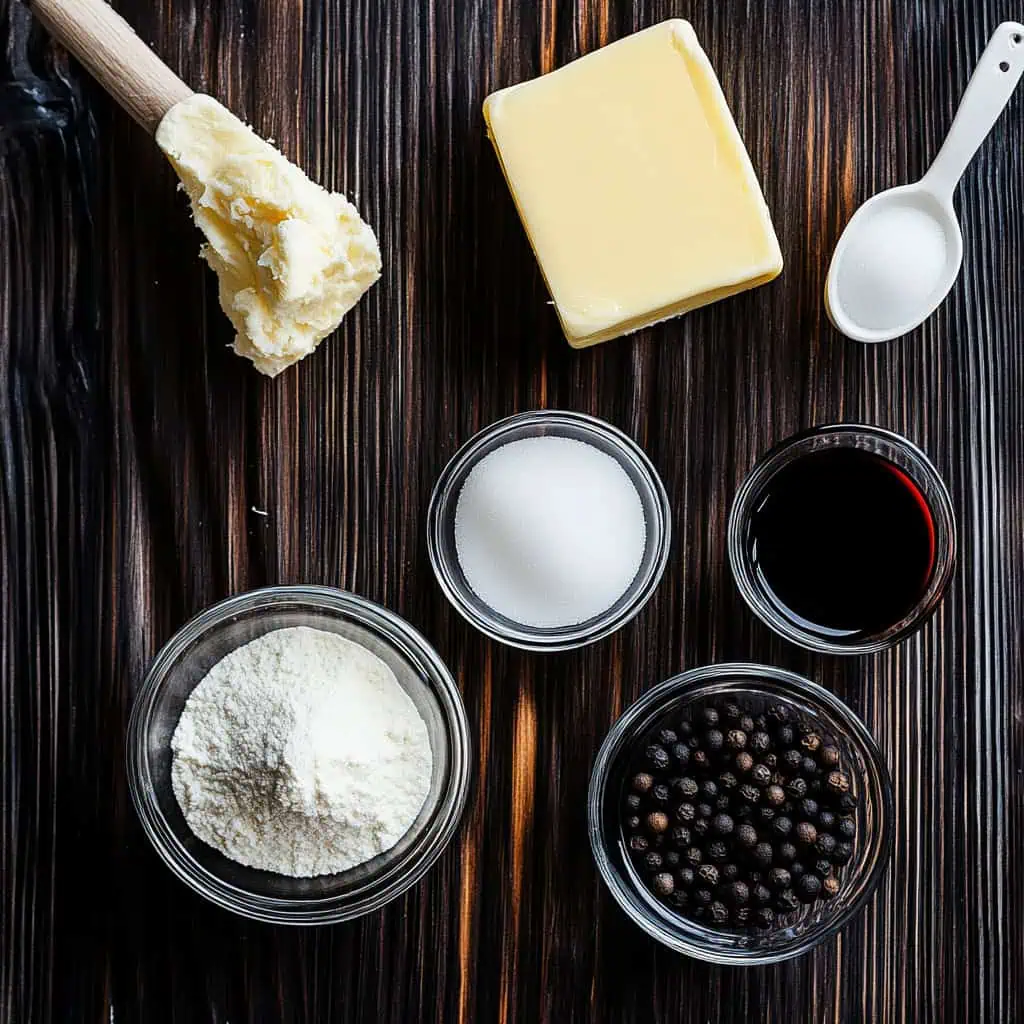
- 3 tablespoons butter or margarine
- 3 tablespoons all-purpose flour
- 1 Knorr chicken broth cube
- 2.5 cups hot water
- ½ cup all-purpose cream
- 1 teaspoon crushed black pepper
- 3-4 tablespoons soy sauce
- 1 teaspoon Worcestershire sauce (optional)
- Salt to taste
- 1 teaspoon sugar
- 1.5 tablespoons garlic powder
- 1 teaspoon dried thyme (optional)
Equipment
- Medium saucepan - For cooking the gravy at the proper temperature
- Whisk - Essential for preventing lumps and ensuring a smooth texture
- Measuring cups and spoons - For accurate measurements that ensure consistent results
- Fine-mesh strainer (optional) - For extra-smooth, restaurant-quality gravy
- Glass jar or airtight container - For storing leftover gravy
How To Make
- Prepare the roux: Place a saucepan over low heat (approximately 140-150°F or 60-65°C). Melt 3 tablespoons of butter completely. Gradually add 3 tablespoons of all-purpose flour while whisking constantly for 1 minute until well combined and slightly toasted.
- Create the base: While making the roux, dissolve 1 Knorr chicken cube in 2.5 cups of hot water (approximately 180°F or 82°C). Slowly pour this chicken broth mixture into the roux while continuously whisking to prevent lumps. Add ½ cup all-purpose cream gradually while maintaining the low heat.
- Season the gravy: Add all the seasonings: 1 teaspoon crushed pepper, 3-4 tablespoons soy sauce, 1 teaspoon Worcestershire sauce, salt to taste, 1 teaspoon sugar, 1.5 tablespoons garlic powder, and 1 teaspoon dried thyme. Keep whisking continuously to incorporate all ingredients.
- Simmer to perfection: Maintain low heat (around 140-150°F/60-65°C) and simmer for 2-3 minutes until the gravy reaches your desired thickness. Remember to whisk constantly during this final cooking stage to ensure a smooth, lump-free gravy. The gravy should coat the back of a spoon but still flow smoothly.
- Adjust consistency if needed: If the gravy becomes too thick, gradually add hot water while whisking until you achieve the perfect consistency.

Tips from Lola's Kitchen
- Room temperature butter is key to preventing lumps in your roux
- Toast the flour slightly in the butter for a deeper, more complex flavor
- Keep the heat consistently low throughout the cooking process to prevent scorching
- Whisk continuously when adding liquids to the roux to ensure a perfectly smooth gravy
- For professional-level smoothness, strain the finished gravy through a fine-mesh sieve
- Let the gravy cool slightly before serving for the best flavor development
Substitutions
- All-purpose cream: Use fresh milk, evaporated milk, or heavy cream instead
- Garlic powder: Substitute with 6 cloves of fresh minced garlic (sauté briefly before adding flour)
- Butter: Margarine or neutral cooking oil will work in a pinch
- Dried thyme: Italian seasoning or dried basil can provide a similar aromatic quality
- Worcestershire sauce: Replace with oyster sauce or additional soy sauce for similar depth of flavor
- Chicken broth cube: Use 2.5 cups of prepared chicken broth instead of water and cube
Troubleshooting
Problem: Lumpy Gravy
Solution: Strain through a fine-mesh sieve or blend with an immersion blender until smooth. To prevent lumps in the future, ensure your roux is smooth before adding liquids and whisk constantly when adding the broth.
Problem: Too Thick
Solution: Add hot water or chicken broth, 1 tablespoon at a time, while whisking until desired consistency is reached.
Problem: Too Thin
Solution: Continue simmering longer to reduce, or make a small amount of additional roux in a separate pan and whisk it into the gravy.
Problem: Too Salty
Solution: Add more cream or a pinch of sugar to balance the saltiness. In extreme cases, adding a small amount of potato (diced and then removed after cooking) can help absorb excess salt.
Problem: Not Brown Enough
Solution: Add a few drops of gravy browning, dark soy sauce, or cook the roux a bit longer initially for a deeper color.
Storage & Reheating
Refrigerator Storage:
Store in an airtight container for up to 5 days. The gravy will thicken when cold, which is normal.
Freezer Storage:
Freeze in portion-sized containers for up to 3 months. Let thaw overnight in the refrigerator before reheating.
Reheating Methods:
- Stovetop (Recommended): Reheat over low heat, whisking frequently. Add 1-2 tablespoons of water or milk if needed to restore original consistency.
- Microwave: Heat in 30-second intervals at medium power, stirring between each interval to ensure even heating and prevent separation.
FAQ
Why doesn't my gravy look as brown as Jollibee's original?
The color can vary depending on how long you cook your roux and the brand of soy sauce used. For a darker color, cook the roux longer or add a few drops of gravy browning or dark soy sauce.
Can I make this gravy in advance for a party?
Yes, this gravy reheats extremely well and can be made 2-3 days ahead. Store in the refrigerator and reheat gently, adding a bit of water if needed to adjust consistency.
How can I make this recipe gluten-free?
Substitute the all-purpose flour with cornstarch or rice flour and ensure your soy sauce and Worcestershire sauce are gluten-free varieties.
Why did my gravy separate when reheating?
This typically happens when reheating too quickly or at too high a temperature. Always reheat slowly over low heat while whisking constantly.
Can I double or triple this recipe for a large gathering?
Absolutely! Just maintain the same ratios of ingredients. You may need to adjust the simmering time slightly for larger batches.
What's the secret to getting that authentic Jollibee taste?
The combination of chicken broth, soy sauce, and garlic powder is essential. The cream adds that signature silky texture that sets Jollibee gravy apart from other fast-food gravies.
Can I reduce the sodium content?
Yes, use low-sodium chicken broth and reduced-sodium soy sauce. You can also reduce the amount of soy sauce and compensate with a bit more Worcestershire sauce for depth of flavor.
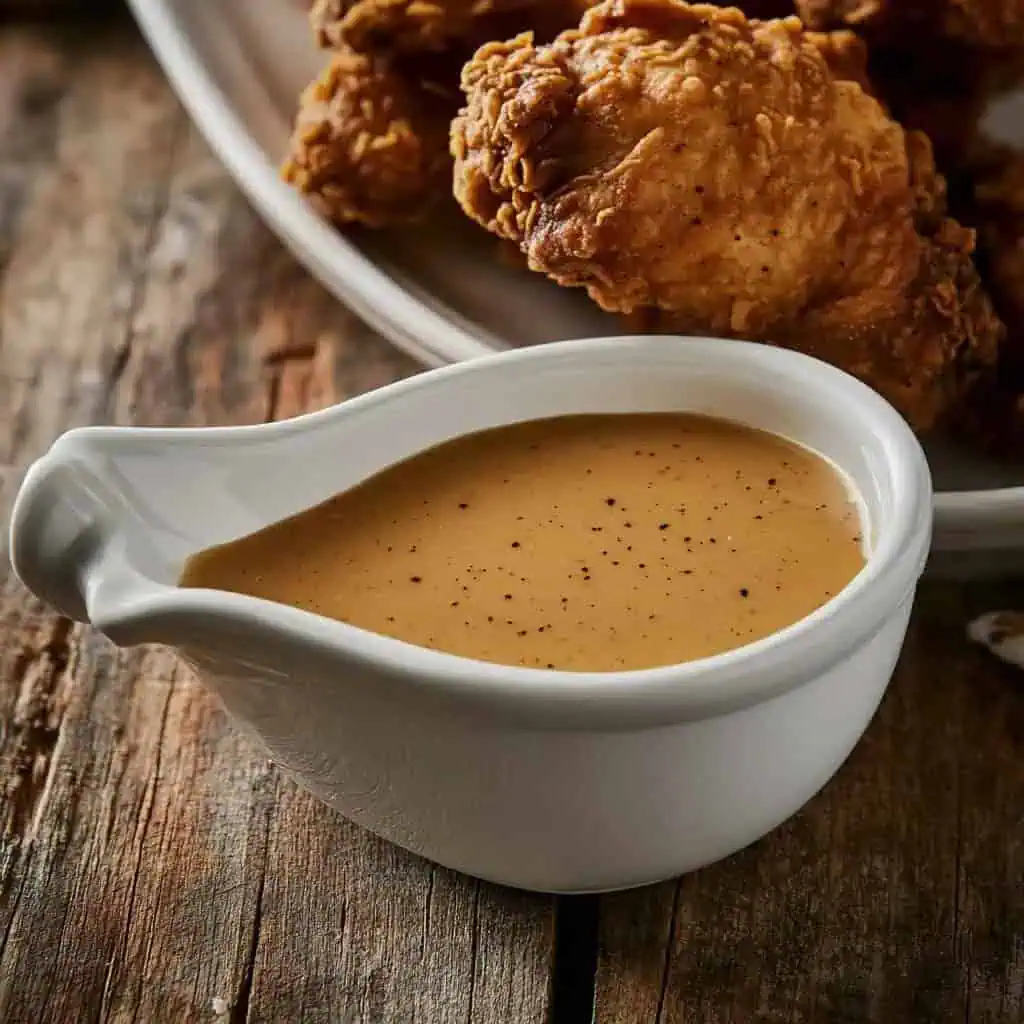
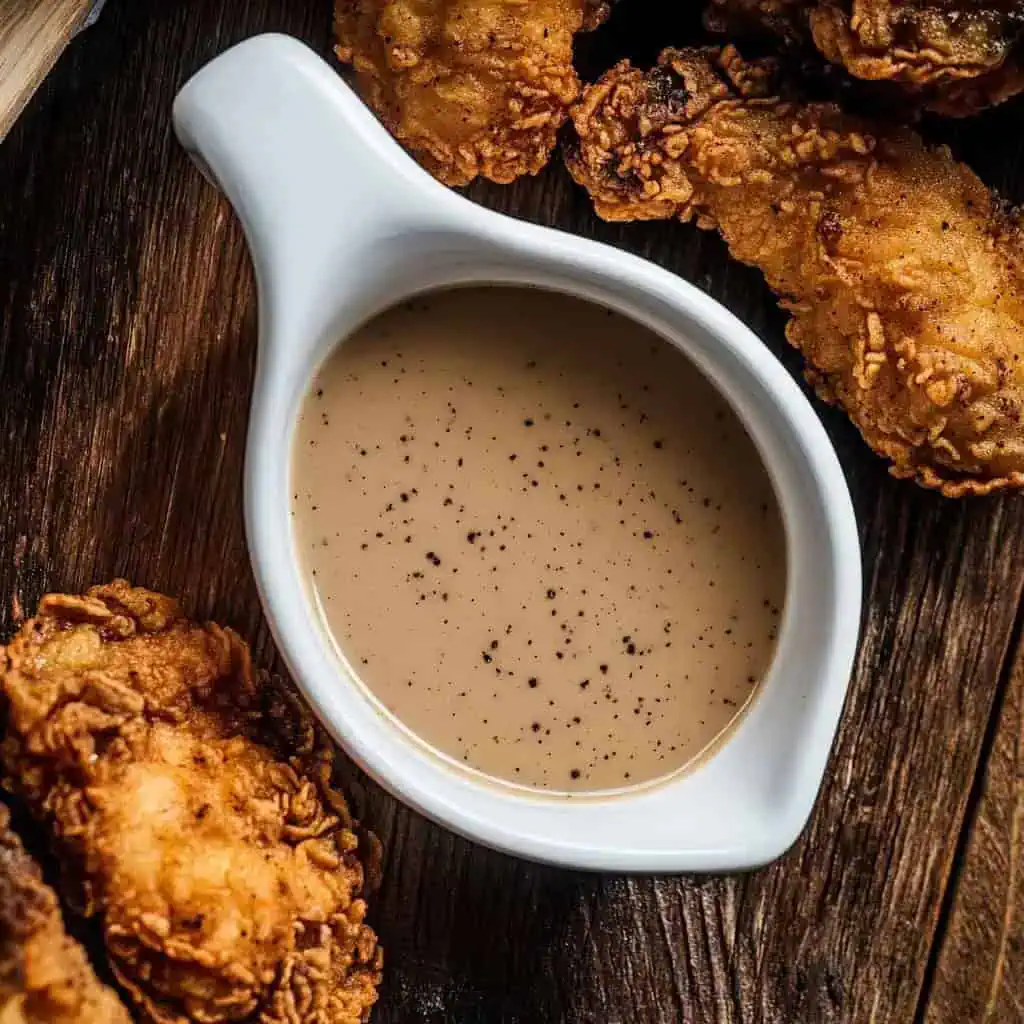
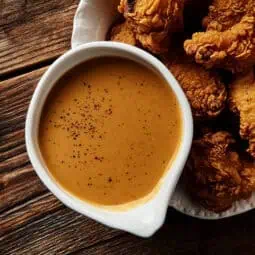
What's the best way to serve this gravy?
Serve warm with fried chicken, pour over steaming white rice, use as a dip for French fries, or drizzle over mashed potatoes or chicken cutlets.
Related
Looking for other recipes like this? Try these:


Homemade Jollibee-Style Chicken Gravy Recipe
Equipment
- For storage (kaserola) For cooking the gravy
- Whisk (wire whisk/panghalo) Essential for preventing lumps
- Measuring cups and spoons (Panukat) For accurate measurements
- Fine-mesh strainer (optional) (salaan) For extra-smooth gravy
- Glass jar (garapon) For storage
Ingredients
- 3 tablespoons butter or margarine mantikilya
- 3 tablespoons all-purpose flour arina
- 1 Knorr chicken broth cube kubong sabaw ng manok
- 2.5 cups hot water mainit na tubig
- ½ cup all-purpose cream krema
- 1 teaspoon crushed pepper dinurog na paminta
- 3-4 tablespoons soy sauce toyo
- 1 teaspoon Worcestershire sauce optional
- Salt to taste asin
- 1 teaspoon sugar asukal
- 1.5 tablespoons garlic powder pulbos na bawang
- 1 teaspoon dried thyme optional (tuyong thyme)
Instructions
- Start by preparing the roux. Place a saucepan over low heat (mababang init) around 140-150°F (60-65°C). Melt 3 tablespoons of butter (mantikilya) completely. Gradually whisk in 3 tablespoons of all-purpose flour (Harina), stirring constantly for 1 minute until well combined and slightly toasted.
- While making the roux, dissolve 1 Knorr chicken cube in 2.5 cups of hot water (mainit na tubig) at around 180°F (82°C). Slowly pour this chicken broth mixture into the roux while continuously whisking to prevent lumps (patuloy na haluin para maiwasan ang pagbuo-buo). Add ½ cup all-purpose cream gradually while maintaining the low heat.
- Now add all the seasonings: 1 teaspoon crushed pepper (dinurog na paminta), 3-4 tablespoons soy sauce (toyo), 1 teaspoon Worcestershire sauce, salt (asin) to taste, 1 teaspoon sugar (asukal), 1.5 tablespoons garlic powder, and 1 teaspoon dried thyme. Keep whisking continuously to incorporate all ingredients.
- Maintain the heat at low temperature (around 140-150°F/60-65°C) and simmer for 2-3 minutes until the gravy reaches your desired thickness. Remember to whisk constantly during this final cooking stage to ensure a smooth, lump-free gravy (patuloy na haluin para maiwasan ang pagbuo-buo). The gravy should coat the back of a spoon but still flow smoothly. If it becomes too thick, gradually add hot water while whisking until you achieve the perfect consistency.
- Store any leftover gravy in an airtight container in the refrigerator for up to 5 days. When reheating, warm it gently over low heat while whisking, adding a small amount of hot water if needed to restore the original consistency.
Tips from Lola's Kitchen
- Always start with room temperature butter to prevent lumps
- For extra smoothness, strain the gravy before serving
- Keep heat low to prevent scorching
- If gravy is too thick, add hot water gradually
- Toast the flour slightly for deeper flavor
Nutrition
The Story Behind Jollibee's Famous Chicken Gravy
When Jollibee introduced Chickenjoy in 1980, their signature gravy played a crucial role in winning the hearts (and taste buds) of Filipinos nationwide. Unlike typical fast-food gravies of the time, Jollibee created a unique sauce that perfectly balanced savory and slightly sweet notes, complementing their crispy fried chicken in a way that resonated deeply with Filipino palates.
The brown gravy quickly became so popular that it transformed Filipino dining habits. It wasn't uncommon to see customers ordering extra gravy packets, not just for their chicken but also to pour over their steaming white rice - a distinctly Filipino way of enjoying the sauce. This practice became so widespread that the phrase "pa-extra gravy po" (extra gravy, please) became a common request at Jollibee counters across the country.
What makes Jollibee's gravy special is its versatility. Unlike traditional chicken gravies that are primarily meat dripping-based, Jollibee developed a roux-based sauce that incorporated Asian flavors through ingredients like soy sauce, creating a unique fusion that bridges Filipino and Western culinary traditions. The gravy's smooth, pourable consistency and rich umami flavor have made it an essential part of the Chickenjoy experience, so much so that many customers consider the gravy just as important as the chicken itself.
Today, Jollibee's gravy has achieved cult status, inspiring countless homemade recipes as Filipinos worldwide try to recreate this beloved sauce. While the original recipe remains a closely guarded secret, this homemade version captures the essence of what makes Jollibee's gravy so special - that perfect balance of flavors that brings comfort with every bite, whether you're enjoying it at home or thousands of miles away from the Philippines.
From its humble beginnings as a simple sauce for fried chicken, Jollibee's gravy has evolved into a cultural phenomenon that represents the Filipino talent for adapting and improving international dishes to suit local tastes. It's more than just a sauce - it's a testament to how Jollibee successfully challenged global fast-food giants by understanding and catering to Filipino flavor preferences.
Comments
No Comments